Spooky teddy is a 2-part Halloween decor. The first part is the teddy bear that has a 3d printed mechanism that can rotate with an Arduino UNO and a solenoid. The second part is a self-rocking chair powered by an Arduino nano and a solenoid attached to the bottom of the chair. The two parts can be used independently from each other. The whole setup is controlled by a remote. But it can also be used with a motion sensor

Outline
In the first and second step I will explain the idea behind this project, later I will give you the list of all the things you may need to build this project on your own. Then I will give some insight on how I designed the 3d parts. After giving you a step by step assembly guide, I will end the instructable with a troubleshooting guide. So you can fix any problems you encounter.
I strongly encourage you to share your build when it’s done!
The purpose of this instructable is not just to give you a cookbook. I’ll show you the way I built this project and provide you with open-ended questions, so you can add your own ideas, and take this project even further.
Let’s get started.
Note:
I have a twitter account where I share the progress of my projects before I publish them. You can follow me and give feedback on my projects. I think this will eliminate many problems of the project before it’s published.
Step 1: Inspiration
While watching the movie Anabelle, I was mostly spooked by the rocking chair scene. And I thought to my self that this would be a great halloween decor for the front porch. Even though I did not know how this scene was shot. I had a feeling that magnets were used somehow.
Step 2: The Idea
The first thing I wanted to do with this project was the rocking-chair mechanism. After experimenting with a few electromagnets, I found out that magnets are a no-go. The electromagnets were not powerful enough to rock the chair from a close distance. And increasing the size of the electromagnet was not a solution since it had to be hidden. So I started experimenting with solenoids. Even though they were a bit noisy the noise could be lowered by attaching rubber bands to the ends of it.
After I was done designing the chair mechanism, I was trying to find an Annabelle doll to put it on the chair. while browsing I had an idea. instead of a stationary Annabelle doll, I could use a teddy bear and replace the stuffing inside with a rotating mechanism to move the head of the bear. This is where the second part comes in. I started designing a rotating system that could fit inside an enclosure attached to the bear. I wanted the mechanism to be quiet. So servo/dc-motor/stepper was out of the equation. After experimenting with a few solenoids I found out that it was the best choice for this project. Again I attached rubber bands to both ends of the solenoid to dampen the noise.
Step 3: Tools & Parts
I collected all necessary code and 3D parts into one file called SpookyTeddy.zip You can find the file attached to this step.
3d printer (not necessary, you can easily do it with cardboard etc.)
1 x 315Mhz Key Wireless Remote & receiver
1 x Rocking chair (look at your local furniture store)
1 x Teddy bear (if it has a zip behind that’s a bonus)
4 x (5mm diameter 200mm length steel rod) – I had these lying around the house.
1 x (F6-14M 6mm x 14mm x 5mm) Thrust Bearing
1 x DC power source (7-12V)
4 x (6mm m3 bolt&nut)
Step 4: Design Process & Printing
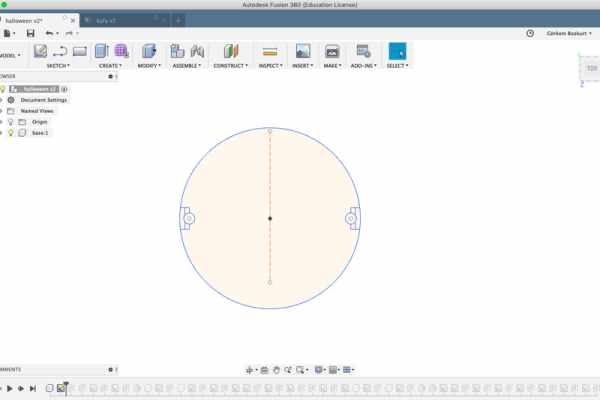
In this step, I will show you how I designed the parts in Fusion 360 in detail. If you just want to print the parts, you can skip this step.
I suggest you read this step in detail before you print anything. I designed the parts according to my dimensions of the teddy bear, solenoid etc. So it is best if you design the structure according to your dimensions/parts.
If you are new to the Fusion 360 environment I suggest you take a look at a few tutorials first.
You can enroll in this class: https://www.instructables.com/class/3D-Design-Cla…
also, this youtube series gives a good beginner tutorial: https://www.youtube.com/watch?v=A5bc9c3S12g
Printing
I used PLA to print the parts, my settings are:
- 0.4 nozzle
- 50% infill
- temp. 195C
Step 5: Assembly Part 1 – Base & Electronics
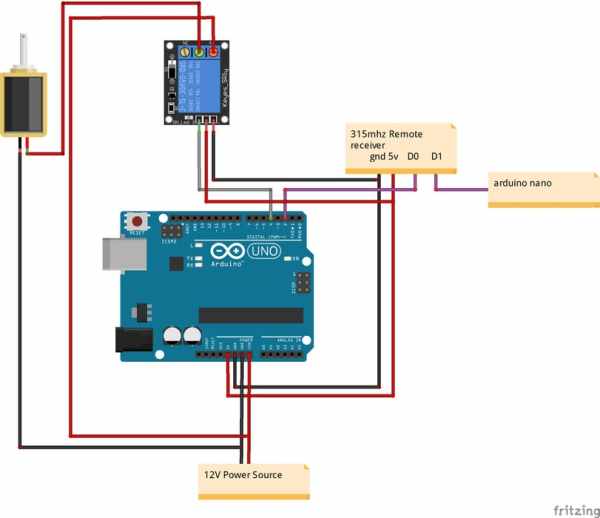
For this step you need the 3d printed base files, a lot of jumper cables and a bit of patience. It is tricky to make it work on the first try. Don’t give up!
I didn’t explain the arduino setup in detail. If you did not use an Arduino board before you can check this tutorial first:
https://www.instructables.com/class/Arduino-Class/
Note:
I’ve attached notes to the pictures explaining how the assembly is done. If you have any questions please don’t hesitate to ask me!
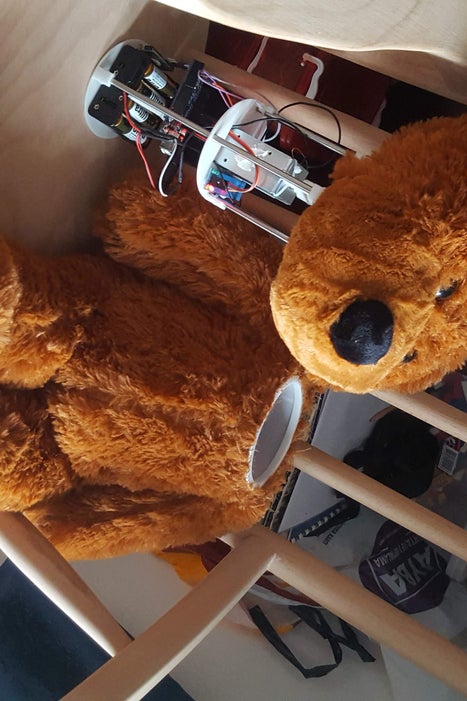
Step 6: Seembly Part 2 – Teddy

Step 7: First Test
In the first test, you have to make sure that the head is rotating without any interruptions.
Here are the steps:
- Connect the solenoid directly to a power source
- Make sure that the head is rotating 90 degrees
- connect the solenoid back to the setup
- now test the setup once again this time activating it with the remote
Things to look for:
- Is the head rotating 90 degrees?
- what is the noise level?
If you have a problem regarding these questions, you can check the troubleshooting guide for solutions!
If the setup is working flawlessly you can start building the chair!
Source: Spooky Teddy – Arduino Powered Self-rocking Chair & Rotating Head