Fixed a SONY PS-X75 Record Player (1980’s) with a blown MB8841-209L microchip. Fixed it with a Arduino Mega2560 Board and the fabulous Embrio Software.
A long, long time ago in 1980’s Sony produced one of the best automatic record players the Sony PS-X75.

The only problem was the main Microprocessor (IC) was prone to breaking. Our Sony had a broken IC and no one manufactures these anymore and you can’t buy secondhand chips either.
The Player was totally dead with only the 33 record speed light showing – no buttons or functionality – DEAD – we took it to a local repairer and he said it was the chip that’s was gone and would only work with a direct replacement chip – same make and model
We searched the galaxy for a replacement and couldn’t find one.
I reversed engineered the chip using Sony PS-X75 Service Manual and programmed a £30 Arduino Mega board to replace all the functions of the main IC chip.
The linked video below for some could be a bit boring but the heart surgery to replace the main chip with an Arduino Mega board WORKED !
All functions thanks to Embrio are now FULLY Restored using an Arduino Mega Board.
All the following works:
Auto Play
Record Size Detection
Auto drop
Auto Stop
Button start / stop
Button up/down
Buttons forward and backwards
Repeat
Speed selection
No record detection
Home arm detection
Stylus force and bias
All lights and buttons
Auto arm up and home on startup, auto play and stop.
New External USB fitted to upload config changed to Arduino.
New light sensor board made for record size detection as main board one was randomly working.
New LED light fitted.
Added a 9v transformer to power the Arduino when the Sony is turned on.
Full Youtube video can be followed in the Youtube video
Enjoy 🙂
Disclaimer – this does need some technical knowledge and know how to attempt – and does remove the heart of the Sony Record player – the IC MB8841-209l chip – Removing this chip does make the Player totally dead unless you replace with a new chip of same make and model or try the following – However, the following has been done on my own player and if you attempt this on yours, you do so at your own risk as this post is for guidance only on what I did to fix my own player.
Supplies
Vinyl Engine – much support and help:
Arduino Bread/ProtoType Board:
All Pin configuration for Chip to Arduino:
Link to Sony PS-X75 Service Manual
Link to all the hard work and software code/configuration using Embrio – You use this pack at your own risk – I do not support or update this code – this is for your own use/research and will require an Embrio Licence to upload to the Arduino Mega Board:
Please note I’m using an external light detection Agent/Hardware to ascertain record size – the code would need tweaking / changing to pickup the digital default pins 30 / 31 Sony Light sensor board, but if you have got this far – this shouldn’t be a problem for you 🙂
Step 1: Remove Old Sony Microprocessor
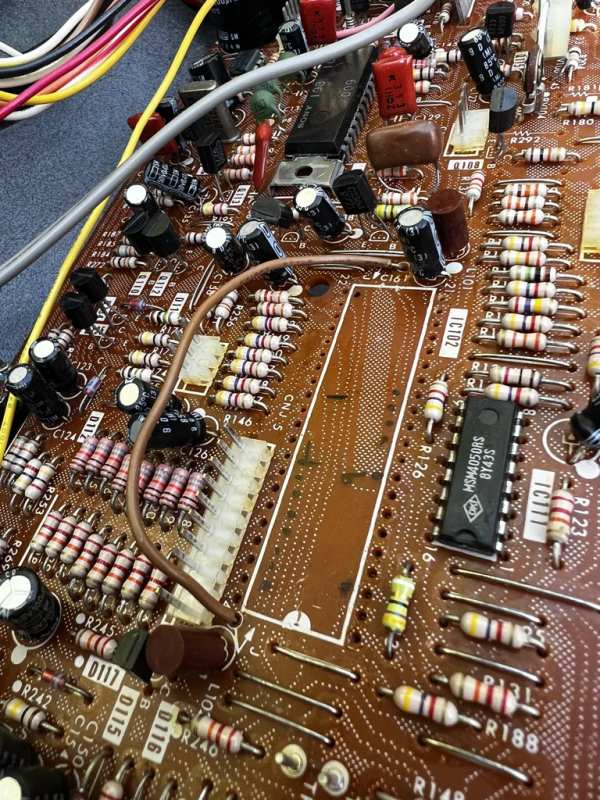
Remove old IC Chip first with some desoldering and cleanup contacts.
Step 2: Install New Arduino Mega2560
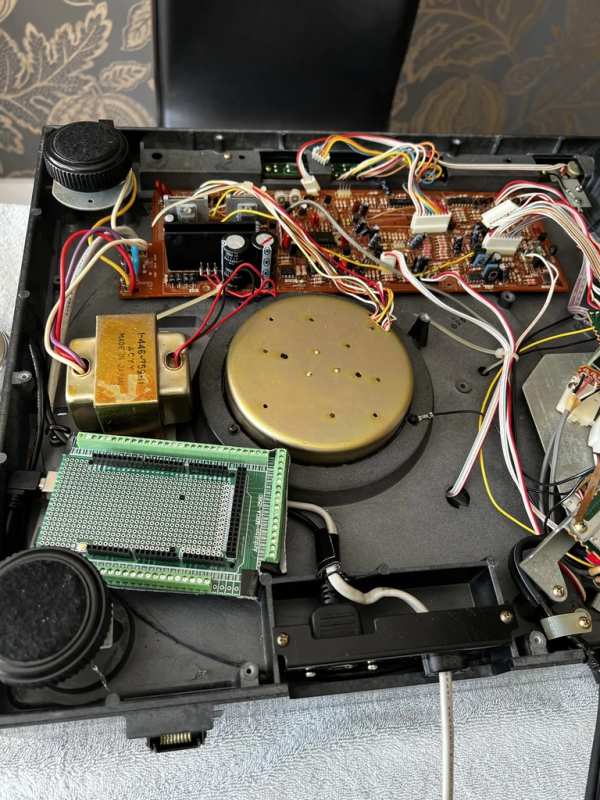
Install Arduino Mega2560 Board and prototype board
Step 3: Wire the Loom From Sony IC Socket to Arduino.
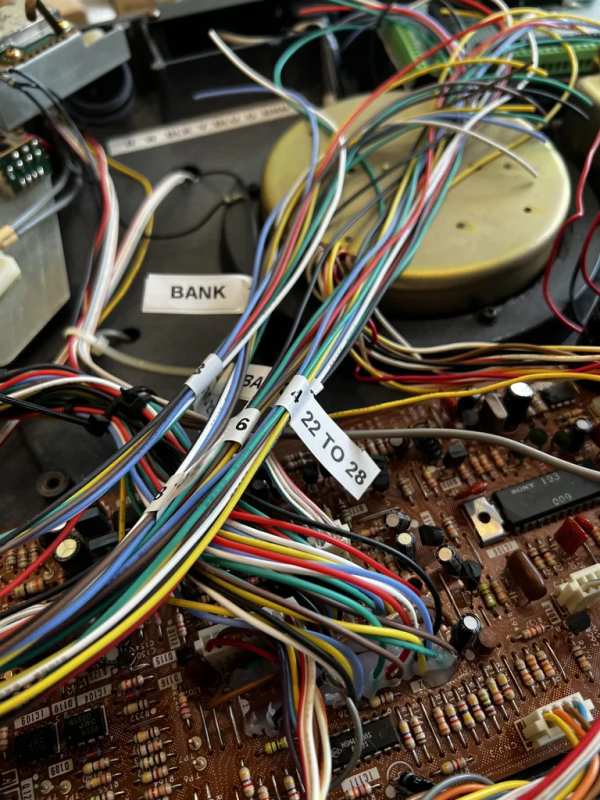
Wire The Loom To From IC Socket To Arduino following the pin to pin guide in the image.
Added an earth from the Arduino GRND pin to the Sony Chassis – you can see this in the top left of the pic, fixing point just under Sony Foot.
Step 4: Light Sensor Board
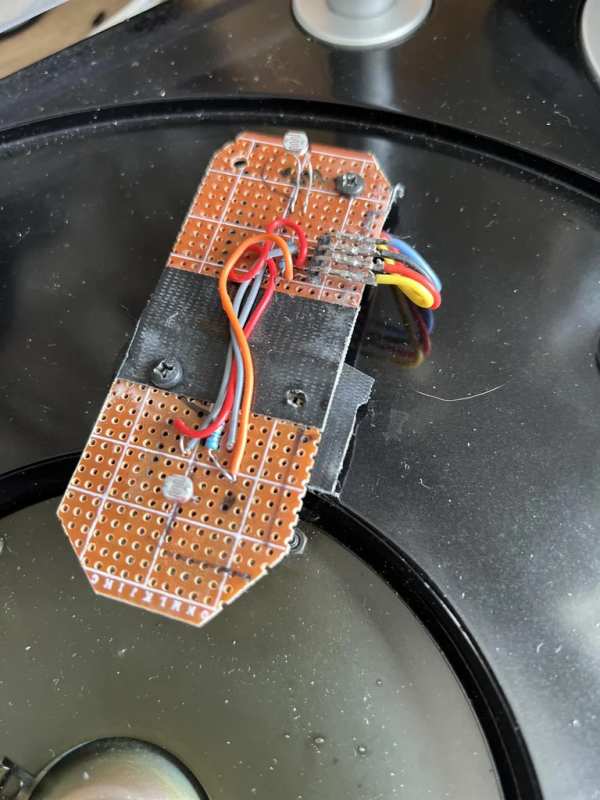
I did have to replace the onboard Light Sensor board which detects the Size of record being played – As I’m using an external light detection i’ve added Embrio Agent/Hardware to ascertain record size – the code would need tweaking / changing to pickup the digital default pins 30 / 31 From Sony Light sensor board, but if you have got this far – this shouldn’t be a problem for you 🙂 to tweak the code back to Pin 30/31.
The homemade light sensor board is connected to analog pins on the Arduino – Pin 10 for 30cm and Pin 11 for 17cm
If you are using the Sony Standard light detection and it still all works – these get connected to Pin 30/31 on the Arduino and you’d need to change the Embrio software
Agent : Size-17cm-IC-31 – change the analog flow / input to a digital input configured to pin 31
Agent : Size-30cm-IC-30 – change the analog flow / input to a digital input configured to pin 30
Both will be standard 1 = high and 0 = low triggers.
Step 5: Install External USB Port
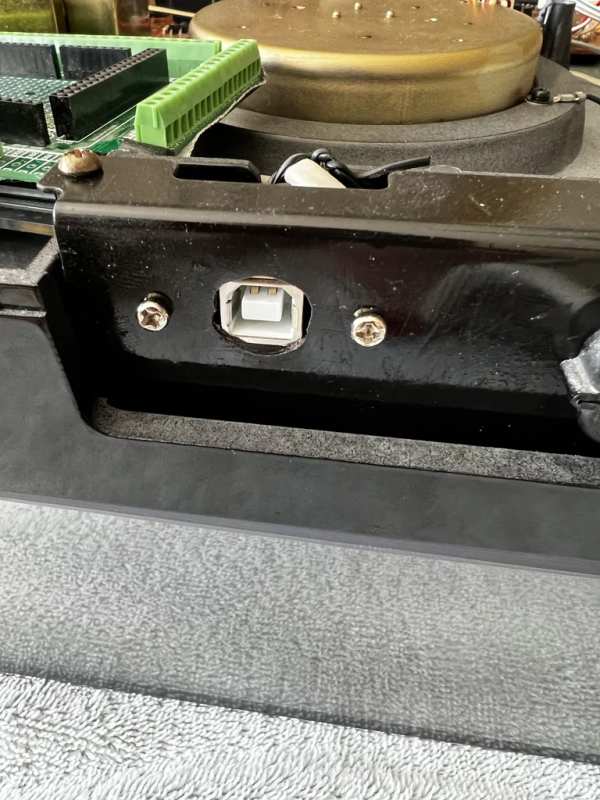
Install an external USB extension port for uploading software and configuration to the Arduino from outside the record player.
Step 6: Install 9v Block – Step-down Transformer
Glue in a 9v step down transformer powered from the Sony switch and connect an external DC Arduino cable to the block and plug into the Arduino.
Step 7: All Main Functions Reversed Engineered From Sony Service Manual
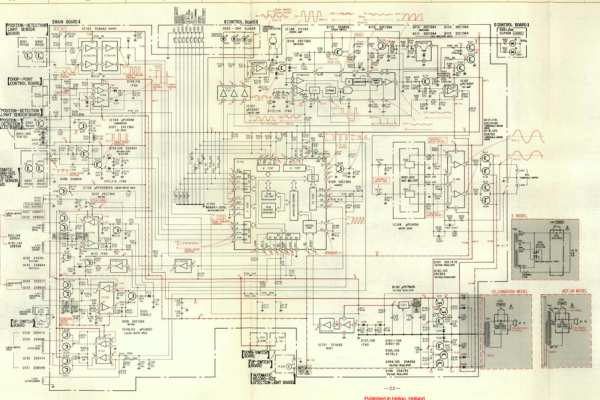
All the Original Sony MD8841-209l chip functions have been clearly documented in the service manual which has been reversed engineered into Arduino functions using the Embrio software – the next section describes how to get the Arduino uploaded with the software functions.
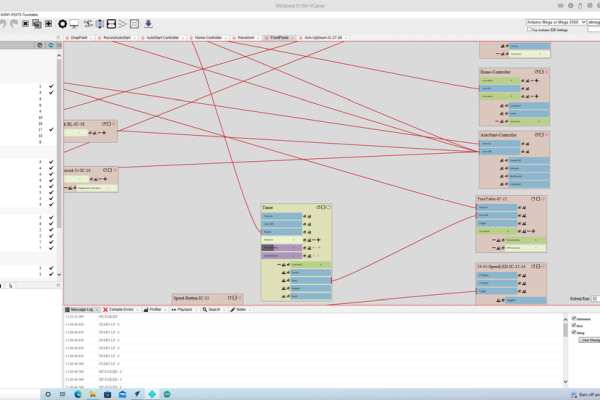
Step 8: Upload the Embrio Software to the Arduino
All software can be obtained from the links above or from the Youtube Video – you will need a license for the Embrio software.
Open the Embrio software
Open up the Sony Project in Embrio
Connect the Computer to the USB of the Sony/Arduino
Link to all the hard work and software code/configuration using Embrio – You use this pack at your own risk – I do not support or update this code – this is for your own use/research and will require an Embrio Licence to upload to the Arduino Mega Board:
Please note I’m using an external light detection Agent/Hardware to ascertain record size – the code would need tweaking / changing to pickup the digital default pins 30 / 31 Sony Light sensor board, but if you have got this far – this shouldn’t be a problem for you 🙂
https://www.dropbox.com/s/yvrjkvebnwty4tc/New-SONY-PSX75-Turntable.zip?dl=0
Upload the software to Arduino
Step 9: Screw Base Back Onto the Record Player
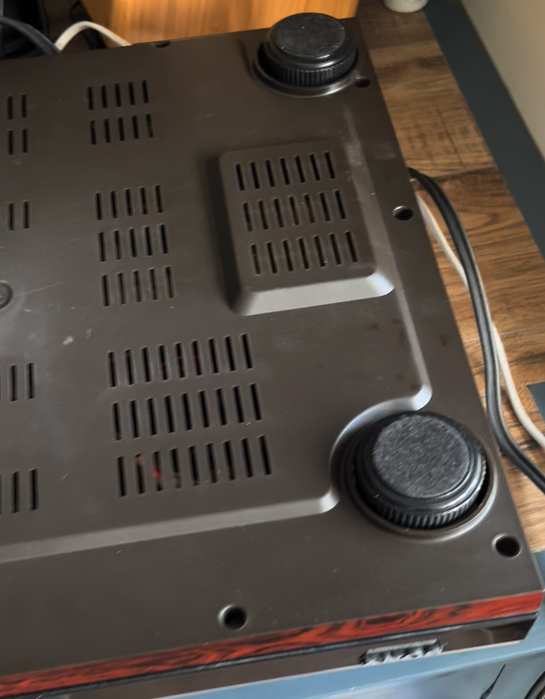
Screw Base Back Onto The Record Player – I did have to trim a bit of plastic off the top right foot entry hole as this was just catching on the Arduino – used a Drimmel to grind about 5mm off the plastic inner cone.
Step 10: Try Playing a Record

The final step will be to try and play a record –
The Stop button will always stop the record from playing and lifts the ARM and returns it back to the home rest.
I did have to change some settings to adjust the software we know the start positions of each size of record and end points – these are all within the config of Embrio and can be tweaked and uploaded to suit.
Enjoy – it worked for us 🙂
Step 11:
This sounds absolutely amazing with the Goldring 1042 cartridge fitted – its OMG working/sounding so beautiful.
Source: Sony PS-X75 Record Player Fixed With Embrio and Arduino Mega2560