Summary of Slapstick
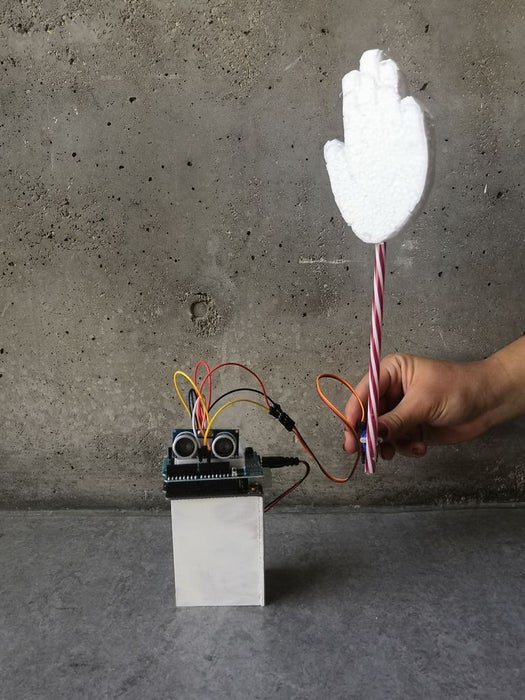
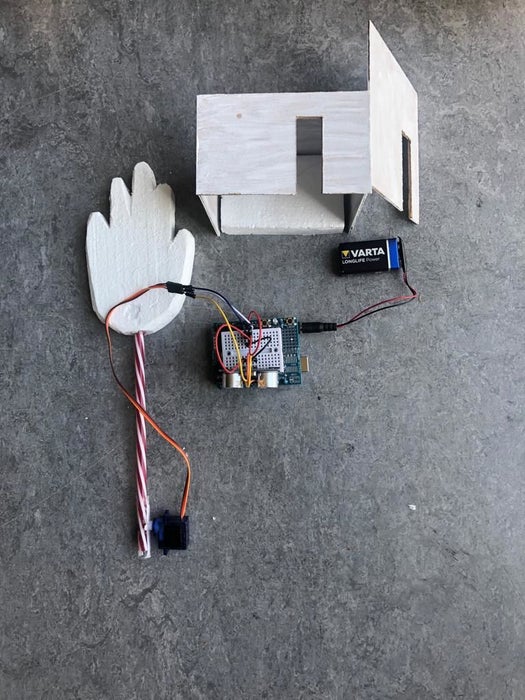
The "Slapstick" is an automated study companion designed to prevent napping during exam prep. Using an ultrasonic sensor, it detects if a user's head gets closer than 6cm and triggers a servo motor to physically "slap" the user with a foam hand. This project combines electronics and digital fabrication to enforce focus through gentle physical interruption.
Parts used in the Slapstick:
- Arduino Uno
- Wires
- Micro Servo Motor
- Ultrasonic Sensor
- Arduino USB Cable
- Arduino Expansion Board
- Small Breadboard
- 9V Battery & Cable
- MDF 2mm
- Foam Cup
- Plastic Straws
- Glue
- Cutter
- White Acrylic
- Tape
The project conducted as part of the Computational Design and Digital Fabrication seminar in the ITECH masters program. https://icd.uni-stuttgart.de
The Idea
Exam period is coming. And you already feel sleepless and hopeless. You want to study, but you’ve lost your motivation. And it’s crucial that you study hard. But the weather outside is perfect, it’s sunny. All you want to do is stroll around. BUT no. You will study. And we will help you do that. We present to you the Slapstick. Slapstick is going to be your exam buddy. You just put it in your desk, in front of your book. And whenever you feel like sleeping…. Slapstick takes control. You don’t want to make it aggressive. So just study hard!
If you get closer than 6cm, be ready for an aggressive friend!
#PLEASE USE MINDFULLY!
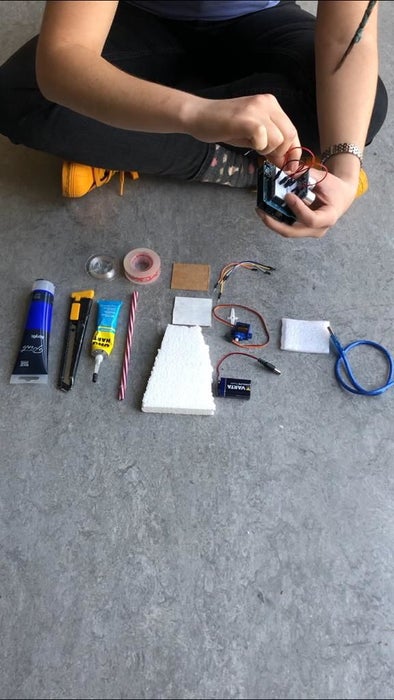
The Materials:
For the Arduino:
- Arduino
- Wires
- Micro Server
- Ultrasonic Sensor
- Arduino USB Cable
- Arduino Expansion Board
- Small Breadboard
- 9V Battery & Cable
For the Mechanism:
- MDF 2mm
- Foam Cup
- Plastic Straws
- Glue
- Cutter
- White Acrylic
- Tape
Step 1: Setting Up the Arduino
Plug the cables, the servo motor & the ultrasonic sensor according to the diagram :
Start with the combining expansion board to Arduino Uno. Have the breadboard and attach the ultrasonic sensor on it. Plug the 5V from Arduino to a pin on the breadboard and do the same for the ‘ground’. Now you have the charge on the breadboard, that you can plug your accessories. From ultrasonic sensor, plug the vcc to the same line with 5v pin and grd to ‘ground’ pin line. According to the code, plug the ‘trig’ and ‘echo’ to the Arduino pins and you are done with the ultrasonic sensor.
For the servo motor, much simpler;
– brown cable to the same line with ground
– red cable to the same line with 5V
– orange cable to the pin you had introduced in the code
Be careful that no cable is not on the sight of the sensor. Otherwise, it will detect the cable and will not respond according to your movement.
In order to have your first Arduino set: https://www.amazon.de/gp/product/B01L0ZL8N6/ref=ox_sc_act_title_1?smid=AV5KLZDJ9GHAI&psc=1
Step 2: Putting the Code Into Arduino
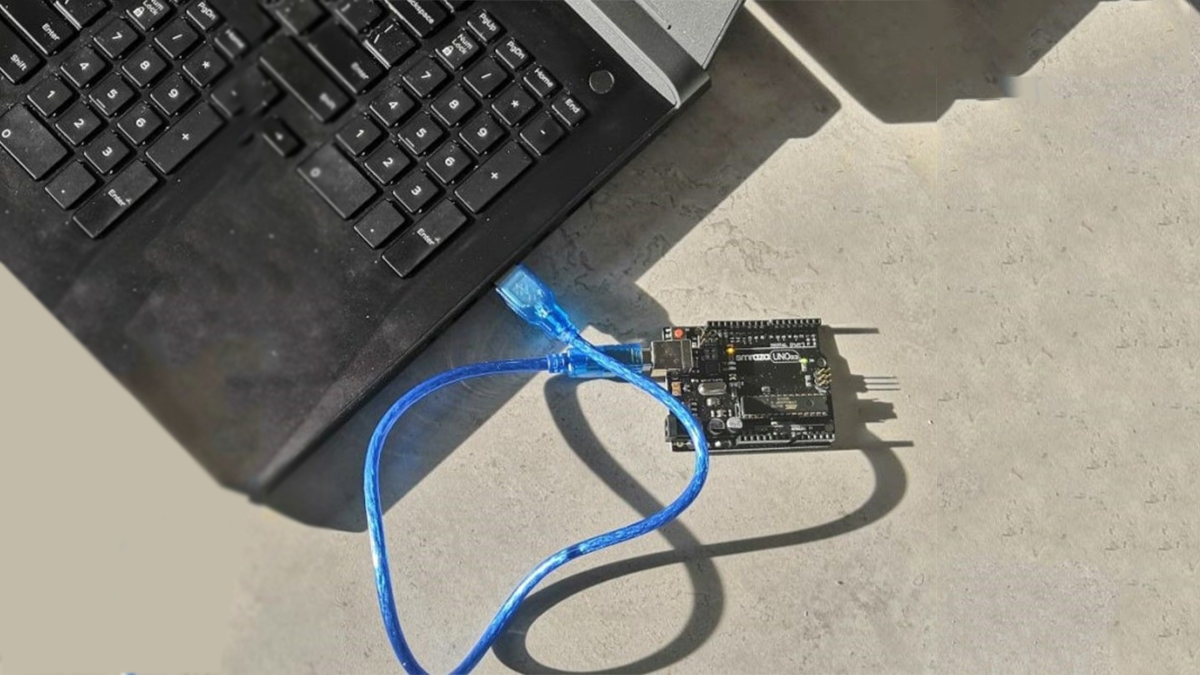
Connect your Arduino to your computer and upload the #Slapstick file :
Just put the code into your Arduino Uno with the USB cable, and once you have put it, it is good to go. You don’t have to put it every time you start the object.
You can learn more about codes and get the servo library
( which is a must to run the code from here: https://www.arduino.cc/en/reference/servo, https://github.com/arduino-libraries/Servo)
#include < Servo.h > //________________________________________________________Ultrasonic variables______________________________________________________
// defines pins numbers
const int trigPin = 10;          // to have the ultrasonic sensor
const int echoPin = 8;
// defines variables
long duration;                 // float duration, distance; OUR CHOICE
int distance;
int desiredDistance = 6;
//_________________________________________________________Time variables___________________________________________________________
//int period = 1000;             // is a function that returns the amount of milliseconds
//unsigned long time_now = 0;
unsigned long startTime;
unsigned long currentTime;
unsigned long sensorTime;


//_________________________________________________________Servo variables___________________________________________________________
Servo myservo;                // create servo object to control a servo
int pos = 0;                  // variable to store the servo position
bool slapped = false;


void setup() {
  // put your setup code here, to run once:

  Serial.begin(9600);
  pinMode(trigPin, OUTPUT); // Sets the trigPin as an Output
  pinMode(echoPin, INPUT); // Sets the echoPin as an Input


  myservo.attach(9);  // attaches the servo on pin 9 to the servo object

  //startTime = millis(); // start counting time
  //sensorTime = millis();
  //unsigned long CurrentTime = millis();                    // time variables?
  //unsigned long ElapsedTime = CurrentTime - StartTime;


}
//___________________________________________________________________________________________________________________LOOP___________________
void loop() {
  currentTime = millis();
  digitalWrite(trigPin, LOW);
  delayMicroseconds(2);
  digitalWrite(trigPin, HIGH);
  delayMicroseconds(10);
  digitalWrite(trigPin, LOW);


  pinMode(echoPin, INPUT);


  // DISTANCE CALCULATION

  duration = pulseIn(echoPin, HIGH);
  distance = (duration*.0343)/2;
  Serial.print("Distance: ");
  Serial.println(distance);
  delay(100);
  //    SLAP

    slapped = false;
if (distance <= desiredDistance){
  if(slapped == false){
      // slapping happens (servo code)
     for (pos = 0; pos <= 180; pos += 5) { // goes from 0 degrees to 180 degrees in steps of 1 degree
       myservo.write(pos);              // tell servo to go to position in variable 'pos'
       delay(20);                       // waits 15ms for the servo to reach the position
        slapped = true;
        }
  }

}
}
Step 3: Making the Box
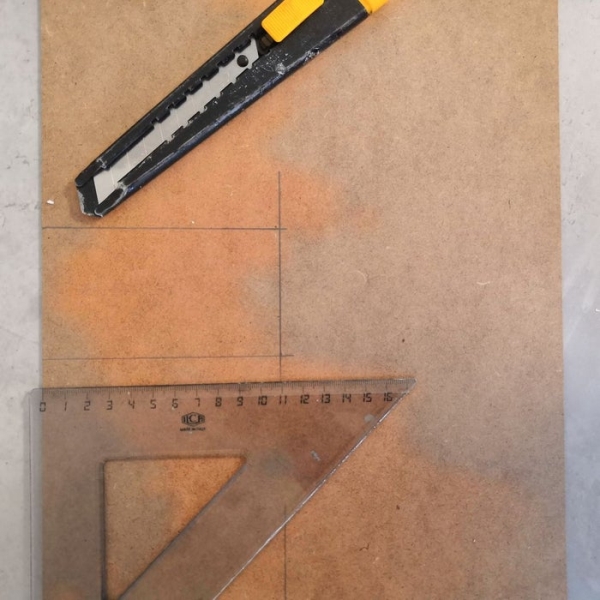
Cut the pdf:
Cut a box with the following dimensions (cm): 11-11 (x2), 11-6 (x2), 11-6,4.
So in total you would have the 6 pieces. But for the base, we need it to be removable, so we could change the battery later on. So have two pieces ; you can make a basis for your box by cutting a 11-6,4 and a 10,6-4 slab and sticking them together. It is better to use this component as a cap.
Step 4: Uncover the Eyes
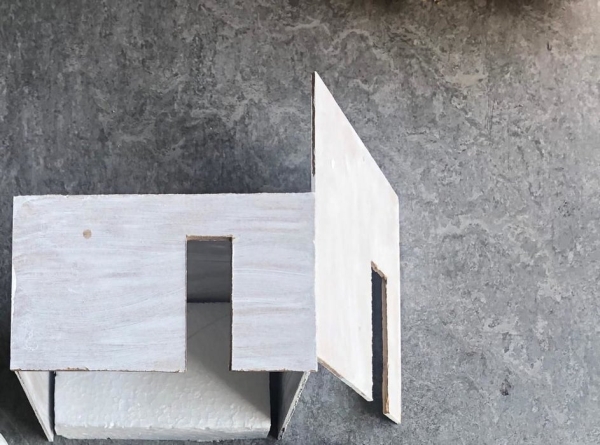
Wake it up:
Now, we need to make the holes so we could have the ultrasonic sensor eyes there and also a small hole for the hand too, so it will have space to go in when it needs to slap 🙂
So cut a small opening at the 11-6,4 & 11-11 components as seen in the pictures.
Step 5: Give It a Character
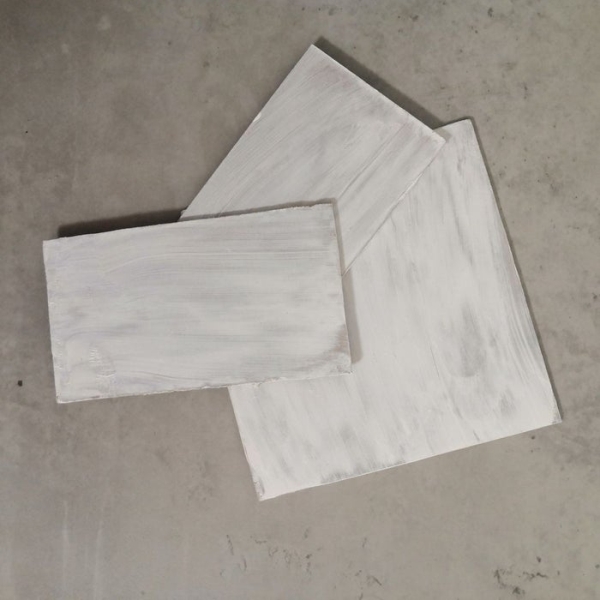
Paint it & Doodle it:
For this step, we preferred to paint it simple white with a some wooden texture behind. But you can color it and draw on it as you want. Then let it dry for a while, that we can make the hand.
Step 6: Cut a Nice Hand Out of Foam Cup
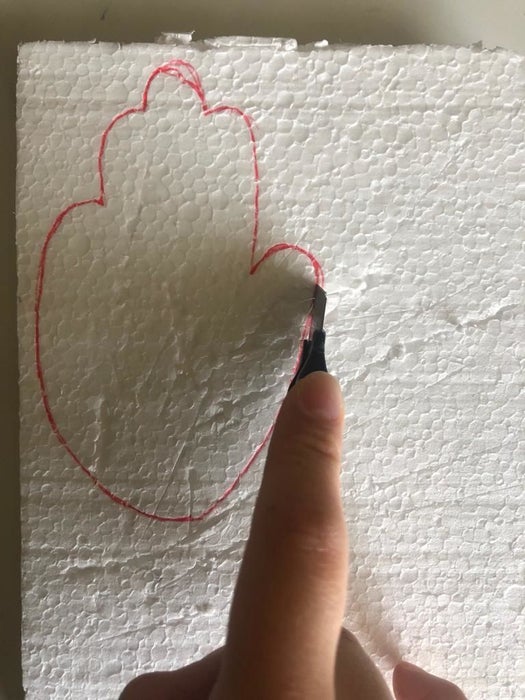
Creating the slapper:
For this we used foam and we cut a simple hand, but again this step is where you can go more creative and create any shape you want. But be careful that, you wouldn’t want it to be too heavy, because the servo motor we are using a simple one, that it needs a light material in order to slap firmly and vastly 🙂
Step 7: Connect the Hand
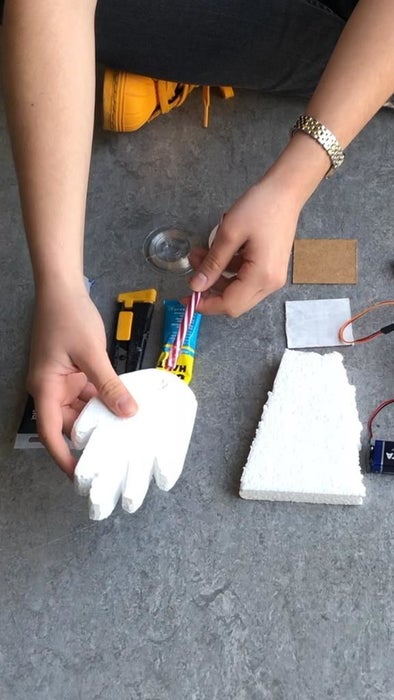
Giving life to the hand:
Take the plastic straw and put some glue on the top. Then stick it in the foam cup hand. Let it dry. Take the two-way plastic servo head and attach (tape) it at the end of the straw. This is the place where we later on connect the hand to the servo.
Be careful that you don’t cover the middle hole to connect to the motor and you attach it hard that it won’t come off as it keeps slapping. Also be careful about the sides of the head component, make sure you are putting it in the right side, so later on you won’t have trouble slide it into servo.
At this stage, actually you have everything to go, so make yourself a trial setup and see if everything works properly. Later on we continue with putting it in a nice package.
Step 8: Really Creating the Box
Put the parts together:
Take the 11-11 box component and glue it with the two 6-11 components. Then glue the 11-6,4 one at the top, with the hole on the right side, as seen in the picture. Leave the 11-11 with the hole last, so that you can put the mechanism inside the box easily.
Also you will put the base in the end, after you have completed all the setup, so it just slides in as a closing piece.
Source: Slapstick
- What is the primary function of the Slapstick device?
It acts as an exam buddy that slaps the user when they get too close to the desk to prevent sleeping. - At what distance does the device activate the slap mechanism?
The device activates when the user gets closer than 6cm. - How do you connect the servo motor cables to the breadboard?
The brown cable connects to the ground line, the red cable to the 5V line, and the orange cable to the pin defined in the code. - Which Arduino pins are assigned to the ultrasonic sensor?
The trigPin is set to pin 10 and the echoPin is set to pin 8. - What material is recommended for creating the slapping hand?
A foam cup is cut into a hand shape because it is light enough for the simple servo motor to move firmly. - Why must the base of the box be removable?
The base needs to be removable so the battery can be changed later without dismantling the whole structure. - How is the foam hand attached to the servo motor?
A plastic straw is glued into the foam hand, and a two-way plastic servo head is taped to the end of the straw to connect to the motor. - What library is required to run the provided code?
The Servo library from the Arduino reference or GitHub is required to run the code.