Here is an easy(enough) project to introduce you to the Arduino microcontroller, as well as Processing. This is my first Arduino and Processing project and I didn’t have too much bother getting it working.
This is my entry to the Sparkfun Microcontroller contest so if you think it’s good, please vote!!(voting starts the 14th feb). Thanks!!
Once everything is set-up, you will be able to control the color of the RBG’s from your computer, using the Processing program, and also see the output color in the program( it ain’t perfect but it’s handy if you want this for remote lighting)
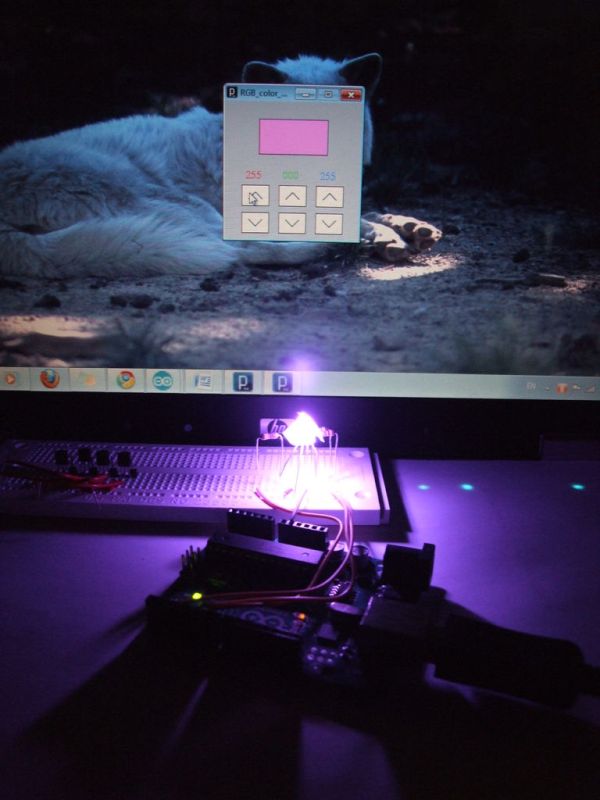
Below is a screenshot of the Processing executing. By clicking (and/or holding) on the up and down arrows, you can change the color levels of each of the colors in the RGB.
Step 1: Equipment
A computer with Arduino and Processing. Try to get the most up-to-date release
http://arduino.cc/en/Main/Softwar e and http://processing.org/download/
An Arduino(make sure it has PWM outputs, which is all/most)
RGB Led’s
Resistors(100×2 ,180×1)
Jumper wires
Breadboard
USB cable(for the Arduino)
If you are using more than one RGB, you may need to calculate the different values for the resistors. Follow this tutorial http://www.sparkfun.com/tutorials/219 or use this site http://led.linear1.org/led.wiz to calculate the required resistances.
Step 2: Right, First of all, the circuit.
Create the circuit on the breadboard. Make sure that that you remember which leg’s of the led are which, otherwise you might see/smell the “magic smoke” later on. On the RGB’s I have, the longest leg is the cathode, while the other three are red, green and blue (picture below). Check the data sheet of your RBG’s to make sure you install them right.
Connect up the breadboard to the Arduino as shows including +5V and GND. Make sure that the pins that you connected the led anode’s to are PWM pins(they have a ~ on them). Once that’s all done, it’s on to the programming. The Arduino outputs 5v so to get a change in the light levels, it uses a system called pulse width modulation. The Arduino generates a square wave at a certain frequency. If you have the duty cycle of the output set to 100% (255 in our case, 8bits), the led will be on the whole time. If the duty cycle is set to 50% (127) the led will be on for half of the cycle. if it’s set to 0%(0)it will be completely off. We don’t see this on/off effect because the frequency is too high for us to notice the light turning on and off.
If you are using clear RBG’s, you will need some way of diffusing the light. I managed this by placing part of a sticky label over the top of the led but any white material should work (paper, masking tape, white socks….)
Step 3: The Arduino code
Once you’ve got the circuit ready, download the Arduino code below and open it in the Arduino program.
If you are new to Arduino programming, read this next paragraph to make sense of it. Otherwise, skip to the next paragraph.

The Arduino sketch normally contains three main parts, the definitions, the setup and the actual loop which is you program proper. In the definitions section, you can give names to numbers, which can then be associated with pins, making it easier to program. You can also define constants and create objects. In the setup, you execute parts of the code that you only want to run once, like starting the serial port and the pin modes. The final part is the loop in which your main program runs. Everything else goes here.
RGB Led’s
Resistors(100×2 ,180×1)
Jumper wires
Breadboard
For more detail: RGB’s with Arduino and Processing