Summary of Program Your Arduino With an Android Device Over Bluetooth
This article guides users on programming an Arduino Uno wirelessly via Bluetooth using an Android device. It details the necessary hardware and software, explains how to upload a setup sketch via PC to configure the HC-05 module's AT commands, describes the circuit connections, and provides instructions for entering AT command mode to finalize the configuration.
Parts used in the Arduino Uno Bluetooth Programming Project:
- Arduino Uno
- Bluetooth HC-05 module
- Mini breadboard
- Capacitor 1uf/16v (elco)
- Resistor 100 ohm
- Jumper wires (5 pcs)
- USB cable
- Android device with Android 4.0.0+
- Laptop/PC
Hello world, in this Instructable I want to show you, how to program your Arduino Uno with your Android device over Bluetooth. It is very simple and so cheap. Also it allows us to program our Arduino where ever we want over wireless bluetooth… So lets get started! 🙂
Step 1: Materials and Tools
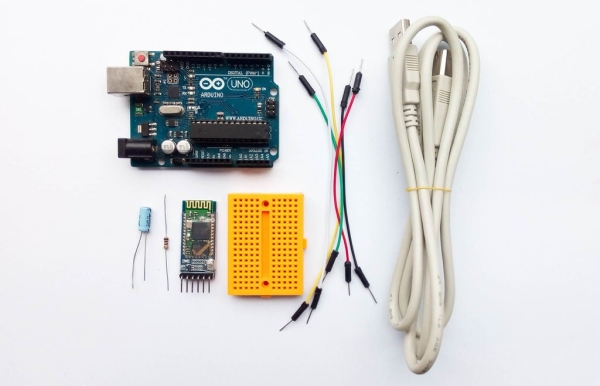
Hardware :
- Arduino Uno
- Bluetooth HC-05 module
- Mini breadboard
- Capacitor 1uf/16v (elco)
- Reasisor 100 ohm
- 5 pcs x Jumper wires
- USB cable
- Android device with Android 4.0.0+ (Bluetooth available)
- Laptop/PC
Software :
- Bluino Loader from the Google Play store
Step 2: Program Your Arduino Using Laptop/PC
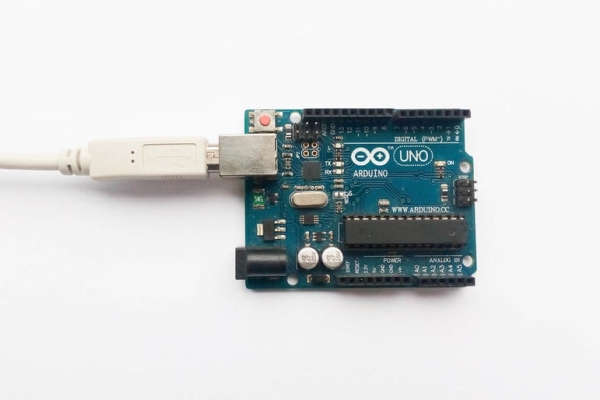
Start by copying the code from text box below.
Then, copy and paste the code into the Arduino IDE editor. Compile. Upload.
This code contains several functions to change the parameters of Bluetooth HC-05 :
- AT+NAME=Bluino#00 : Change name of bluetooth module, default name is “HC-05”.
- AT+BAUD=115200,0,0 : Change baud rate to 115200 (Arduino Uno, Bluino and Mega2560)
- AT+BAUD=57600,0,0 : Change baud rate to 57600 (Arduino Nano, Leonardo, Micro, Pro Mini 3V3/5V and Duemilanove)
- AT+POLAR=1,0 : Change state pin conditio
- For additional you can change password to use not standard password while pairing, AT+PSWD=xxxx.
Name of bluetooth must “Bluino#00-9999”, if you want custom name you should use the paid version of Bluino Loader App.
void setup() {
  Serial.begin(38400);
  delay(500);
  Serial.println("AT+NAME=Bluino#00");
  delay(500);
  Serial.println("AT+UART=115200,0,0"); // Use this baudrate if using for Arduino Uno, Bluino and Mega2560
//Serial.println("AT+UART=57600,0,0");  // Use this baudrate if using for Arduino Nano, Leonardo, Micro, Pro Mini 3V3/5V and Duemilanove
  delay(500);
  Serial.println("AT+POLAR=1,0")
  delay(500);
}

void loop() {
}
Step 3: Hook Up Like Schematic
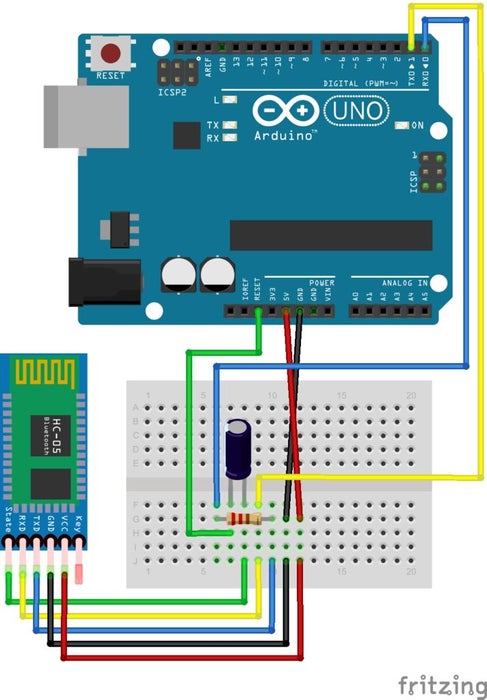
Following the above image, the layout is relatively simple.
If you want you can replace breadboard with PCB prototype board with some soldering work, so you get small size or like shield for Arduino.
Step 4: Time to Setup Bluetooth HC-05
Basically in this step how to setup HC-05 over At command, with following this step you will set HC-05 to some parameters.
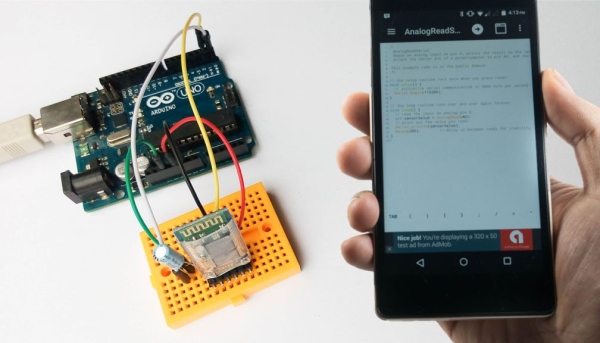
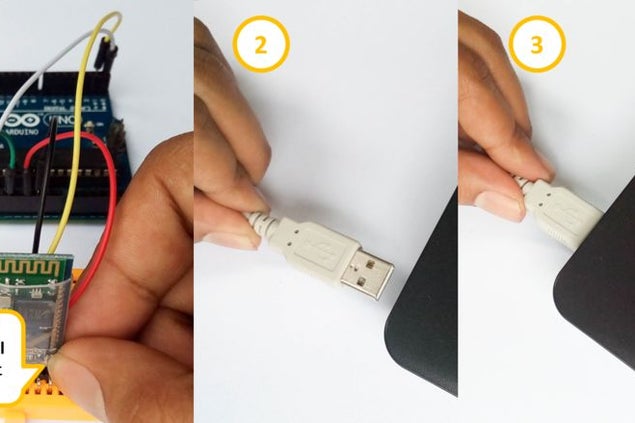
In step 2 you have upload sketch to Arduino, in that code have Serial function to communicate over pin RX/TX (D0/D1), which is when you connect to HC-05 pin RX/TX is will force setup HC-05 on At command mode. Just follow step like on pictures.
• Press and hold KEY button
• Plug USB cable for powering Arduino
• Wait about 5 second (still hold KEY button)
• Unplug and re plug USB for reset from AT command mode
Read more: Program Your Arduino With an Android Device Over Bluetooth
- What software is required to program the Arduino?
The Bluino Loader from the Google Play store is required. - How do you change the baud rate of the Bluetooth module?
Use the AT+BAUD command, such as AT+BAUD=115200,0,0 for Arduino Uno. - Can you customize the Bluetooth module name?
Yes, by using the AT+NAME command, but custom names require the paid version of the app. - How do you enter AT command mode on the HC-05?
Press and hold the KEY button while plugging in the USB cable, wait five seconds, then reset. - Which pins are used for communication during setup?
Pins RX and TX (D0/D1) are used to communicate over the Serial function. - Is it possible to use a PCB instead of a breadboard?
Yes, you can replace the breadboard with a PCB prototype board after soldering. - What is the default name of the bluetooth module?
The default name is "HC-05". - How do you set a non-standard password for pairing?
You can change the password using the AT+PSWD command.