Most of the temperature measurement techniques around the world require some sort of physical contact between the temperature sensor and the object or environment whose temperature is to be measured, but as technology advanced, this changed too. The need to be able to measure the temperature of an object without physical contact arose. This need brought the measurement of temperature using infrared sensors.
The principle of operation of Infrared thermometers is simple, all bodies at a temperature above 0°Kelvin (absolute zero) emit an infrared energy which can be detected by the infrared thermometer sensor. It’s design includes a lens that focuses the infrared energy being emitted by the object in front of a detector. The detector converts the energy into an electrical signal which then can be passed to a microcontroller to interpret and display in units of temperature after compensating for the variation in ambient temperature.
Today, we will build a DIY Infrared based thermometer using an Arduino Uno, the MLX90614 IR temperature sensor, and a Nokia 5110 LCD display shield to display the measured temperature.
The MLX90614 is an infrared temperature sensor for non-contact temperature measurement. It can measure temperatures within the range of -70 to 380 degree Celsius with an accuracy of about 0.5C at room temperature.
Some of the features of this sensor are listed below:
- Small size and low cost
- Easy to integrate
- Factory calibrated in wide temperature range: -40 to 125°C for sensor temperature and -70 to 380°C for object temperature
- High accuracy of 0.5°C over a wide temperature range (0..+50 C for both Ta and To)
- Measurement resolution of 0.02°C
- Single and dual-zone versions
- SMBus compatible digital interface for fast temperature readings and building sensor networks
- Customizable PWM output for continuous reading
- Available in 3V and 5V versions
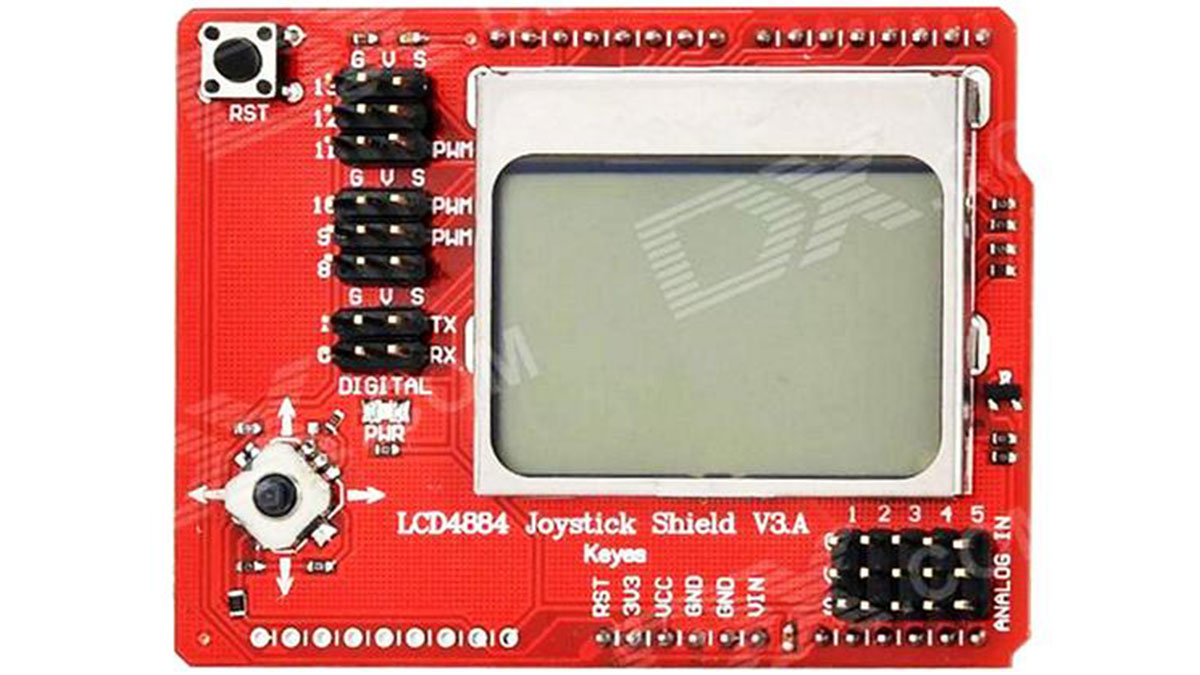
For this tutorial also, for the first time, we will use the Nokia 5110 LCD shield, while we have used the other version of the display several times we have never used the shield version. The shield comes with a joystick and a button. It is pin compatible with the Arduino Uno and most other Arduino boards.
Required Components
The following components are required to build this project:
As usual, the exact components used in this tutorial can be bought via the links attached to each of the components above.
Schematics
The schematics for this project is very easy because the display comes as a shield which takes away the need to connect it via wire and all we need to do is to plug the display on the Arduino. The connection between the Arduino and the temperature sensor is shown in the schematics below.
To make the connections easier to follow, the connection is further detailed below.
MLX90614 – Arduino Uno

VCC  - 5V
GND  -  GND
SCL  - A5
SDA  - A4
Go over the connection once again to ensure everything is as it should be.
Code
Our goal for this project is to measure the temperature, process it and display it on the LCD. To enable us to communicate easily with the mlx90614 temperature sensor, we will use the mlx90614 temperature sensor library from Adafruit and the Nokia 5110 LCD graph library for easy display of text on the screen. The libraries can be downloaded via the link attached to each of the libraries in the sentence above.
Read more: Infrared Thermometer with Arduino and MLX90614 Temperature Sensor