
Summary of DIY | Easy Arduino Laser Tripwire Security System!
This article provides a step-by-step tutorial on constructing a DIY Laser Tripwire Security System using an Arduino. The project involves aligning laser and sensor modules, connecting them to a breadboard, and wiring components like a speaker and LED to the Arduino board. The guide also explains how to upload and customize code to trigger an alarm when the laser beam is interrupted, making it an accessible electronics project for home security.
Parts used in the Laser Tripwire Security System:
- LED light
- Laser Module
- Laser Sensor Module
- Speaker or Piezo Buzzer
- 2 Small Breadboards with sticky tape on the back
- Arduino
- Breadboard wires
- USB Cable (to program the Arduino)
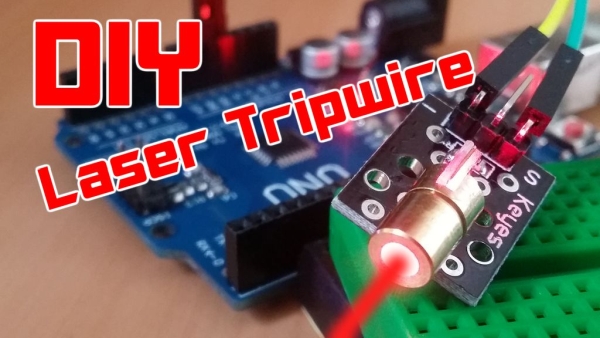
In this tutorial I will be teaching you how you can build your own Laser Tripwire Security System at home!
You will need the following components and materials:
- LED light
- Laser Module
- Laser Sensor Module
- Speaker or Piezo Buzzer
- 2 Small Breadboards with sticky tape on the back
- Arduino
- Breadboard wires
- USB Cable (to program the Arduino)
This project is very simple to build since we won’t have to modify any parts.
You can watch the video tutorial and finished product right here – https://www.youtube.com/watch?v=X18CfOKtyTQ
Step 1: Aligning the Laser Modules
First off, we plug our laser module and sensor into the mini breadboards.
Make sure you align them properly, otherwise your alarm will start beeping as soon as you upload the code.
Step 2: Connecting the Speaker and LED to the Arduino
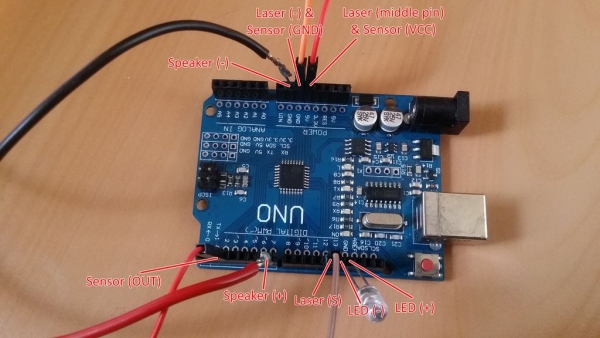
We will plug our speaker into GND and Pin 7 of the Arduino.
The LED will go into GND and Pin 13 of the Arduino.
I provided a image with all pins tagged to make things easier for you.
Step 3: Connecting the Laser and Sensor to the Arduino
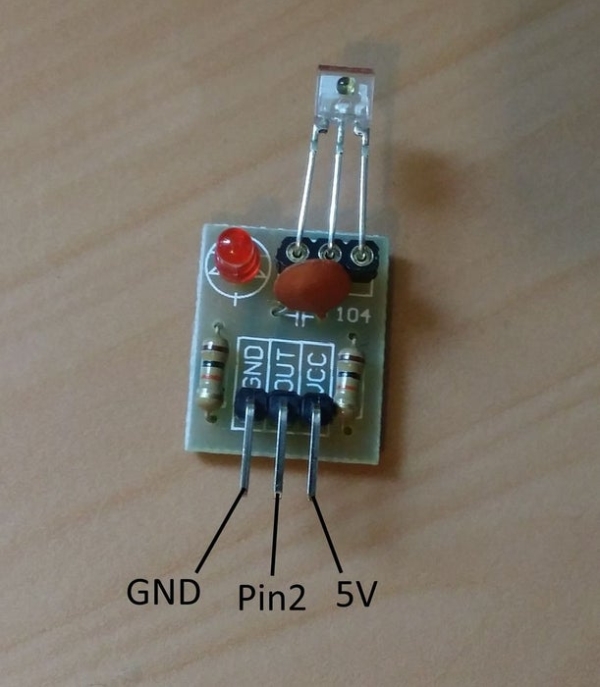
Starting off with the sensor, the pins should be connected like this:
Sensor – Arduino
GND → GND
OUT → Pin 2
VCC → 5V
And now the laser module:
Laser – Arduino
S → GND
Middle → 5V
– → GND
I suggest using longer cables to connect the laser module, since you’d probably attach it to the other side of the room / door.
Once again I provided images to make things easier.
Step 4: Program Your Arduino
Connect the Arduino to your PC and program your Arduino using the code provided in this step.
You can change the alarm by editing the void “alarmTone” and the void “alarm”.
If you don’t want a delay or you need a longer delay in order to disable the alarm you can change the value “3000” in “delay(3000);” in the void “alarm”.
Source: DIY | Easy Arduino Laser Tripwire Security System!
- How do I prevent the alarm from beeping immediately after uploading code?
You must plug the laser module and sensor into the mini breadboards and make sure you align them properly. - Which pins should I use to connect the speaker to the Arduino?
The speaker plugs into GND and Pin 7 of the Arduino. - What are the correct pin connections for the laser sensor module?
Connect the sensor GND to Arduino GND, OUT to Pin 2, and VCC to 5V. - How do I wire the laser module to the Arduino?
Connect the S pin to GND, the Middle pin to 5V, and the - pin to GND. - Can I change the alarm sound or delay duration?
Yes, you can edit the void alarmTone and void alarm functions, and change the value 3000 in the delay command. - Why might I need longer cables for this project?
Longer cables are suggested because you will likely attach the laser module to the other side of a room or door. - Is it necessary to modify any parts to build this system?
No, the project is simple because you do not have to modify any parts.
