Summary of DC Motor Control Using an H-Bridge using arduino
This tutorial explains how to control the direction of a DC motor using an H-bridge circuit with an Arduino. It details connecting a switch, power supply, and the Texas Instruments L293NE or SN754410 chip to reverse current flow. The guide covers pin configurations, voltage requirements (5–15V), and safety tips for testing motors without damage.
Parts used in the DC Motor Direction Control:
- Breadboard
- Arduino module
- Digital Input Switch
- DC Motor (5-15V range)
- Soldering leads
- Texas Instruments L293NE or SN754410 H-bridge IC
- Optional bench power supply
Overview
In this tutorial, you’ll learn how to control a DC motor’s direction using an H-bridge.
To reverse a DC motor, you need to be able to reverse the direction of the current in the motor. The easiest way to do this is using an H-bridge circuit. There are many different models and brands of H-Bridge. This tutorial uses one of the most basic, a Texas Instruments L293NE or a Texas Instruments SN754410.
If you simply want to turn a motor on and off, and don’t need to reverse it, for example if you’re controlling a fan, try the tutorial on controlling high current loads with transistors.
(:toc Table of Contents:)
Parts
For this lab you’ll need:
Prepare the breadboard
Connect power and ground on the breadboard to power and ground from the microcontroller. On the Arduino module, use the 5V and any of the ground connections:
Add a Digital Input (a switch)
Connect a switch to digital input 2 on the Arduino.
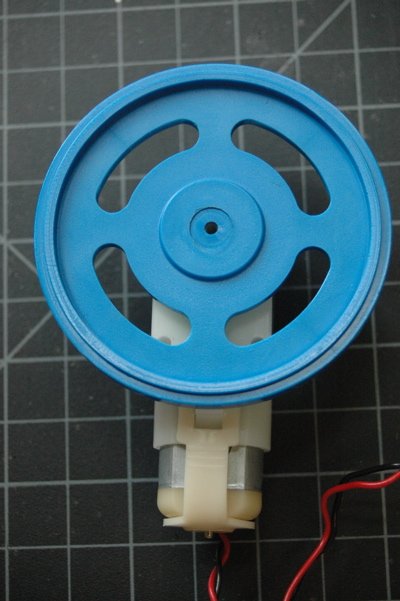
Find a motor
Find yourself a DC motor that runs on low DC voltage within the range of 5 – 15V. RadioShack often sells several small DC motors, the NYU Computer Store on occasion has small a few, the junk shelf is almost always a goldmine for discarded motors and fans. Asking classmates and second years is another good approach.
Solder leads to the motor’s terminals. With DC motors, there is no polarity regarding the motor terminals so you can connect it any way you’d like.
Optional: Consider testing your motor with a bench power supply from the equipment room. Ask a teacher or resident if you need help setting one up. Begin by adjusting the voltage on the bench power supply and observe its effects. Take note of its speed at different voltages without dipping to low or too high. Running a motor at a voltage much lower or much higher than what it’s rated for could potentially damage or permanently destroy your motor. When the motor doesn’t spin, the voltage is too low. When the motor runs hot, or sounds like it’s straining, the voltage is too high.
This example uses an H-bridge integrated circuit, the Texas Instruments L293NE or Texas Instruments SN754410. There is one in your Physical Computing Kit, and the NYU Computer Store and many distributors such as Digikey, SparkFun, Mouser and Jameco sell them as well.
How your H-bridge works
The L293NE/SN754410 is a very basic H-bridge. It has two bridges, one on the left side of the chip and one on the right, and can control 2 motors. It can drive up to 1 amp of current, and operate between 4.5V and 36V. The small DC motor you are using in this lab can run safely off a low voltage so this H-bridge will work just fine.
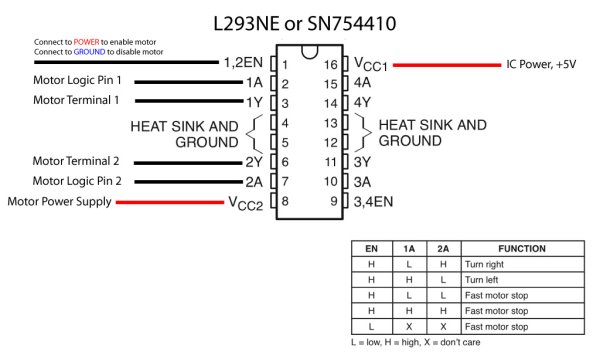
The H-bridge has the following pins and features:
- Pin 1 (1,2EN) enables and disables our motor whether it is give HIGH or LOW
- Pin 2 (1A) is a logic pin for our motor (input is either HIGH or LOW)
- Pin 3 (1Y) is for one of the motor terminals
- Pin 4-5 are for ground
- Pin 6 (2Y) is for the other motor terminal
- Pin 7 (2A) is a logic pin for our motor (input is either HIGH or LOW)
- Pin 8 (VCC2) is the power supply for our motor, this should be given the rated voltage of your motor
- Pin 9-11 are unconnected as you are only using one motor in this lab
- Pin 12-13 are for ground
- Pin 14-15 are unconnected
- Pin 16 (VCC1) is connected to 5V
Below is a diagram of the H-bridge and which pins do what in our example. Included with the diagram is a truth table indicating how the motor will function according to the state of the logic pins (which are set by our Arduino).
For more detail: DC Motor Control Using an H-Bridge
- How do you reverse a DC motor?
You reverse the direction of the current in the motor using an H-bridge circuit. - Which H-bridge models are recommended for this project?
The tutorial recommends using the Texas Instruments L293NE or the Texas Instruments SN754410. - What voltage range should the DC motor operate within?
The motor should run on low DC voltage within the range of 5 to 15 volts. - Can I connect motor terminals in any order?
Yes, there is no polarity regarding motor terminals so you can connect them any way you like. - What happens if a motor runs at too high a voltage?
Running a motor at too high a voltage may cause it to run hot or sound like it is straining. - How many motors can the L293NE chip control?
The chip has two bridges and can control up to two motors simultaneously. - Which pins are connected to ground on the H-bridge?
Pins 4, 5, 12, and 13 are designated for ground connections. - What is the function of Pin 16 on the H-bridge?
Pin 16 (VCC1) is connected to 5V to enable the logic side of the chip.