Summary of Control Arduino Wirelessly with MATLAB
This article demonstrates a simple method to control an Arduino wirelessly using MATLAB via an ENC28J60 Ethernet shield. The setup involves connecting the shield and LED to the Arduino, linking both to a PC via a printer cable, and connecting the shield to a Wi-Fi router using a UTP cable. The process includes installing specific libraries in Arduino IDE 1.0 and uploading code configured for the local DHCP range.
Parts used in the Wireless Arduino Control Project:
- Arduino (Gizduino)
- ENC28J60 Ethernet Shield
- Wi-Fi Router
- LED
- Printer Cable
- UTP Cable
Been seeing few DIYs on how to establish a communication between MATLAB application and Arduino that is hardwired to PC. However, I haven’t encountered anything that control Arduino via MATLAB wirelessly using the ENC28J60 compatible Ethernet shield. In this ible’, I’m going to show the simplest way to control Arduino using MATLAB wirelessly.
WHAT YOU NEED?
1) Arduino – You need a controller. I used Arduino since it is supported by MATLAB. For this project however I used, Gizduino, a locally made Arduino-based controller.
2) Ethernet Shield – You need a compatible Ethernet shield for your board. I used the ENC28J60 for my board.
3) Wi-Fi Router – To connect your Arduino which would be the means to communicate to your PC wirelessly.
4) LED – Any components to indicate communication between devices. For this project I used LED.
5) Printer Cable – To connect Arduino to your PC.
6) UTP Cable – To connect your Ethernet shield to the router.
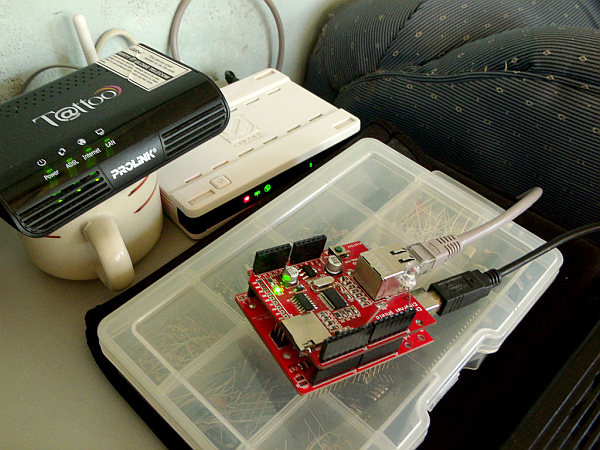
Step 1: Connect Ethernet Shield to Arduino
Step 2: Connect LED
Connect any components that could indicate communication between devices. In this ‘ible I used an LED. Will try to turn LED on and off wirelessly using MATLAB. I’ve connected my LED’s anode (long pin) to Digital I/O pin 6 of the Ethernet shield attached to the Arduino and LED’s cathode (short pin) to Ethernet’s GND.
Step 3: Connect Arduino to PC
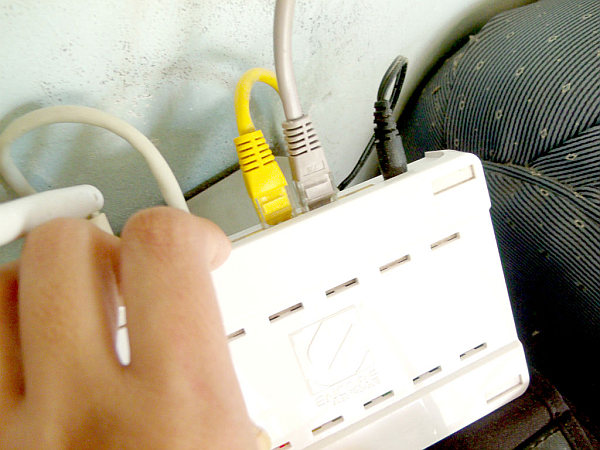
Step 4: Connect Ethernet Shield to Router
Step 5: Open Arduino IDE
Step 6: Upload Code to Arduino
 Codes.rar674 bytes
2. Ethernet Shield
3. Wi-Fi Router
4. LED
5. Printer Cable
6. UTP Cable
For more detail: Control Arduino Wirelessly with MATLAB
-
How do I connect the Ethernet shield to the Arduino?
Carefully connect the Ethernet shield to the Arduino while avoiding bending the pins. -
Which version of Arduino IDE is recommended for this project?
Arduino 1.0 is used because of its compatibility with the Ethernet shield library. -
Where should I connect the LED's anode pin?
The LED's anode (long pin) should be connected to Digital I/O pin 6 of the Ethernet shield attached to the Arduino. -
How can I find my router's default gateway address?
You can access your router by opening a browser and typing the default gateway address, typically 192.168.0.1, or use the ipconfig command in Windows. -
What type of cable connects the Ethernet shield to the router?
A UTP cable is used to connect the Ethernet shield to any LAN port of the router. -
How do I establish communication between the Arduino and the PC?
Connect the Arduino to the PC using a printer cable. -
Why must the web server address be within the DHCP server range?
The web server address must be within the DHCP server range to ensure proper communication before uploading the codes.