Summary of Connect 4 Game Using Arduino and Neopixel
This article details a DIY Connect 4 game kit built with an Arduino Uno and Neopixel LEDs, designed for kids to assemble without soldering. The project teaches basic coding concepts like loops and conditions through interactive play. It features a plug-and-play design using a breadboard, button switches, and a battery holder, all mounted on a baseboard with a cardboard stand.
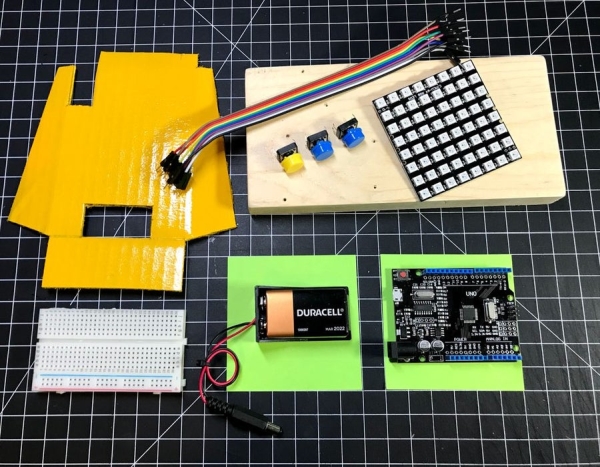
Parts used in the Arduino Connect 4 Game:
- Arduino Uno or equivalent
- 8x8 Neopixel RGB LED
- Breadboard
- 3 button switches
- Jumper wires
- Screws
- Case - baseboard & cardboard stand
- Battery holder
Rather than just giving an off-the-shelf toy gift, I wanted to give my nephews a unique gift that they could put together and (hopefully) enjoy. While the Arduino code for this project may be too difficult for them to understand, the basic concepts of input, output, loops, and conditions used in this code could be explained visually as they play the game of Connect 4.
In this Instructable, I will show you how to put together an Arduino kit that you can assemble and code with your kids to play Connect 4. No soldering is required for this project; just plug and play.
Step 1: Parts
For this project, you will need:
- Arduino Uno or equivalent
- 8×8 Neopixel RGB LED
- Breadboard
- 3 button switches
- Jumper wires
- Screws
- Case – baseboard & cardboard stand
Tools: Screw driver, glue gun
Step 2: Prepare the Neopixel Display Stand Unit
First, connect 3 jumper wires to Neopixel. I’m using the following wiring color code:
White: GND
Gray: 5V
Purple: Data IN
Then, affix Nelpixel to the display board with hot glue.
Step 3: Prepare the Button Switch Unit
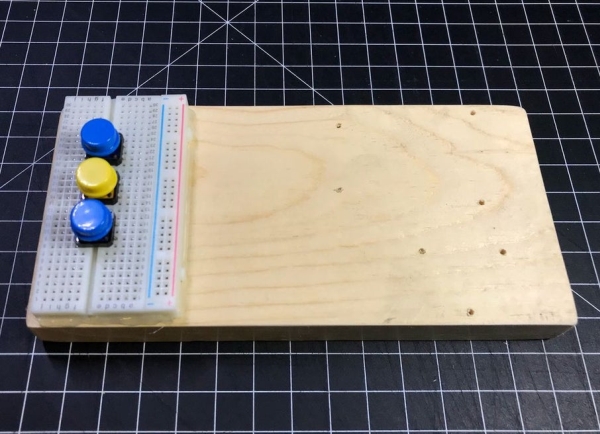
Place button switches on the breadboard and connect jumper wires using the following wiring color code:
Brown:  Left Button
Red:    Left Button
Orange: Center Button
Yellow: Center Button
Green:  Right Button Switch
Blue:   Right Button Switch
Brown, orange, green wires are connected to the (-) rail along with a new black wire.
Note:
You may noticed that I’m not using any resistors for these buttons. That’s because I will be using Arduino code to use built-in 20K Arduino pin resistors. See my other project on how to use internal resistors using your code to simply your circuit.
https://www.instructables.com/id/Simon-Whack-a-Mol…
Step 4: Attach Arduino and Battery Holder to Baseboard
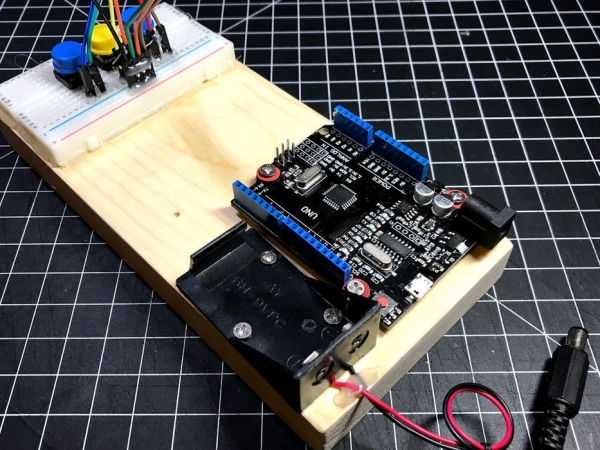
Use screws (or hot glue) to attach Arduino and the battery holder to the baseboard.
Step 5: Affix Display Unit to Baseboard
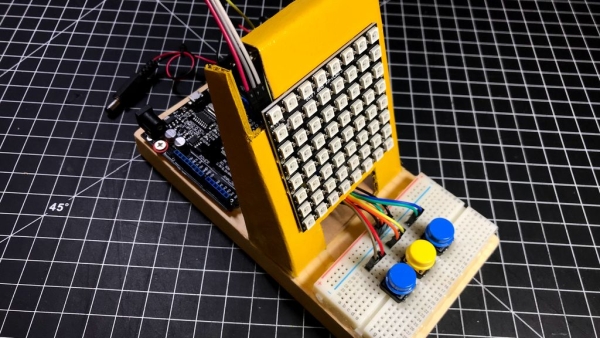
Use hot glue to affix the display unit to the baseboard as shown.
Step 6: Connect Jumper Wires to Arduino
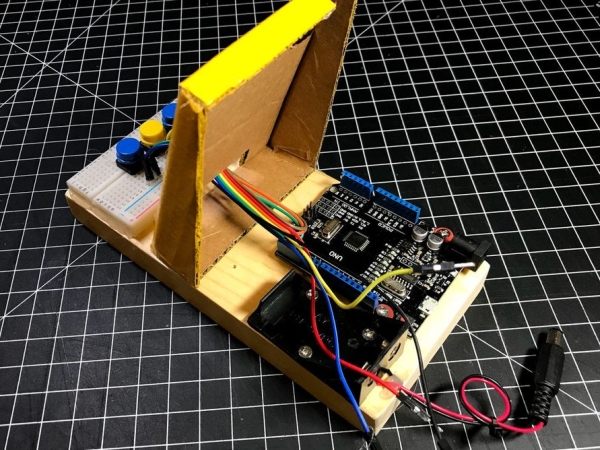
Connect all the jumper wires to Arduino according to the following pin assignment:
Red    -> 2
Yellow -> 3
Blue   -> 4
Purple -> 5

Black  -> GND
White  -> GND
Gray   -> 5V
Step 7: Upload Code & Play
I pre-loaded the Arduino with attached code so that as soon as the 9V battery was connected to the Arduino, it started to play the game. The blue buttons are for moving your chip position to left or right column before pressing the yellow button to drop the chip. (See the video)
To enter the demo mode, simply press any button and press & release reset. Once the screen is clear, release the button and you’ll see red and blue playing automatically. You’ll notice that in the demo mode, red and blue players are simply selecting columns randomly and not using any winning strategy to beat the other player.
To exit the demo mode, just reset the Arduino.
I’m planning to add a single player vs Arduino mode in the future so if you know of a basic algorithm for Connect 4, let me know.
Source: Connect 4 Game Using Arduino and Neopixel
- How do I wire the Neopixel display?
Connect White to GND, Gray to 5V, and Purple to Data IN. - Do I need resistors for the buttons?
No, the project uses internal 20K Arduino pin resistors via code. - What is the best way to mount the components?
Use screws or hot glue to attach the Arduino, battery holder, and display unit to the baseboard. - How do I move a chip in the game?
Press the blue buttons to move the chip position left or right before pressing the yellow button to drop it. - How can I enter demo mode?
Press any button and press and release the reset switch while the screen is clear. - Does the demo mode use a winning strategy?
No, red and blue players select columns randomly without a winning strategy. - How do I exit demo mode?
Simply reset the Arduino to exit the demo mode. - Is soldering required for this project?
No, no soldering is required as the project is designed to be plug and play.