Summary of A Guide to Building Your Own Single-Axis Solar Tracking System
The article introduces a Single Axis Solar Tracker Arduino project that uses two LDR sensors and a single servo motor to rotate a solar panel along one axis, tracking the sun’s movement to maximize energy capture. It explains operation, components, connections, brief code, and mentions using PCBWay for PCB prototyping.
Parts used in the Single Axis Solar Tracker:
- Arduino Uno board with Atmega328P microcontroller
- Light Dependent Resistor (LDR) sensor (x2)
- 10k ohm resistor (x2)
- Servo motor (x2 mentioned in components list, project uses one)
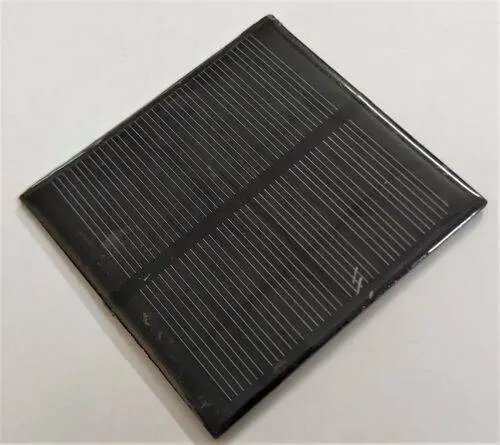
- Photovoltaic panel
- Connection wires/cables
- Breadboard or PCB/board for holding and connecting components
Introductions of single axis solar tracker:
A commonly favored Arduino project is a solar tracker system that follows the intensity of sunlight. It is divided into two primary categories: the single-axis solar tracker and the dual-axis solar tracker.
The solar tracker with only one axis is operated by one motor, enabling movement in two directions. On the other hand, the dual-axis tracker can pivot in four different directions because of its movement in two axes.
A Preview image of Single axis solar tracker
![]()
Greetings everyone, we are Shahid and Adnan welcoming you back to Techatronic. We believe that all of you are in good health. We are delighted to introduce an extremely thrilling project to you today – the Single Axis Solar Tracker project.
Normally, solar panels are stationary, constantly oriented towards the sunrise. Nevertheless, this orientation leads to a decrease in the quantity of incoming light. Our exceptional solar tracker, conversely, functions in a different manner. Throughout the afternoon and evening, it adapts to track the movement of the sun, maximizing sunlight exposure and harvesting more solar energy.
What is a Single Axis solar tracker?
The single-axis solar tracker project serves as a great example of a small-scale electronics project. It has become extremely popular recently.
Essentially, this solar tracker system adjusts to the movement of sunlight. By putting this mechanism into place, it maximizes the amount of solar energy captured by solar panels by increasing their exposure to sunlight.
This system, which has a solar panel, follows light movement in two dimensions. As the sun rises during the morning, the system adapts accordingly and replicates this motion for the evening’s setting.
The system tracks the sun’s movements to maximize solar power collected by ensuring optimal exposure. Solar panels produce more electricity when exposed to higher levels of sunlight intensity.
An LDR sensor is employed in the solar tracker to recognize and adjust to different levels of light intensity.
![]()
How does it work? Working of single axis solar tracker
The solar tracker system with one axis uses servo motors to move in two directions along a specific axis. When positioned on the x-axis, it travels in both the positive (+x) and negative (-x) directions, usually up to 60 degrees in each direction.
This is the process the project follows:
The system utilizes a light-dependent resistor (LDR) sensor that changes the resistance of the circuit in response to light. Two LDR sensors are incorporated in the circuit, placed on opposite sides.
The motor moves in the direction where the LDR shows decreased resistance. Every LDR sensor consistently sends its data to the Arduino device. Following this, the Arduino processes the data from the LDR sensors and sends instructions to operate the servo motors as needed.
PCBWay PCB Prototyping Services
The entire circuit is now established on a breadboard. Yet, PCBWay offers Rapid PCB Prototyping tailored for research endeavors due to the inefficiency of breadboard assembly for this specific project. I support PCBWay because they allow you to get your first boards in just 24 hours, helping you start your project quickly.
The prototyping stage is essential for both engineers, students, and enthusiasts. PCBWay speeds up your board production while also guaranteeing accuracy and cost-effectiveness. This greatly decreases costs and speeds up the schedule for your electronic project.
PCBWay provides a variety of PCB choices, ranging from 2 Layer boards to sophisticated HDI and flex boards. Although the boards have different uses and purposes, I am pleased with their quality, on-time delivery, and affordability.
I believe that the information given above gives enough insight into how the single-axis solar tracker project operates.
![]()
Components Used in Single Axis Solar tracker
Definitely! Here is an alternative version of the necessary components:
– Arduino Uno board with Atmega328P microcontroller
– A pair of Light Dependent Resistors (LDR sensors)
– A pair of resistors with a resistance of 10,000 Ohms each
– A pair of Servo Motors
– Photovoltaic Panel
– Cables used for connecting components
– A board for holding and connecting electronic components.
![]()
Circuit Diagram for single axis solar tracker
Fritzing is used to create circuit diagrams for a single-axis solar tracker to help with understanding connections. If you face any challenges, do not hesitate to contact us through the comment section for help.
![]()
Connection Table of single axis solar tracker
| Arduino UNO | Servo Motor | ||
| D9 Pin | Out Pin | ||
| +5V | VCC | ||
| GND | GND | ||
| Arduino UNO | LDR 1 | LDR 2 | 10k ohm Resistor, 2 p |
| A0 Pin | Terminal 1 | Terminal 1 | |
| A0 Pin | Terminal 1 | Terminal 1 | |
| +5V | Terminal 2 | Terminal 2 | |
| GND | Terminal 2 |
Learn How to use Single axis solar tracker using Arduino code
// Single axis solar tracker
// Techatronic.com
#include //including the library of servo motor
Servo sg90;
int initial_position = 90;
int LDR1 = A0; //connect The LDR1 on Pin A0
int LDR2 = A1; //Connect The LDR2 on pin A1
int error = 5;
int servopin=9; //You can change servo just makesure its on arduino’s PWM pin
void setup()
{
sg90.attach(servopin);
pinMode(LDR1, INPUT);
pinMode(LDR2, INPUT);
sg90.write(initial_position); //Move servo at 90 degree
delay(2000);
}
void loop()
{
int R1 = analogRead(LDR1); // read LDR 1
int R2 = analogRead(LDR2); // read LDR 2
int diff1= abs(R1 – R2);
int diff2= abs(R2 – R1);
if((diff1 <= error) || (diff2 <= error)) { } else { if(R1 > R2)
{
initial_position = –initial_position;
}
if(R1 < R2)
{
initial_position = ++initial_position;
}
}
sg90.write(initial_position);
delay(100);
}
- What is a single axis solar tracker?
A system that uses one motor to move a solar panel along one axis to follow sunlight and increase energy capture. - How does the single axis solar tracker detect sunlight direction?
It uses two LDR sensors that change resistance with light; the Arduino reads both and moves the motor toward the sensor with lower resistance. - Can the tracker move in two directions with one axis?
Yes, the single-axis tracker moves in two directions (positive and negative along the axis), typically up to 60 degrees each way. - What microcontroller board is used in the project?
The project uses an Arduino Uno board with the Atmega328P microcontroller. - What components are required to build the tracker?
The article lists Arduino Uno, two LDRs, two 10k ohm resistors, servo motor(s), a photovoltaic panel, cables, and a board or breadboard/PCB. - How are the LDRs connected to the Arduino?
The two LDRs are connected to analog pins A0 and A1 on the Arduino as described in the connection table. - What pin does the servo use on the Arduino?
The servo is connected to a PWM pin; the example uses digital pin 9. - Does the article provide example code for the tracker?
Yes, the article includes Arduino code that reads the LDR values and moves the servo accordingly. - Is a breadboard recommended for final assembly?
The article notes breadboard assembly is used for prototyping but recommends PCB prototyping services like PCBWay for reliable boards.