Time Required: 3-5 hours depending on experience
Someone mentioned that Jameco needed a robotic mascot. I have always been a tinkerer, especially with radio-controlled electronics and so I volunteered for the chance to design and create the J-Bot. While this was my first autonomous robot build, I’m confident it won’t be my last. We thought this would be a fun project to build.
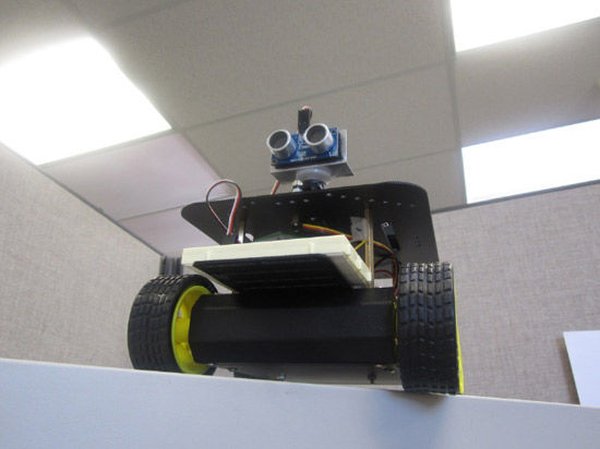
Step 1: Building the 4 wheel drive platform
After soldering the wires to the motors, I suggest adding a drop of hot glue to the copper clips so the clips do not rip off because they are very fragile.
At this point it would be a good idea to label all the cables so you can identify them later. I decided to label them by using regular scotch tape. I labeled the two front motors “FL” and “FR” for front-left and front-right, as well as the back as “BR” and “BL” for back-right and back-left.
Step 2: Step 2 – Wiring and Mounting Arduino to Platform
http://www.youtube.com/embed/P4xuYb412G4 This video shows how to wire a battery back.
To mount the Arduino to the platform, I first put the standoffs on the Arduino to see where I could mount it. I decided to mount the Arduino on the bottom plate because it would require less drilling. I drilled one hole on the platfom so I could get all four standoffs connected to the platform.
Pull all the wires out from beneath the platform. There should be five cables, four for the motors and one positive battery cable from the switch and the negative cable from the battery pack.
Next we will build the Adafruit motor control shield to control the motors on the platform. This website walks you through the simple build. http://ladyada.net/make/mshield/solder.html
The kit includes some headers so you can solder them onto the motor control shield to make it easier to connect the different sensors. The headers that are provided are 8-position. You will need to cut in the middle of the seventh pin so it will fit onto the motorshield. If you decide not to use the headers, you can solder jumper wires to the board. In this build we will be using pin A0, one grd (ground), and one +5V pin.
Take both sets of wires from the left side (front left and back left) and test them with an AA battery (not included) to make sure they are wired correctly. Both of the wheels should go the same direction. We are wiring the motors in series. Do the same with the right side.
After making sure that the motors are wired correctly, put the left side to the terminal labeled M1. Put the right side to terminal M2.
You will need to solder the plug and the battery holder together as shown below. This will provide power to the Arduino UNO
[box color=”#985D00″ bg=”#FFF8CB” font=”verdana” fontsize=”14 ” radius=”20 ” border=”#985D12″ float=”right” head=”Major Components in Project” headbg=”#FFEB70″ headcolor=”#985D00″]Required tools and parts:
Jameco J-BOT Kit
Arduino UNO
11 AA batteries (5 for the motors and 6 for the Arduino, servo and sensor)
Philips screwdriver
Long nose Pliers
Soldering iron
Solder wire
Helping hands[/box]
For more detail: Arduino 4wd robot with ping sensor “J-Bot”