My school is kind of strange. We don’t have a cafeteria, but we do have a four week course on “The Simpsons.” We don’t have a jungle-gym on the elementary playground, but we do have a half-buried firetruck. We don’t have a football team, but we do have a bee-keeping club. It’s pretty awesome.
This year I decided to do some cool experiments with honey bees. This project uses 12 temperature probes placed throughout a beehive to track the movement of honey bees over the course of several weeks. The project is completely solar powered, weatherproof, and can log months of data onto a 1GB memory card. I wouldn’t have been able to build this without the parts supplied by the bee keeping club.
Parts you’ll need (in no particular order):
- Waterproof temperature probes x 12 = $107.52
- Cable glands x 13 = $22.88
- I’m linking to the smaller size of gland, when I actually bought the larger size. While the larger size did work, you won’t have to tighten the smaller ones as much and they should work much more easily.
- Arduino = $29.95
- I used an Arduino Mega, but this was way overkill. Any Arduino will do just fine. Because I used a Mega, the code is a bit affected.
- SD card shield = $19.50
- SD Card = $9.95
- Large weatherproof enclosure box = $19.95
- 6600mAh Lithium ion battery pack = $39.50
- Yes, it’s a giant battery, but we want this thing to keep working if it rains for a few days!
- Lithium ion battery charger = $24.95
- Large, 6V solar panel = $34.95
- 3.7v to 5v boost converter = $19.50
TOTAL: $328.65 + Shipping (if you’re getting everything new)
Here’s the code I wrote for this project. Much of it was modified from existing Arduino SD card examples.
The parts for the SD card may have to change a little depending on what shield and Arduino you use. Because I used a Mega here, I had to do a bit of a work around to get the SD shield to work without modifying it, so it could probably be simplified a bit further.
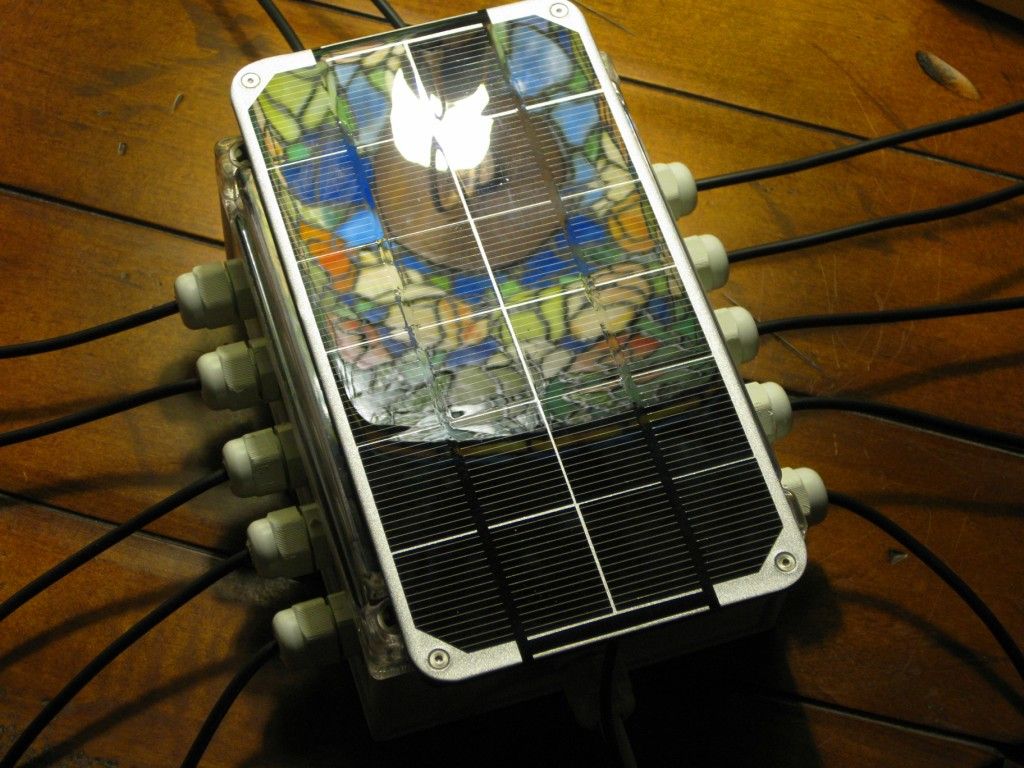
Step 1: Mount the Cable Glands
The outermost cable glands had a nut on the inside that ran into one of the box’s support posts. I just cut off part of the outside of the nut to make it fit – it shouldn’t compromise the seal too badly, and the box should survive splashes from the rain just fine (hopefully this thing won’t end up entirely underwater!).
Step 2: Wire the Temperature Probes
There should only be white (signal) wires left from the temperature probes. I insulated the bottom of the terminal blocks with electrical tape so they don’t short out with each other.
Next I wired each signal wire to the SD card shield. Pictured is a Sparkfun SD card shield. In the parts list I linked to an Adafruit shield, as that’s what I recommend buying (and what I ended up actually using). The Sparkfun shield was a huge pain. Don’t use it. The Adafruit shield also has a RTC (real time clock) module built in, so we can timestamp our data points more accurately, even after power gets cut out. I highly recommend it.
Because these temperature probes work on the digital, one-wire bus system (where each probe has a unique address), all of the signal wires get tied together and brought to a single digital pin on the Arduino. I chose to use pin 3.
Then I used a 4.7K pull up resistor on the signal wires, tying them to the 5v supply on the Arduino. I also connected the power busses to 5v and ground at this time. Now you can slap your Arduino on there!
Step 3: Figuring Out Power
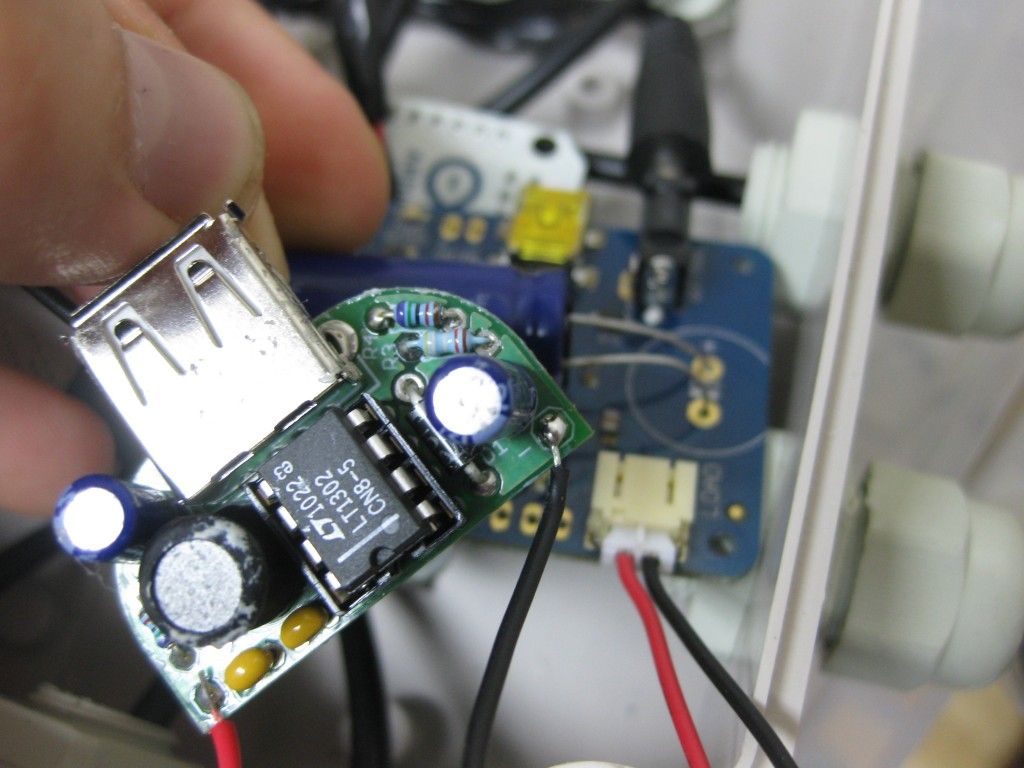
Next I began the wiring for the power supply. This was really simple. After soldering the large capacitor onto the charging circuit (leaving lots of extra lead so that it could save space by bending the capacitor over), I connected the charger’s load output to the boost converter, and the 6V charger input to the solar panel. I also extended the solar panel’s wires; this ensures that when we bring the box out to the hive we can place the solar panel somewhere with as much sunlight as possible.
Next, I connected the power out from the USB connection on the boost converter to the DC in jack on the Arduino. Make sure to add a power switch so you don’t have to disconnect the solar panel whenever you want to program the Arduino.
I placed all of the power circuitry in an anti-static bag to avoid any short circuits.
For more detail: Track Honeybees With Temperature