
Summary of pH sensor arduino
This article provides a step-by-step guide to interfacing an Atlas Scientific pH sensor with an Arduino Uno. It explains the chemical definition of pH, its measurement standards, and various applications in science and engineering. The tutorial emphasizes safety warnings regarding the high-impedance circuit, specifically advising against soldering or modifying the probe. Key components include the microcontroller, sensor module, wiring, and the specific pH circuit board.
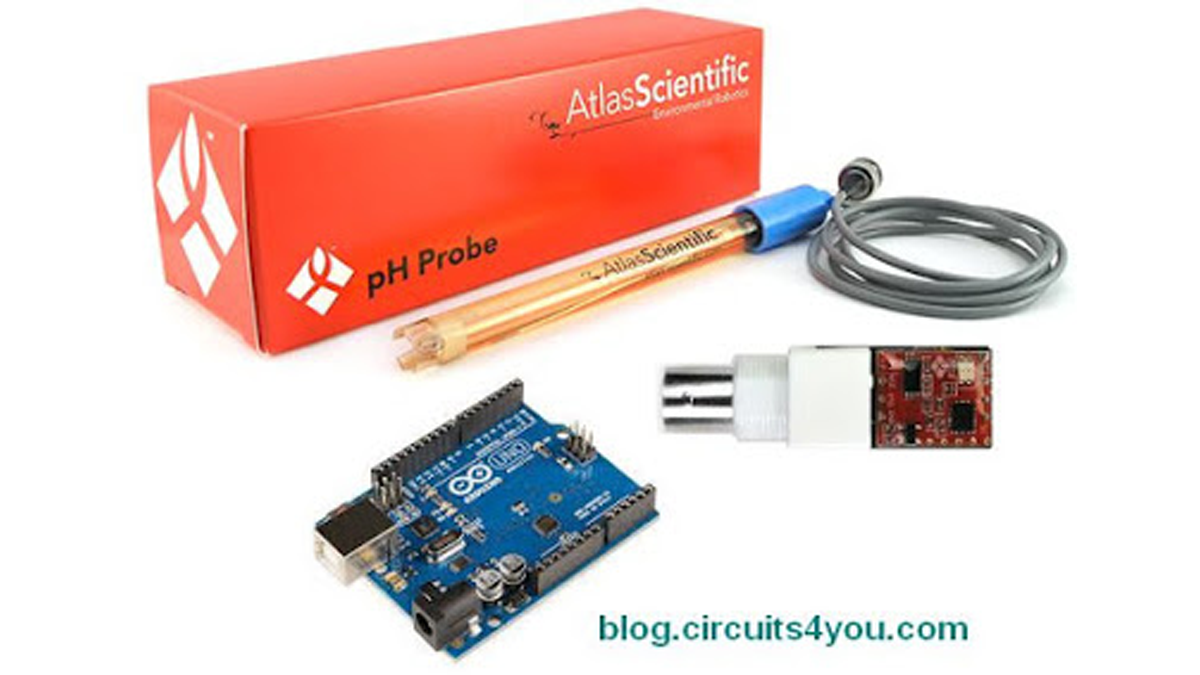
Parts used in the pH Sensor with Arduino Project:
- Arduino Uno
- pH Sensor (Atlas Scientific)
- Connecting wires
- pH Sensor Circuit
In this project, step by step tutorial we are discussing about how to interface pH sensor with Arduino.
In chemistry, pH is the negative log of the activity of the hydrogen ion in an aqueous solution. Solutions with a pH less than 7 are said to be acidic and solutions with a pH greater than 7 are basic or alkaline. Pure water has a pH of 7. Contrary to popular belief, this value can extend past 0 or 14 for sufficiently concentrated acids and bases, however it is difficult to measure precisely.
The pH scale is traceable to a set of standard solutions whose pH is established by international agreement. Primary pH standard values are determined using a concentration cell with transference, by measuring the potential difference between a hydrogen electrode and a standard electrode such as the silver chloride electrode. Measurement of pH for aqueous solutions can be done with a glass electrode and a pH meter, or using indicators.
pH measurements are important in medicine, biology, chemistry, agriculture, forestry, food science, environmental science, oceanography, civil engineering, chemical engineering, nutrition, water treatment & water purification, and many other applications.
Mathematically, pH is the negative logarithm of the activity of the (solvated) hydronium ion, more often (albeit somewhat inaccurately) expressed as the measure of the hydronium ion concentration.
Step 1: Components Requires
1. Arduino Uno
2. pH Sensor ( Atlas Scientific )
3. Connecting wires
4. pH Sensor Circuit
1. Arduino Uno
2. pH Sensor ( Atlas Scientific )
3. Connecting wires
4. pH Sensor Circuit
Step 2: Connections and Circuit
Make connections as Shown
Warnning: DO NOT SOLDER pH CIRCUIT, IT WILL DAMAGE IT, IT IS HAVING VERY HIGH IMPEDANCE, soldering is not good for it, use jumper wires/headers, Do not cut the pH sensor probe to extend length or change its BNC connector.
Read More: pH sensor arduino
-
What is pH mathematically defined as?
pH is the negative logarithm of the activity of the hydronium ion. -
Can pH values extend beyond 0 or 14?
Yes, for sufficiently concentrated acids and bases, though precise measurement is difficult. -
Which components are required for this project?
You need an Arduino Uno, an Atlas Scientific pH Sensor, connecting wires, and a pH Sensor Circuit. -
Is it safe to solder the pH circuit?
No, you must not solder the pH circuit because it has very high impedance and will be damaged. -
How should I connect the components if I cannot solder?
You should use jumper wires or headers instead of soldering. -
Can I cut the pH sensor probe to change its length?
No, do not cut the pH sensor probe or change its BNC connector. -
In which fields are pH measurements important?
pH measurements are vital in medicine, biology, agriculture, water treatment, and many other sciences.
