Summary of Make A Giant Leaf Planetarium Using Arduino
This instructable shows how to convert an IKEA leaf canopy into a portable mini-planetarium using a Lilypad Arduino, fiber optics, power LEDs, conductive thread, and basic craft supplies. It covers materials, sewing the Lilypad and LED buttons onto a fabric light base, cutting and bundling fiber optic filaments, and attaching fiber bundles to LEDs to create twinkling star effects inside the leaf canopy.
Parts used in the Leaf Planetarium:
- IKEA leaf canopy
- Lilypad Arduino
- 1mm fiber optic filament (>400 feet)
- Conductive thread
- Power LEDs (six)
- Battery or 3.7V wall adapter (li-po and USB charger or adapter)
- Green fabric (13" x 6" piece)
- Velcro strips
- Small clear beads
- Hot glue
- Sewing needle and scissors
- Green gaff tape
- Blue painter's tape
- Single stranded wire
- Electrical tape
- Fine grained file or sandpaper
- Heat-shrink tubing (big enough for ten 1mm fibers)
- Solder and soldering iron
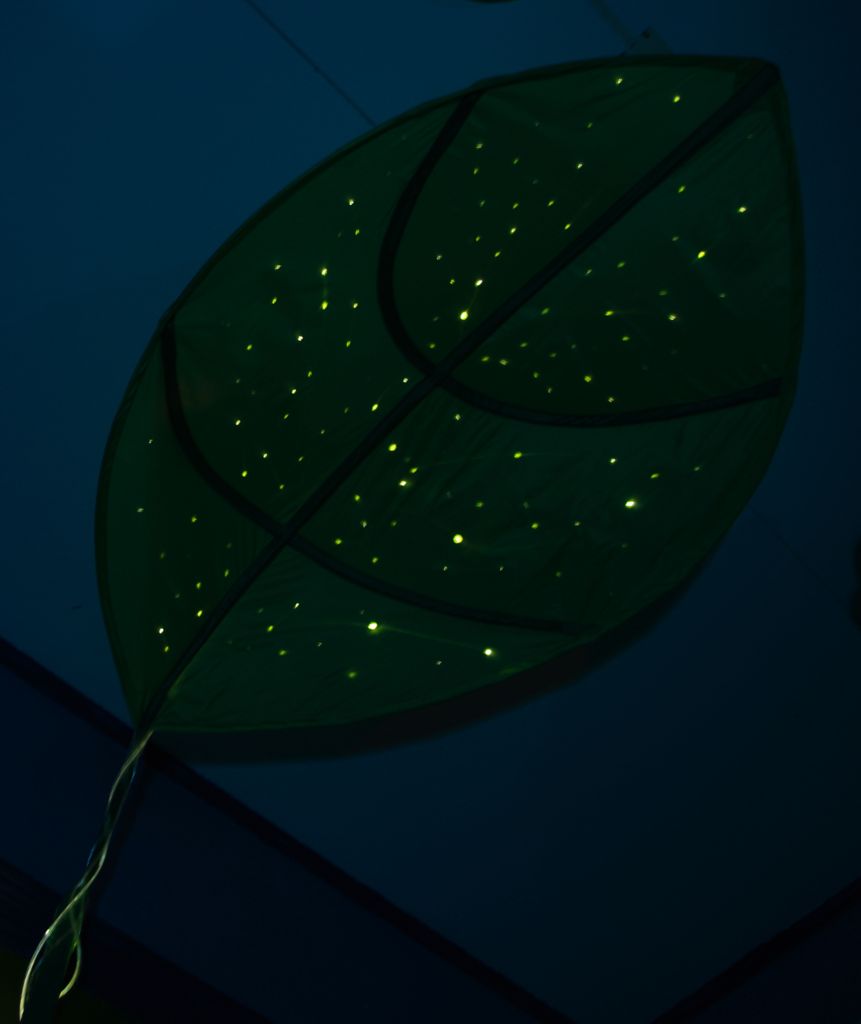
Have you ever wanted a mini-planetarium for your room? Well now you can! This instructable will help you create a fairly portable planetarium leaf that you can put over a bed, a couch, or anywhere else in your house. All you need is an IKEA leaf canopy , some fiber optics, power LEDs, conductive thread, and a lilypad Arduino. Also, this leaf is HUGE.
Step 1: List of Materials
Unfortunately you can’t order these leaves from IKEA online. You have to actually go to IKEA. I suggest calling your local IKEA first and seeing if they have some (they almost always do). Otherwise, ebay occasionally has some. They cost about $15.
In addition you’ll need:
1) Lilypad Arduino : $20
2) >400 feet of 1mm fiber optic filament : $60-$70
3) Conductive Thread : $33/spindle, but you could get a smaller amount for $9
4) Six Power LEDs: Anywhere from $5-$10 each. Check on ebay if you want to buy bulk. Luxeon LEDs are nice, but the ones I used are discontinued. Check up on your forward voltage depending on what voltage you run your lilypad (which has no current regulator). I ran mine on 3.7V and my LEDs had a forward voltage of 3.4V, so I didn’t need a resistor (the lilypad can handle 40mA safely).
5) Battery / 3.7V Wall Adapter: I used these tiny li-pos ($12) with a usb charger ($10). It runs the leaf for 4-5 hours per charge. You can also by a wall adapter and use that to power your Arduino (just cut the chord and attach your power and ground lines or else get a coaxial converter). If you get a 5V wall adapter ($6) add some resistors to your LEDs (like 40 Ohms. 100 Ohms to be extra safe with whatever LEDs you buy).
6) Green Fabric: Cheap at craft stores. You won’t even need a square yard.
7) Velcro: Cheap at craft stores.
8) Small Clear Beads: Cheap at craft stores.
9) Hot Glue: Cheap at craft stores.
10) Sewing Needle and Scissors: Cheap at craft stores.
11) Green Gaff Tape: Cheap at craft stores.
12) Blue Painter’s Tape: Cheap at stores.
13) Single Stranded Wire: Cheap
14) Electrical Tape: Cheap
15) Fine grained file or sandpaper: Cheap
16) Heat-Shrink big enough to hold ten 1mm fibers: Cheap
16) Solder and Soldering Iron: Expensive but hopefully you can access one!
Remember to check ebay/online for cheaper prices!
Step 2: Light Base
Hopefully you’ve already put together your leaf (it’s fun and fast!) but now you need to make your lighting base.
First cut out a piece of green fabric (13″x6″)
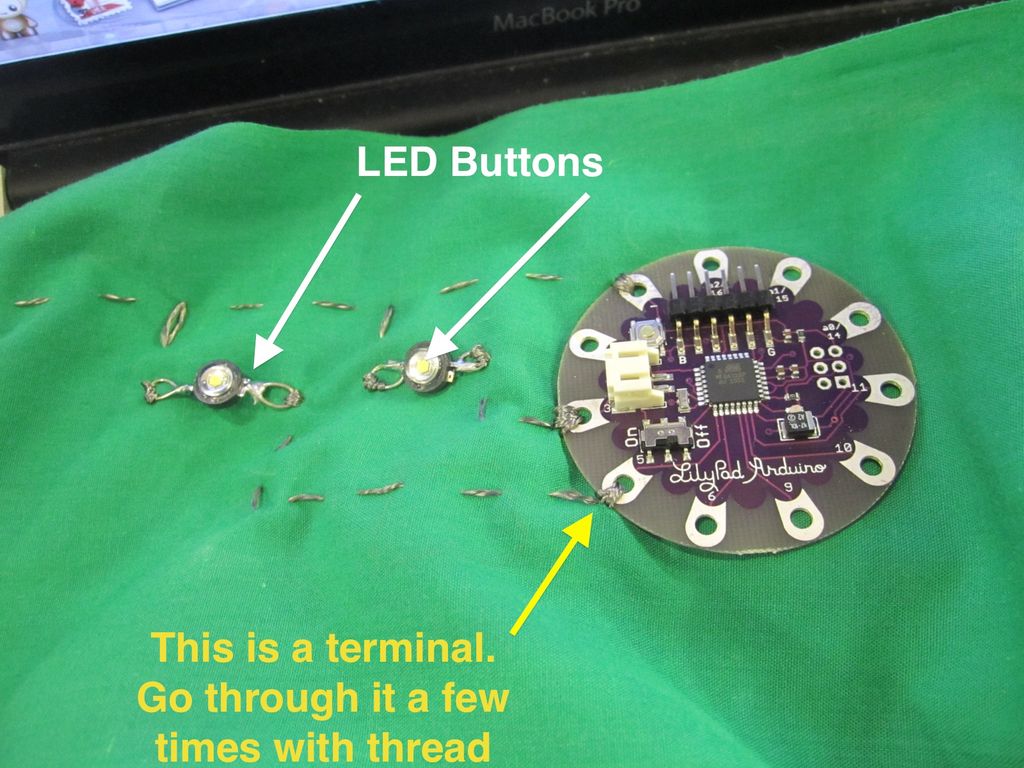
Next, sew your Arduino with conductive thread to one side. Make LED buttons to sew on to the fabric. This can be done by taking single stranded wires, stripping them, taking the naked wire and making loops. Solder the loops to the terminals of the LED. You can see the LED buttons in the fabric. Double check to make sure your power and grounds match up! You can make resistor buttons in a similar manner. Just take their leads, and swirl them into loops, and add a glob of solder. Also, be sure to use terminals 3, 5, 6, 9, 10, 11 on the lilypad (you need them in order for the code to PWM). It doesn’t matter which lilypad version you have, use those terminals.
Note: When sewing, make sure you go through each terminal/connector (whether it be a lilypad or LED) a lot (more than 3 times). You want to make sure they’re well-connected and robust.
You should also sew your velcro now (I did this later and regretted it). Take velcro strips and sew them onto the long ends of the fabric. If the velcro catchs on the cloth/thread, put a piece of blue painter’s tape over it to prevent snagging.
Load this code onto your Arduino.
When you’re done, you’re lilypad should be able to twinkle your LEDs. You can also check if it twinkles with alligator clips too (like in the video).
Step 3: Cut Fiber Optic Filaments
Note: DO NOT USE ELECTRICAL TAPE FOR THE FILAMENTS. USE BLUE PAINTER’S TAPE. The electrical tape leaves black residue. I did this when I took my pictures, so they are a little misleading. Sorry!
This was how I cut the pieces:
100″ for 24 pieces
90″ for 12 pieces
60″ for 12 pieces
50″ for 12 pieces
Arrange the short, medium, and long pieces into bundles of 2. Then take about 5 of these bundles (of varying length!) and put them in some heat-shrink and make them into one big bundle of 10. If you melt the 10 fiber optics together (not with tape on them), it helps carry the light. You should end up with six bundles of 10 fibers.
If your fiber optic bundle is good, it should be transparent and carry light. (You can check for this without LEDs as long as your environment is bright)
Step 4: Attaching Bundles to LEDs
THIS IS THE WORST PART.
To be honest, you could probably buy plastic booties , but I just used electrical and gaff tape instead.
Essentially, take a fiber optic fiber bundle and hold it over the LED. Make sure it lights up well. Add gaff tape to each bundle and attach it to the LED and fabric (use gaff first, it sticks well to fabric, especially cotton). Go over it with some electrical tape to cover the light, and them some gaff again to make it green. Do this for all the bundles.
- Where can I get the IKEA leaf canopy?
You must buy it in person at IKEA or try ebay, as IKEA does not sell them online. - What Arduino is used for this project?
The project uses a Lilypad Arduino. - How much fiber optic filament is recommended?
Use more than 400 feet of 1mm fiber optic filament and cut pieces of varying lengths. - Which Lilypad terminals should I use for LEDs and why?
Use terminals 3, 5, 6, 9, 10, 11 because the code requires those pins for PWM. - Do I need resistors for the LEDs?
If running the Lilypad at 3.7V and LED forward voltage is close (example 3.4V) a resistor may not be needed; if using a 5V adapter add resistors (around 40 to 100 Ohms). - How are the fiber optic filaments bundled?
Cut lengths into groups, pair them, then make bundles of ten fibers using heat-shrink to combine five paired bundles into one bundle of ten; make six such bundles. - What tape should I use when handling filament ends?
Use blue painter's tape, not electrical tape, because electrical tape leaves black residue. - How do I attach fiber bundles to the LEDs?
Hold the fiber bundle over the LED to check light, then secure to the fabric with gaff tape, cover with electrical tape to block stray light, and finish with gaff tape to match color. - How should LEDs be prepared for sewing onto the fabric?
Make LED buttons by soldering loops of stripped single stranded wire to LED leads, then sew them onto fabric with conductive thread ensuring multiple passes through each terminal. - How long will the leaf run on the li-po battery used?
The li-po battery and USB charger setup runs the leaf for about 4–5 hours per charge.