How To Make An RC Rocket Launch System

This instructable will show you how to make an RC launch system for your Estes rocket, which can be operated with a TV remote. What it does is it allows you to press the center button on your TV remote, and it’ll automatically launch your rocket. In this way it is basically a wireless version of the standard launch controller. But this is not all it does. You can use the up and down arrows on your remote to set a delay, and you can use its count-down feature to ignite it like a time-bomb. It works with just about every TV remote, and uses standard rocket igniters.

INSTRUCTIONS FOR OPERATION:
1. Clip alligator clips to igniter.
2. Plug 9v battery into Arduino.
3. The screen should say “0 delay”
4. Press up and down on your remote until it says the exact number of seconds you want it to countdown from.
5. When ready to launch, walk away from the rocket (without worrying about how far the cable stretches) and press the center button on your TV remote.
6. It’ll countdown from the number you chose (displaying the countdown on the bottom row of the LCD) and your rocket will be up in the air!

Here is a poor quality video showing the device activating an igniter. Just imagine that the igniter is inside a rocket.

RC Rocket Launch System

Step 1: Supplies

Here are all the supplies you’ll need:
1 Estes Launch Controller
1 Arduino
1 5v Relay
1 LCD screen (for displaying countdown)
1 IR receiver diode
1 NPN transistor
1 10k resistor
1 diode
The IRremote library

Step 2: Remove Controller Back

You should hopefully know how to do this. Flip the launch controller over, and remove the screws on the back. Then take off the back.

Step 3: Open it up even further

Now you will open it up to see the inner workings of it. I don’t think that Estes condones doing this, but who cares? Look at the pictures and pry the pictured panel off.

Step 4: Solder

You will now solder two wires to it, look at the pictures for more details. These wires will later be plugged into a relay to over-ride the key and button system, while still allowing you to use that if you wanted to.

Step 5: Set up relay on breadboard

This part is tricky. A relay switch is simply a switch that in not controlled by pressing a button, or sliding switch, but is controlled by current. If it has current running through it, it will throw a switch. I’m no electrical engineer, so I can’t explain this as well as some people, but wiring a relay directly to a micro controller will drawn infinite current, and will fry your micro controller. There are many ways to stop this from happening, each person has there own strategy, but I would use the one found here:
http://blog.makezine.com/2009/02/02/connecting-a-relay-to-arduino/

Step 6: Wire up IR receiver

This is pretty easy. Wire pin 1 on the IR receiver (far left) to Arduino pin 3, wire pin 2 (middle) to ground, and pin 3 (far right) to 5v.

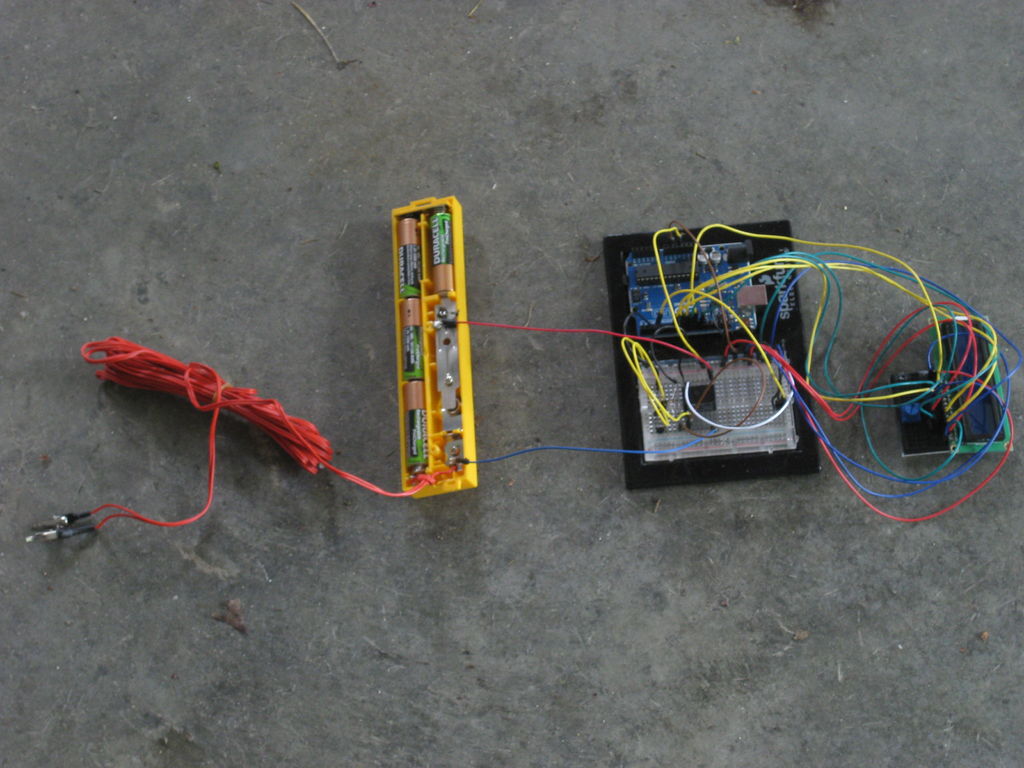
RC Rocket Launch System circuit

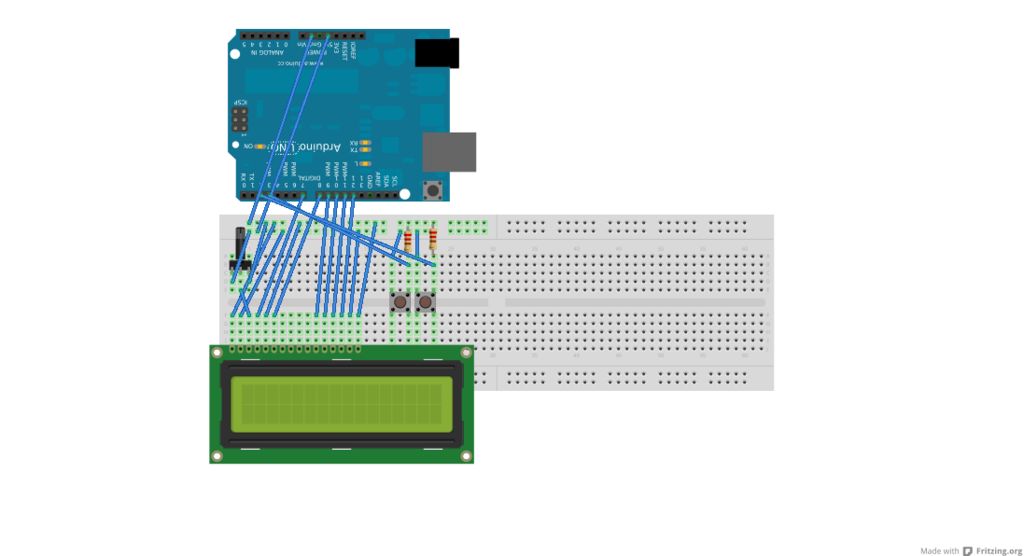
Step 7: Wire up LCD

I needed another breadboard for this. Look at the second picture for reference, make sure to discard the buttons, those are leftover from another project (I’ve been reusing the same picture).


About The Author

Ibrar Ayyub

I am an experienced technical writer holding a Master's degree in computer science from BZU Multan, Pakistan University. With a background spanning various industries, particularly in home automation and engineering, I have honed my skills in crafting clear and concise content. Proficient in leveraging infographics and diagrams, I strive to simplify complex concepts for readers. My strength lies in thorough research and presenting information in a structured and logical format.

Follow Us:
LinkedinTwitter

Leave a Comment

Your email address will not be published. Required fields are marked *

Scroll to Top