
Summary of Heart Beat Monitoring over Internet using Arduino and ThingSpeak
This project builds an IoT-based Heart Beat Detection and Monitoring System using an Arduino Uno, Pulse Sensor, and ESP8266 Wi-Fi module. It displays real-time BPM on an LCD and transmits data to the ThingSpeak server for remote global monitoring via the internet, expanding upon a previous non-connected version.
Parts used in the Heart Beat Detection and Monitoring System:
- Pulse sensor
- Wi-Fi module ESP8266
- Arduino Uno
- LCD
- Bread Board
- 10k potentiometer
- 1k resistors
- 220 ohm resistors
- LED
- Connecting wires
In this project we are going to make a Heart Beat Detection and Monitoring System using Arduino that will detect the heart beat using the Pulse Sensor and will show the readings in BPM (Beats Per Minute) on the LCD connected to it. It will also send the readings to ThingSpeak server using the Wi-Fi module ESP8266, so that Heart Beats can be monitored from anywhere in the world over the internet. ThingSpeak is a great source for displaying the data online and you can access the data from ThingSpeak at any time and at any place.
We have previously built a simple Heart Beat Monitor without showing data on Internet. This time we have used ThingSpeak to monitor the system over internet, and this will put this project into IOT category.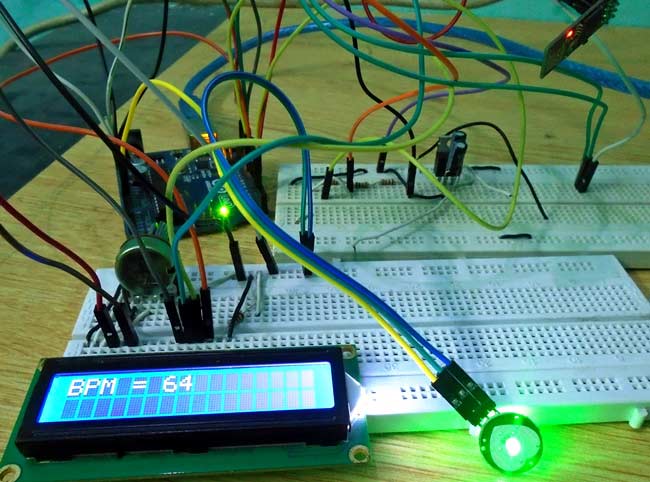
Components Required:
- Pulse sensor
- Wi-Fi module ESP8266
- Arduino Uno
- LCD
- Bread Board
- 10k potentiometer
- 1k resistors
- 220 ohm resistors
- LED
- Connecting wires
Circuit Diagram and Explanation:
First of all we will connect the ESP8266 with the Arduino. ESP8266 runs on 3.3V and if you will give it 5V from the Arduino then it won’t work properly and it may get damage. Connect the VCC and the CH_PD to the 3.3V pin of Arduino. The RX pin of ESP8266 works on 3.3V and it will not communicate with the Arduino when we will connect it directly to the Arduino. So, we will have to make a voltage divider for it which will convert the 5V into 3.3V. This can be done by connecting three resistors in series like we did in the circuit. Connect the TX pin of the ESP8266 to the pin 9 of the Arduino and the RX pin of the ESP8266 to the pin 10 of Arduino through the resistors.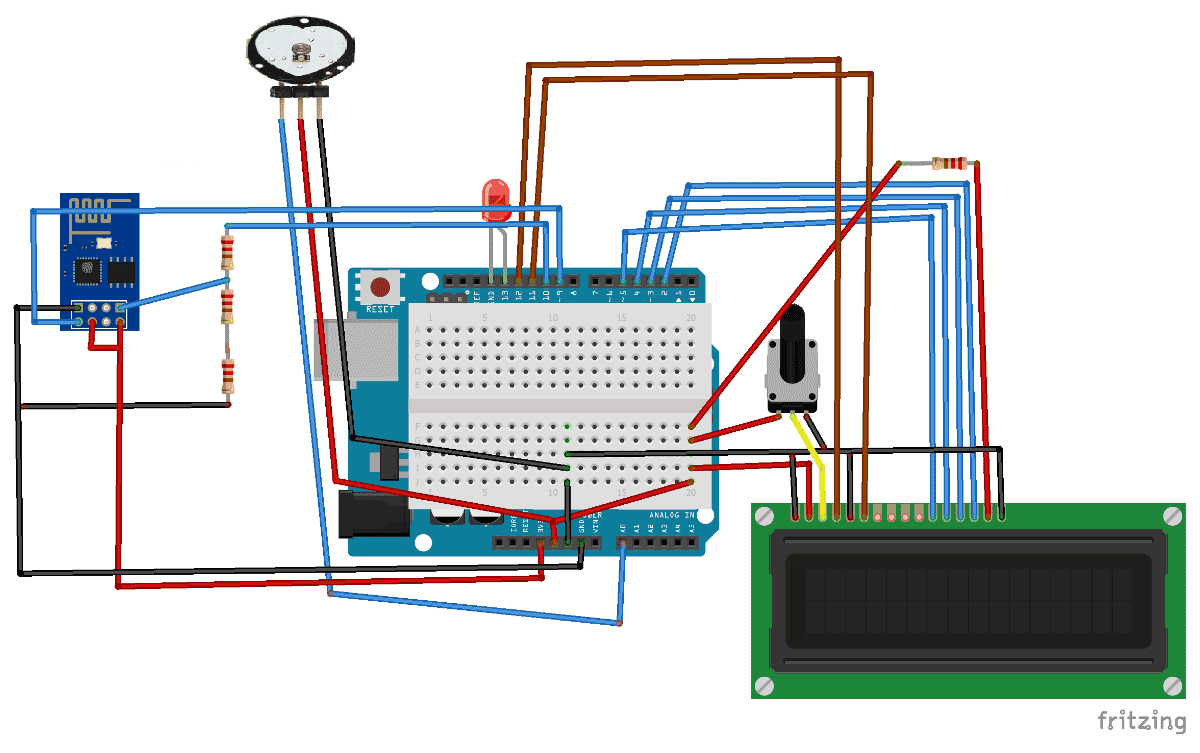
Read More: Heart Beat Monitoring over Internet using Arduino and ThingSpeak
- How does the system monitor heart beats over the internet?
The system sends readings to the ThingSpeak server using the Wi-Fi module ESP8266. - What voltage should be used for the ESP8266 VCC pin?
The ESP8266 must be connected to the 3.3V pin of the Arduino. - Why is a voltage divider needed for the ESP8266 RX pin?
The RX pin works on 3.3V and will not communicate directly with the 5V Arduino without conversion. - Which Arduino pins are used to connect the ESP8266 TX and RX?
The ESP8266 TX connects to Arduino pin 9, and the RX connects to pin 10 through resistors. - Can the heart beat data be accessed from anywhere?
Yes, data can be accessed at any time and place via the ThingSpeak server. - What happens if 5V is given to the ESP8266 VCC?
The module will not work properly and may get damaged. - Does this project display data locally?
Yes, it shows the BPM readings on the connected LCD. - What component converts 5V to 3.3V for the RX pin?
A set of three resistors connected in series acts as a voltage divider.
