How to Make a Gimbal
Learn how to make a 2-axis gimbal for your action camera
In today’s culture we all love recording video and capturing the moments, especially when you are a content creator like me, you sure have faced the issue of such shaky videos from time to time. So in this blog we will make a DIY version of motorized Gimbal
Step 1: Gather Required Parts for Gimbal
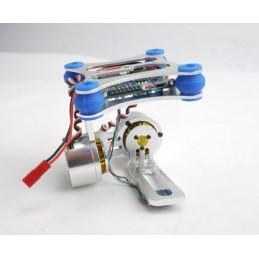
2 axis FPV BGC Gimbal assembly.
2 Lithium Ion Cells.
Arduino Nano.
Joystick Module.
3s JST connector Cable.
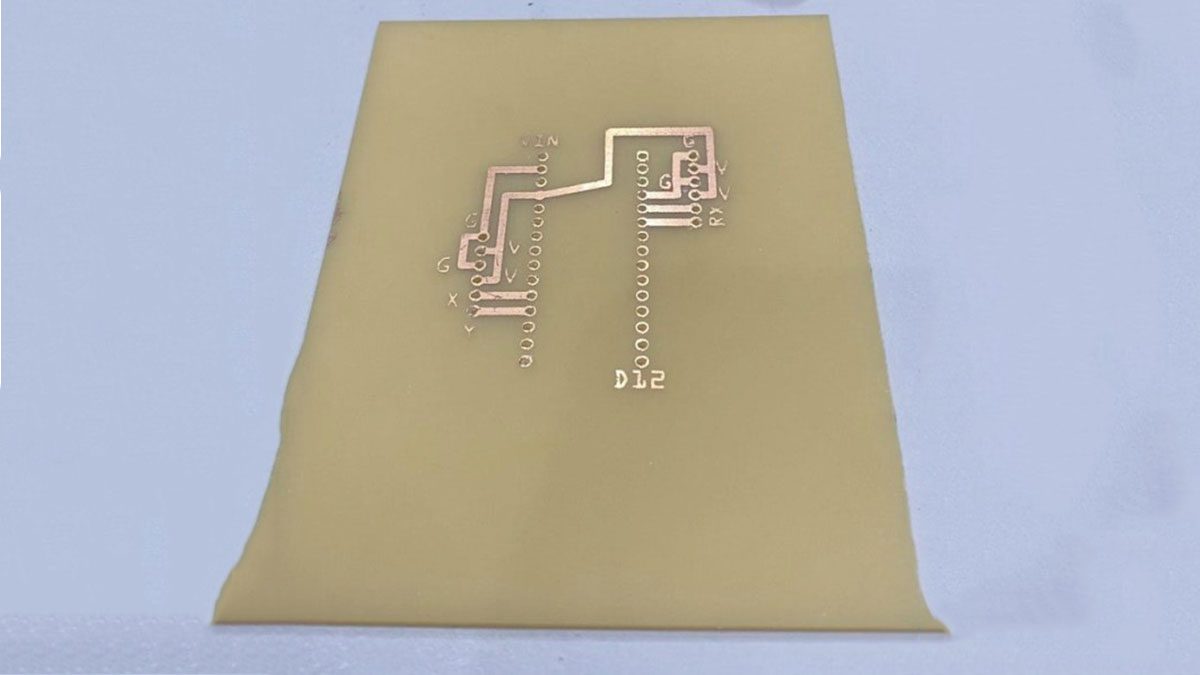
Custom PCB.
Step 2: Connections
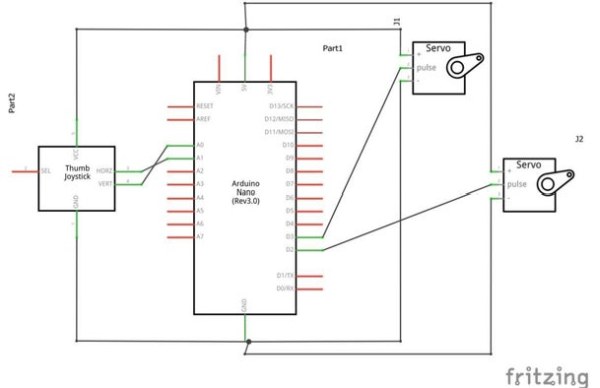
We are using a 2 Axis BGC Gimbal Assembly which out of the box is functional as a Gimbal. But it is not exactly like a Commercial Gimbal since we need Pan Tilt motions. We need Services. We need to get input from user to get more creative. We can use RX- Roll and RX-Pitch pins to give Additional inputs to Mother Board of BGC, which would be done with the help of PWM / PPM signal. To generate PWM/PPM signal, we will use Arduino Nano as Controller and we will take Input from Joystick, which basically will be the controller interface hardware for our Gimbal. connections are basically 2 signal pins to Arduino and 2 Output pins to RX Roll and RX Pitch.
Step 3: Upload the Code to Arduino
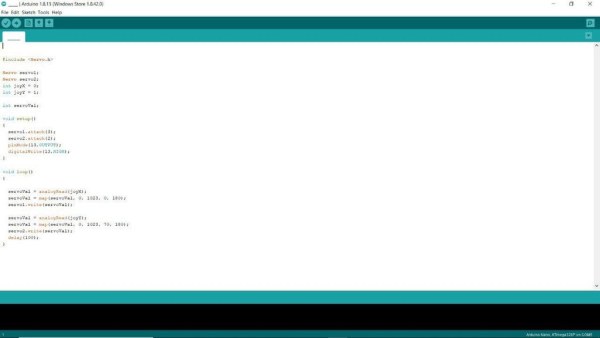
First we will define the Pinouts for PWM output as Servo 1 and Servo 2
then, we will Define Input Outputs for Servo and Joystick at last, we will Map our Output in Correspondence to Input from Joystick You can find the Code here! code
Step 4: Software
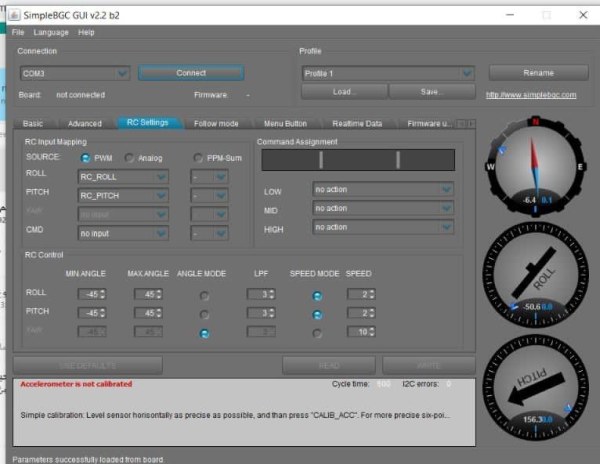
Since we are using a 2 Axis BGC gimbal that comes with Motherboard and developers at basecam have did a wonderful job in developing a Software interface for this Hardware, you can download the software from this link
We need out Gimbal to be very smooth since it is a Hand Held Gimbal so we adjust the PID and Motor Power in Basics Tab of our Software.
Step 5: Additional Functions
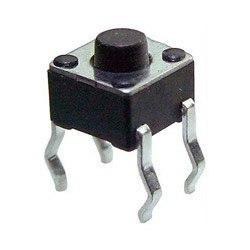
Won’t it be amazing to add services like switching the Gimbal ONN and OFF, adjusting the Gimbal Position by hand. To achieve this task we can use Switch , which can be replaced by the switch on joystick module by soldering extra wires to the pad, and connect it to joystick module.
Also we will need to Open our Software, Under Services Tab, “Select 1 Click – Motor ONN / OFF”, “2 Click Set Tilt Angles By Hands”.
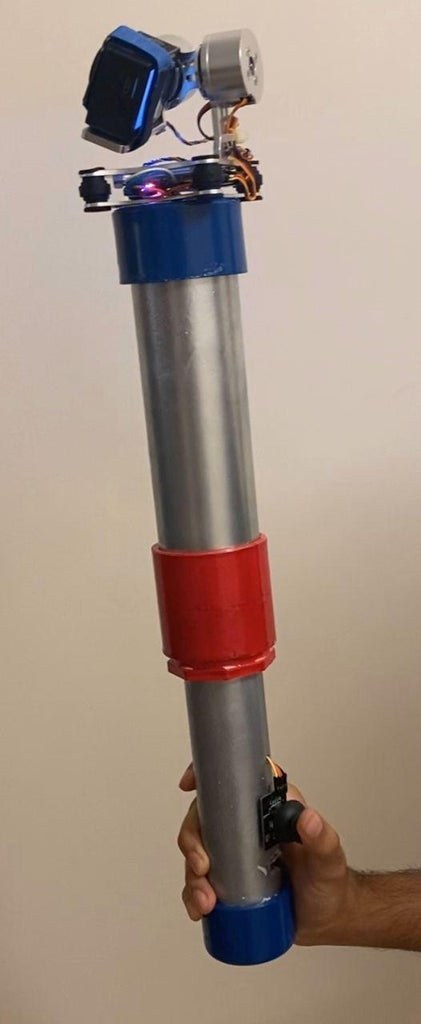
Step 6: Enclosure
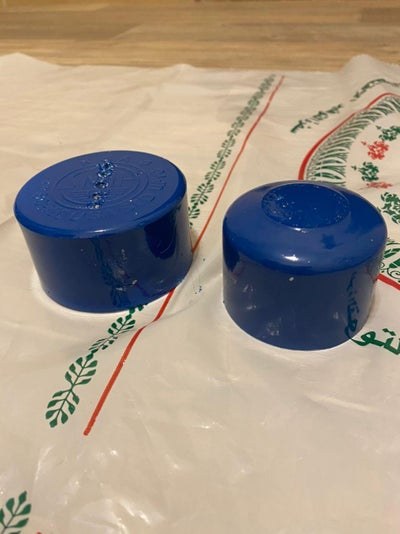
Since I don’t have a 3D printer, many of us don’t have it so we will use PVC pipe along with few Joints and hot glue gun. I wish to make a handle like a selfie stick, which will enclose batteries and circuits inside.
we will need the Following Parts. 1.5 inch diameter pipe with 6.0 inch Length. 2.0 inch diameter pipe with 4.5 inch Length. 1.5 inch diameter end cap. 1.5 inch to 2 inch Joint.2.0 inch diameter end cap.M4 15mm long Self Treading Screws.you can find the above parts in local hardware shop. At last, use few self threading bolts and mount base plate of Gimbal to PVC surface and finally stuff everything inside
Step 7: Conclusion

Our 2 axis DIY gimbal looks and works just awesome, here is the side by side footage taken with and without a Gimbal from my Action Camera, and clearly the results are 100 times better! So guys I hope you enjoyed this simple yet effective DIY Gimbal build
Step 8: Schematics and Simulation
Source: Gimbal Stabilizer Project