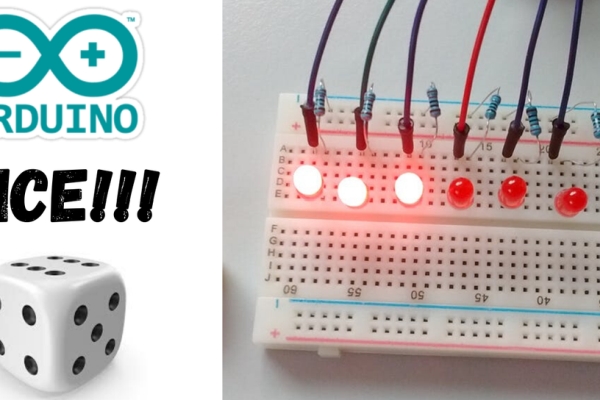
Summary of Electronic Dice!!!
This article details a holiday project creating an electronic dice prototype using an Arduino Uno. When a push button is pressed, the system generates a random number between 1 and 6 and illuminates the corresponding number of LEDs to display the result. The tutorial covers necessary materials, circuit connections, code implementation, and optional aesthetic improvements for a cleaner breadboard layout.
Parts used in the Electronic Dice:
- Arduino Uno
- 6x LED's
- Breadbord or prototyping board
- 6x 220 ohm Resistors
- 1x 1k ohm Resistor
- Push button
ABOUT THIS PROJECT
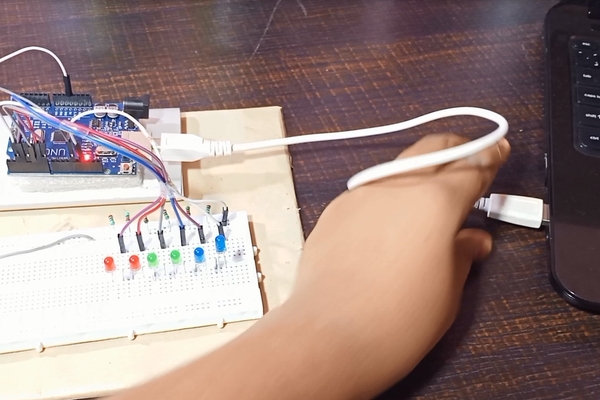
I made a dice throwing prototype: if you press the button, a random number between 1 and 6 is generated and the corresponding number of LEDs are lit up. This was a holiday project with my kids 🙂
Dice throwing prototype using Arduino UNO, a button switch and 6 LEDs.
Full tutorial on my channel visit my channel for full tutorial!!!
Step 1: Parts & Materials Required!!!
- Arduino uno
- 6x LED’S
- A breadbord or a prototyping board
- 6x 220 ohm Resistors
- 1x 1k ohm Resistors
- A push button
Step 2: Circuit Diagram!!!
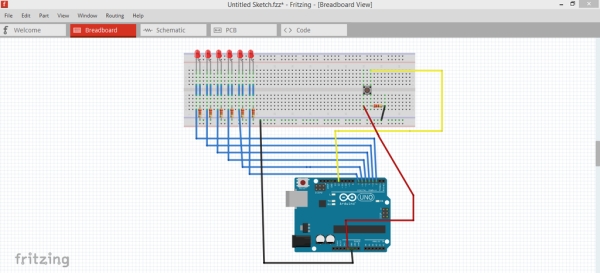
I have made a circuit diagram for the connections of Arduino,led,push button and resistors.
see the circuit diagram for the connections.
Step 3: Connections!!!
Now connect led’s negative terminal to the 220ohm resistors and positive terminal to the arduino’s digital pins from 2 to 7.and connect the other led of the resistors to the Gnd(ground) pin.
For rest of the connections for push button see the circuit diagram!!
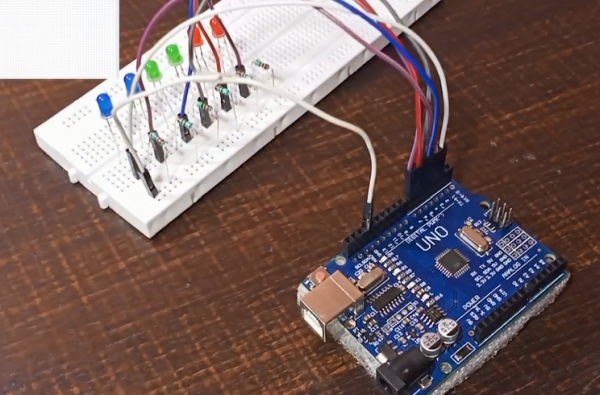
Step 4: Additional Changes for the Led’s!!!
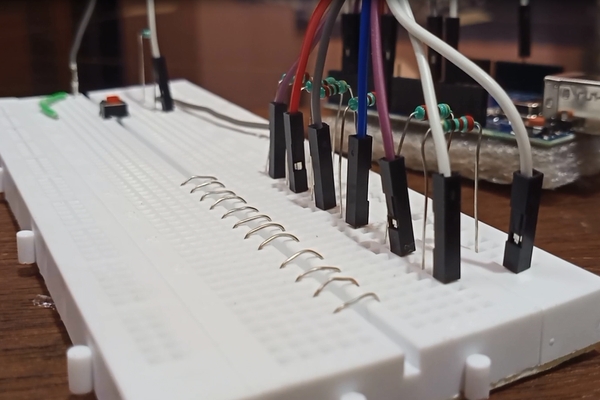
I have added the BRIDGE like structure at the middle of the breadboard for the led’s to rest infront of the wires and resistors JUST TO LOOK CLEAN.
U CAN ALSO SKIP THIS PART IF U DO NOT WANT TO DO THIS.
Step 5: CODE!!
//Now hook up your pc with arduino and just download the below code and upload to your arduino.
//Dynamic Innovator// set to 1 if we're debugging
#define DEBUG 0

// 6 consecutive digital pins for the LEDs
int first = 2;
int second = 3;
int third = 4;
int fourth = 5;
int fifth = 6;
int sixth = 7;

// pin for the button switch
int button = 12;
// value to check state of button switch
int pressed = 0;

void setup() {
  // set all LED pins to OUTPUT
  for (int i=first; i<=sixth; i++) {
    pinMode(i, OUTPUT);
  }
  // set buttin pin to INPUT
  pinMode(button, INPUT);

  // initialize random seed by noise from analog pin 0 (should be unconnected)
  randomSeed(analogRead(0));

  // if we're debugging, connect to serial
  #ifdef DEBUG
    Serial.begin(9600);
  #endif

}

void buildUpTension() {
  // light LEDs from left to right and back to build up tension
  // while waiting for the dice to be thrown
  // left to right
  for (int i=first; i<=sixth; i++) {
    if (i!=first) {
      digitalWrite(i-1, LOW);
    }
    digitalWrite(i, HIGH);
    delay(100);
  }
  // right to left
  for (int i=sixth; i>=first; i--) {
    if (i!=sixth) {
      digitalWrite(i+1, LOW);
    }
    digitalWrite(i, HIGH);
    delay(100);
  }
}

void showNumber(int number) {
  digitalWrite(first, HIGH);
  if (number >= 2) {
    digitalWrite(second, HIGH);
  }
  if (number >= 3) {
    digitalWrite(third, HIGH);
  }
  if (number >= 4) {
    digitalWrite(fourth, HIGH);
  }
  if (number >= 5) {
    digitalWrite(fifth, HIGH);
  }
  if (number == 6) {
    digitalWrite(sixth, HIGH);
  }
}

int throwDice() {
  // get a random number in the range [1,6]
  int randNumber = random(1,7);

  #ifdef DEBUG
    Serial.println(randNumber);
  #endif

  return randNumber;
}

void setAllLEDs(int value) {
  for (int i=first; i<=sixth; i++) {
    digitalWrite(i, value);
  }
}

void loop() {
  // if button is pressed - throw the dice
  pressed = digitalRead(button);

  if (pressed == HIGH) {
    // remove previous number
    setAllLEDs(LOW);

    buildUpTension();
    int thrownNumber = throwDice();
    showNumber(thrownNumber);
  }

}
Source: Electronic Dice!!!
- What components are required to build this project?
You need an Arduino Uno, six LEDs, a breadboard, six 220 ohm resistors, one 1k ohm resistor, and a push button. - How are the LEDs connected to the Arduino?
The positive terminals connect to digital pins 2 through 7, while negative terminals connect to 220 ohm resistors leading to ground. - Can I skip the bridge structure on the breadboard?
Yes, you can skip adding the bridge-like structure if you do not want the LEDs to rest in front of the wires. - How does the code generate a random number?
The code uses the random function with a seed initialized by noise from analog pin 0 to generate numbers between 1 and 6. - What happens when the button is pressed?
The previous lights turn off, a tension-building light sequence runs, a random number is generated, and the corresponding LEDs light up. - Which digital pins are assigned to the LEDs?
Pins 2, 3, 4, 5, 6, and 7 are used as outputs for the six consecutive LEDs. - What is the purpose of the buildUpTension function?
This function lights LEDs from left to right and then back to create a visual effect before showing the final number. - Is debugging enabled by default in the code?
No, the debug flag is set to 0, meaning serial communication is disabled unless changed to 1.