
Summary of DIY magnetometer inside a Tic Tac box
This article details a DIY magnetometer project using an SS49E linear Hall sensor and an Arduino Nano. It explains that while smartphones have built-in sensors, they are limited to weak fields and lack flexibility for specific measurements like electromagnet bores. The project offers a sensitive, battery-operated solution capable of detecting permanent magnets, electromagnets, and time-varying fields from motors.
Parts used in the DIY Magnetometer:
- SS49E linear Hall sensor
- Arduino Nano
- Tic Tac box (enclosure)
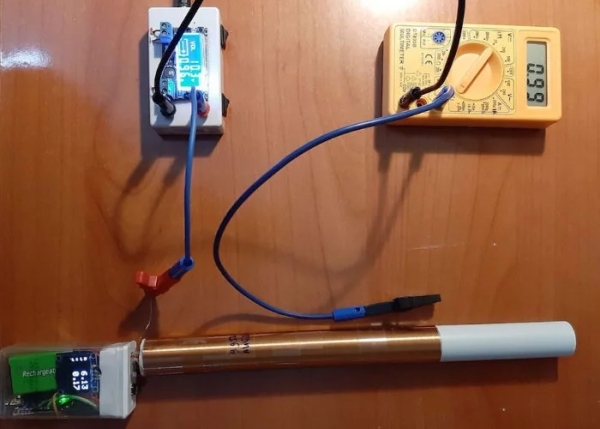
Instructables member “rgco” has published a great tutorial to the project site providing details on how you can create your very own DIY magnetometer or Gaussmeter to measure the strength of magnetic fields. A magnetometer is an essential tool to test the strength of permanent magnets and electromagnets and to understand the field shape of nontrivial magnet configurations. “If it is sensitive enough it can also detect if iron objects got magnetized. Time-varying fields from motors and transformers can be detected if the probe is fast enough” explains “rgco” who used a SS49E linear Hall sensor combined with an Arduino Nano.
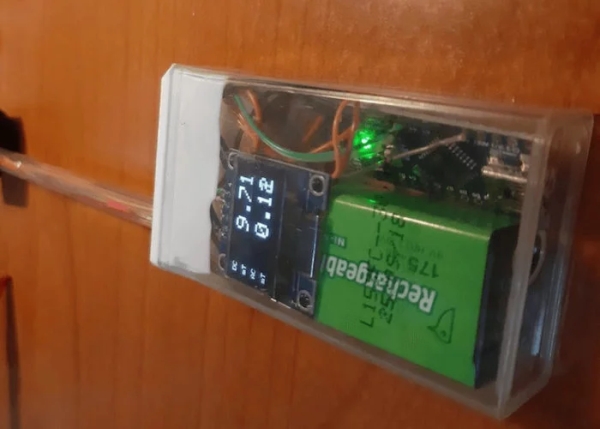
Mobile phones usually contain a 3-axis magnetometer but they have been optimized for the weak earth magnetic field of ~1 Gauss = 0.1 mT and saturate at fields of a few mT. The location of the sensor on the phone is not obvious, and it is not possible to place the sensor inside narrow apertures such as the bore of an electromagnet. Moreover, you might not want to bring your smartphone close to strong magnets.”
For more information and instructions on how to build your very own DIY magnetometer jump over to the Instructables project page by following the link below.
Specifications of the SS49E linear Hall sensor :
– Supply voltage: 2.7-6.5 V, so perfectly compatible with the 5V from the Arduino.
– Null-output: 2.25-2.75V, so approximately halfway between 0 and 5V.
– Sensitivity: 1.0-1.75mV/Gauss, so it will require calibration to get precise results.
– Output voltage 1.0V-4.0V (if operated at 5V): well covered by the Arduino ADC.
– Range: +-650G minimum, +-1000G typical.
– Response time 3mus, so it can sample at a few tens of kHz.
– Supply current: 6-10mA, low enough to be battery-operated.
– Temperature error: ~0.1% per degree C. Seems little but a 0.1% offset drift gives a 3mT error.
Source: DIY magnetometer inside a Tic Tac box
-
What components are required to build this DIY magnetometer?
The project requires an SS49E linear Hall sensor combined with an Arduino Nano. -
Why should I not use my mobile phone for measuring strong magnetic fields?
Mobile phone sensors saturate at fields of a few mT and are optimized for the weak earth magnetic field. -
Can this device detect iron objects that have become magnetized?
Yes, if the probe is sensitive enough, it can detect if iron objects got magnetized. -
Is this magnetometer suitable for measuring inside narrow apertures?
Yes, unlike phones where sensor location is fixed, this DIY probe can be placed inside narrow apertures such as the bore of an electromagnet. -
Does the SS49E sensor require calibration?
Yes, because its sensitivity ranges from 1.0 to 1.75mV/Gauss, calibration is required to get precise results. -
What is the typical operating range of the SS49E sensor?
The sensor has a minimum range of plus or minus 650 Gauss and a typical range of plus or minus 1000 Gauss. -
Can this device operate on battery power?
Yes, the supply current is only 6-10mA, which is low enough to be battery-operated.
