Chore Tracker is a device used to help motivate you to do your chores, and manage your time. Each week, Chore Tracker gives you a goal to complete five chores of your choice. It will set a timer for you to stay on track and complete your chore as well as track your progress throughout the week. When you complete your chore goal, it’s time to reward yourself!
Supplies:
- Circuit Playground Express
- 5 Alligator Clips (3-5 Inches works best)
- TinkerCAD.com account
- Makecode account
- 3-D printer
- 3-D filament
- 5 metal buttons (2-4 cm diameter)
- Conductive tape
- Hot glue gun
- Hot glue
- Ruler
- Pen
- Labels (Optional)
Step 1: Create Casing for Tracker
Create a casing for your chore tracker using TinerCAD or any other 3-D design program
- My casing was a pentagon shape that was 19X19X2.4 cm for the base and 19X19X.5 cm for the lid
- Cut out five holes in the lid for the buttons on each corner and a 4.6 cm hole for the Circuit Playground
- Make sure the base is hollow as we will use it to put the electronic components into
- You can use my template: here
- Print out the casing using a 3-D printer
Step 2: Code Circuit Playground
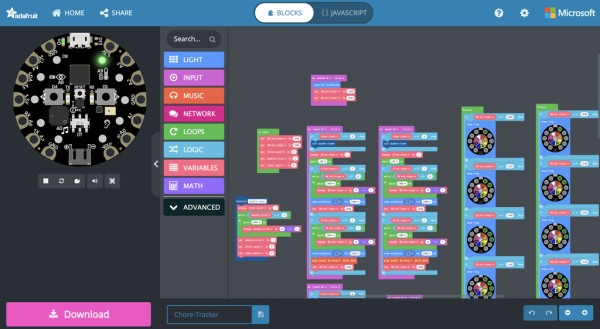
- Using makecode.adafruit.com/ program the Circuit Playground to set a timer and track chore progress
- Here is the code you will use
- Connect Playground to computer and press reset button
- Download the code and drop the file onto the circuit playground
- You are now ready to put everything together!
Step 3: Putting It All Together
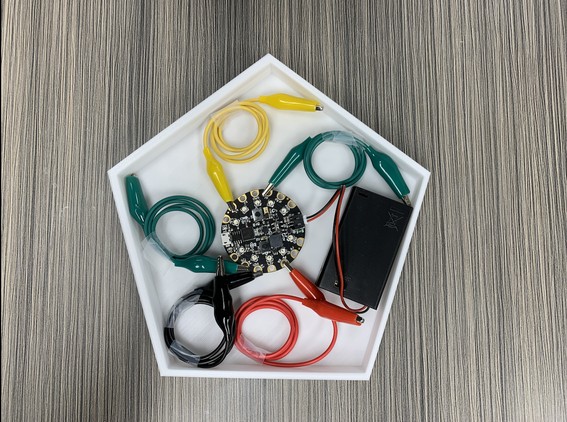
- Connect an alligator clip to the A1, A3, A4, A5, and A6 clips on the playground
- Cover the 5 buttons with magnetic tape and leave a “tail” on the bottom side to connect the alligator clips
- Hot glue each button into a hole on the lid
- Place playground in the center of the casing and attach the other sides of the alligator clips to the buttons
- Tape down alligator clips in-place
- Test each button to ensure it is connected and working properly
- Hot glue the lid to the base of the casing
- (optional) add labels under each button of a chore of your choice.
- Your chore tracker is ready to use!
Step 4: Tips and Problem Solving
- I used 20-inch alligator clips which made it difficult to fit everything into the casing. Try and find shorter clips if you can or use a different conductor to connect to the buttons
- You don’t have to just implement 5 chores, you can add as many or few as you want
- Superglue, Rubber Cement, and Acetone will also work to bond the lid to the base of the casing
- Try painting your chore tracker, make it unique!
- Put your chore tracker somewhere you will see every day as a reminder
Step 5: Overview Video and How to Use
Source: Chore Tracker