Sometimes you get a chance to combine helping out your family with a nice hobby project..
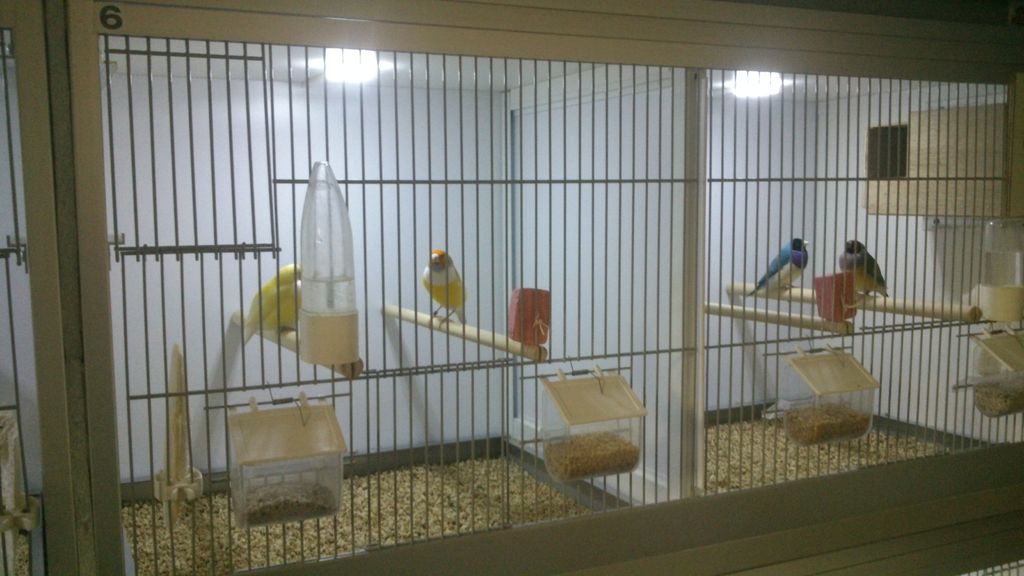
In this case my father in law was looking for a lighting system for his bird breeding cages. A daylight simulation system to be exact. He asked me to take a look at a website which sells such systems, since he wanted to know what he needed to order. After a quick look at those websites and seeing their pricing.. I convinced my father in-law I would develop and install the system myself.. He would get his lighting, I would have a new hobby project!
Daylight-simulation systems
The requirements for a daylight simulation system are simple: lights should gradually (say in 20 minutes) increase to a set high intensity in the morning, stay at that intensity during the day, gradually decrease to a set lower intensity in the evening, and stay at the low intensity during the night.
Other ‘non-functional’ requirements of such systems: the light should not flicker (this is stressful for the birds), the dimming should be smooth (again related to stress), the system should be reliable..
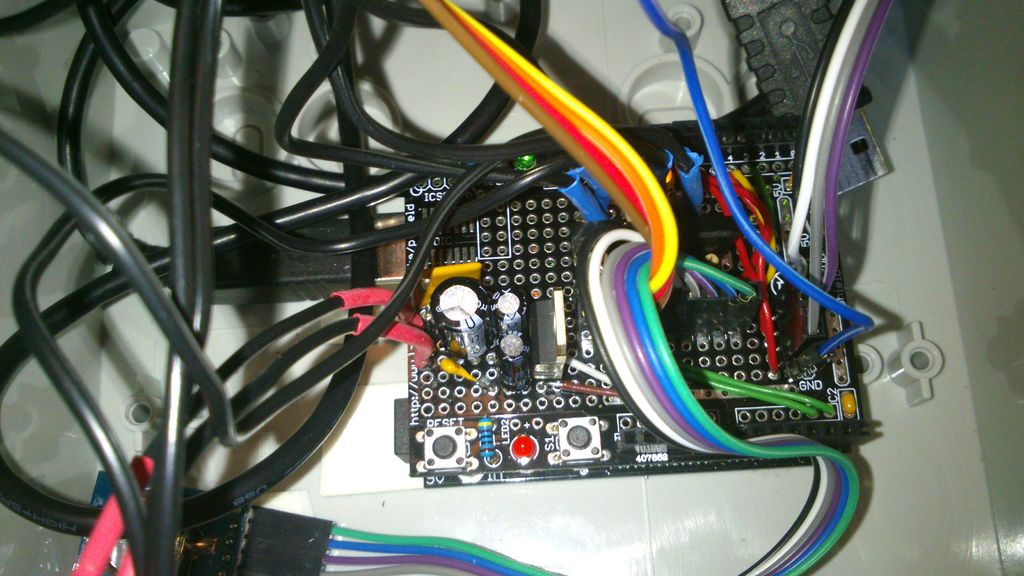
This instructable describes how I built this system based on an Arduino, some N-channel NPN transistors, a real time clock, a character LCD and some cheap LEDs from eBay.
A sidenote: The birds are only in the cages for breeding, the remainder of the year they are in an outside bird sanctuary. So no animals were harmed for making this instructable!
I’ve submitted this project to the 123D Circuits Contest and the 2014 makerlympics (both pending approval). So if you like this project: please vote for it! Thanks!
Step 1: Bill of materials
The base of the system is an Arduino Duemillenova. I think a Uno should work just fine. If you are considering to use a Leonardo or Mega: the code sets special registers in the Arduino.. these might be different for these boards!
furthermore the system uses:
- an Arduino experimenting cape
- a 16×4 character LCD (HD44780)
- an I2C serial display adapter (or just get a serial LCD)
- BD135 transistors (any NPN N-channel will do. Power MosFets would be even better)
- a 7809 9v voltage regulator (12v to 9v for the Arduino)
- A ds1302 RTC module
- some capacitors and resistors
- Cool white LED modules (12v led strips will also do)
- an auto-reset fuse ( or normal fuse if you like)
- Some switches (if you want to switch off unused cages). I used: http://www.conrad.nl/ce/nl/product/701011/
- a 12v power supply (over dimensions). I used a 3.5A supply for 18 x 4 LEDs (total +- 18 watts)
- A case: I used a Fibox TAM201610 http://www.conrad.nl/ce/nl/product/533259/
I think everything combined including shipping cost about 85 euro’s
All items were sourced online from dealextreme, eBay, Conrad etc.. but any electronics store would do.
A note on ‘daylight’ LEDs
According to bird breeder forums and stores: birds need special daylight LEDs. Maybe this is true (I do not want to start a religious discussion), but to me such definitions feel a bit like high-end audio discussions…
I’ve seen special birdkeeper websites showing off ‘home developed’ LED units for which the CE marking is of the ‘China Export’ type. A quick search on eBay revealed that the advertised LEDs (which are sold at special discount prices of 5 EUR per unit) very much resemble ‘Cool White store lighting’ LED chains sold for around 10USD / 20 units. Therefore I feel that at least some of the advise is a sneaky way to overprice the LEDs.
Step 2: Power the Arduino and LEDs
A schematic of supplying power to the arduino via a voltage regulator IC. Note that the same power supply can directly be used to power the LEDs without a voltage regulator.
Note that since the number of available components is still a bit limited, the 9v battery represents a power supply ( > 9v) and the PNP transistor represents a 7809 voltage regulator IC. The schematic view gives the clearest representation.
Be sure to use a power supply which can easily supply the the current you need to drive all your LEDs. I started out with a 12V / 2A power supply from some equipment that I no longer had. This seemed OK in the beginning, but resulted in a lower brightness and an unreadable LCD after about a day of testing!
Step 3: LED dimming
Dimming/fading of leds is the key part of the daylight simulation system. Leds can be faded by supplying a PWM signal instead of a DC signal. An example of this is known to most arduino owners: The ‘fade’ example. The only thing you need for this is a simple LED and a resistor to limit the current through the circuit.
The same code can be used for fading a LED strip instead of a single LED. When powering or fading a LED strip, the voltage or the current that can be supplied by an Arduino pin are no longer sufficient. Therefore an n-channel NPN transistor is introduced. A very common transistor for this is the BD135. The current that can be supplied by this LED is limited (the TO220 type I used for this can supply a maximum of 1A). If more power is needed, a Power MOSFET can be used.
An example circuit is shown below:
Here a 9V battery is used to power a led which is controlled by an Arduino. Here, the 9v battery represents any type of external power supply. Note that a 10k external puldown resistor is used to keep the signal low until the arduino supplies a signal on Pin 9. Also, in case you are powering a LED strip, the current limiting resistors are already integrated in the strip itself and can be left out.
The above example does not take into account two things:
- The relation between the pulse width and the (perceived) LED brightness is not linear, but logarithmic (or at least: logarithmic is a good enough approximation)
- The default PWM frequency is rather low, this might disturb the birds if they’re in this light all day
Google is your friend, and there are a lot of topics covering fast PWM and logarithmic LUTs for arduino, so you don’t have to re-invent the wheel. My main source of inspiration: http://forum.arduino.cc/index.php/topic,130736.0.h…
So here’s some example code which uses a logarithmic LUT and fast PWM on pin 9:
Note that this works on my duemillanova clone, and might not work on Arduino mega, due, leonardo etc.
<p>/* BirdLight</p><p>Example of a 12bit logarithmic LUT & Fast PWM for gently increasing
/ decreasing brightness during day to night and night to day transitions. </p><p>Code mostly retrieved from: <a href="http://forum.arduino.cc/index.php/topic,130736.0.html"> http://forum.arduino.cc/index.php/topic,130736.0....</a> </p><p>Copyright 2013 - Patrick Bronneberg
*/
/*-----( Configuration )-----*/
const double Night_Level = 5.0;
const double Day_Level = 99.0;
const int LED_PWM_PIN = 9;     // the pin that the fading LEDs are attached to</p><p>/*-----( Declare Constants )-----*/
const int PWMMax = 4095;     // Set maximum brightness for PWM
// Define a logarithmic LUT for PWM dimming
const int PWMLut[] = {0,0,1,1,2,2,3,3,4,4,5,5,6,6,7,7,8,9,9,9,10,11,
  13,15,16,17,19,21,23,25,26,27,29,31,32,33,35,37,39,41,43,45,47,49,51,53,55,57,
  60,63,66,69,71,74,77,80,84,88,91,94,98,102,106,110,114,118,123,128,133,138,143,
  148,154,160,166,172,179,185,192,199,207,214,222,230,239,248,257,266,276,286,296,
  306,317,329,341,353,366,379,392,406,421,436,451,466,483,500,518,536,555,574,595,
  616,638,661,684,707,732,757,784,811,840,869,900,931,964,997,1032,1067,1105,1144,
  1184,1224,1267,1311,1357,1404,1453,1503,1555,1609,1665,1722,1782,1843,1907,1973,
  2042,2112,2185,2260,2339,2419,2503,2589,2679,2771,2867,2965,3069,3174,3284,3397,
  3514,3629,3761,3905,4024,4079,4094};
//Define the size of the lut: note that integers are 16bits so 2 bytes
const int lutSize = sizeof(PWMLut)/2;</p><p>/*-----( Declare global variables )-----*/
int ledBrightnessLevel = 0;
int dayLevel = 0;
int nightLevel = 0;
boolean isDay = true;</p><p>void setup()
{
  //Initialize the LED PWM
  pinMode(LED_PWM_PIN,OUTPUT);
  TCCR1A = (1 << COM1A1) | (1 << WGM11);                // Enable Fast PWM on OC1A (Pin 9)
  TCCR1B = (1 << WGM13) | (1 << WGM12) | (1 << CS10);   // Mode 14 Fast PWM/ (TOP = ICR1), pre-scale = 1
  ICR1 = PWMMax;     //Set the TOP value for 12-bit PWM

  // Calculate levels from configured percentages
  dayLevel = LutPercentageToLevel(Day_Level);
  nightLevel = LutPercentageToLevel(Night_Level);
}</p><p>void loop()
{
  if (isDay)
  {
    //Decrease led brightness until we reach night level
    if (ChangeLedBrightness(nightLevel, -1))
    {
      isDay = false;
    }
  }
  else
  {
    //Increase led brightness until we reach day level
    if (ChangeLedBrightness(dayLevel, -1))
    {
      isDay = true;
    }
  }
}</p><p>double LutLevelToPercentage(int lutLevel)
{
  return lutLevel*100.0/lutSize;
}</p><p>int LutPercentageToLevel(double lutPercentage)
{
  return (int)((lutSize/100.0)*lutPercentage);
}</p><p>boolean ChangeLedBrightness(int finishedLevel, int ledFadeAmount)
{

  // set the current brightness
  analogWrite(LED_PWM_PIN, PWMLut[ledBrightnessLevel]);    </p><p>  // change the brightness for next time through the loop:
  ledBrightnessLevel = ledBrightnessLevel + ledFadeAmount;</p><p>  //Check if dimming is finished
  if ((ledFadeAmount > 0 && ledBrightnessLevel >= finishedLevel)
      || (ledFadeAmount < 0 && ledBrightnessLevel <= finishedLevel)  )
  {
    //Finished!
    return true;
  }
  //Not yet finished
  return false;
}</p>
Step 4: Adding the display
I had a 20×4 HD44780 character display lying around which I bought for less than 1 Euro on a clearance. I wanted to use this in this project, but did not want to lose 10pins of my arduino just for driving the LCD.
To overcome this issue, I used an I2C backpack for the display. This is basically an adapter which drives all pins of the LCD but only costs you 2 pins + 5V & ground on your arduino. As stated in the Bill of Materials, these backpacks can be bought for less than 3 dollars on the internet.
The downside of using such a device is that the standard Arduino character LCD library doesn’t work, and you have to browse on the internet for a while until you find a suiting replacement. The replacement I used is:F Malpartida’s NewLiquidCrystal library. which works great, so many thanks to F Malpartida of electroFUN LTD!
Unfortunately it took me 2 evenings to get the display up & running with the backpack. So watch out for the following issues
For more detail: Bird cage LED daylight simulation system