This simple project is intended to help you in answering the lifelong question “Does this battery have any juice left?”. Although popularity of single cell batteries (such as AA, AAA, C and D cell) is diminishing, there are still many small devices like TV remotes, flashlights, and other small portable electronics that run on these forms of power.
Step 1: Hardware Required
In order to make a battery tester, there are a few things you will need:
-Three 560 ohm resistors
-One 2.2k ohm resistor
-One green LED
-One yellow LED
-One red LED
-a breadboard
-various jumpers (connecting wires)
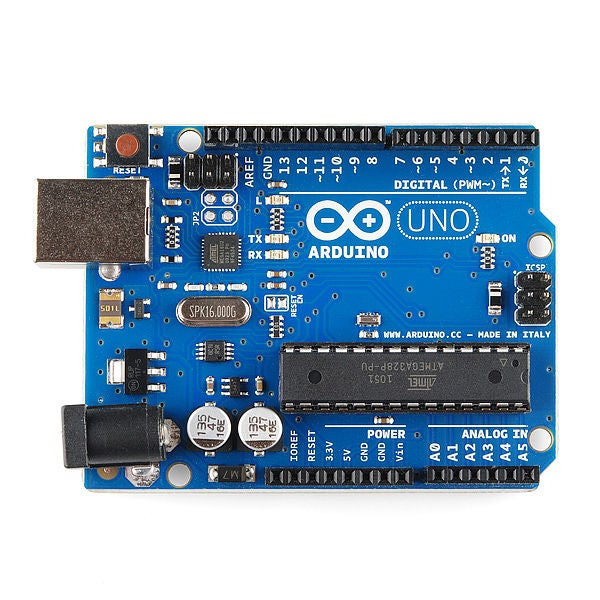
-One Arduino Uno R3 Microcontroller with usb cable
This project will cost somewhere in the $30-$40 range, however the most expensive part is the Microcontoller (~$30), which is of course re-programmable so this cost can be displaced over future projects.
These items can be found on easily on Amazon.com or Sparkfun.com
Step 2: The Wiring
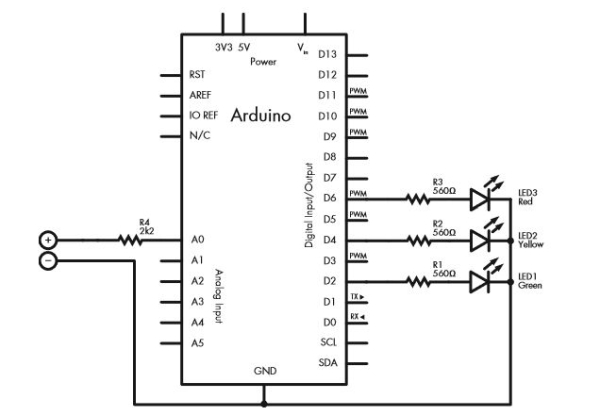
A little wiring is required to get this circuit operating, thankfully the Arduino is supplying the power so there is no need for an external power supply, that being said be careful with other projects as the Arduino can’t source a large amount of current. The Schematic is also slightly open ended to allow the user to connect the probing wires or a wiring harness to various battery sizes. Attached is an electrical schematic drawn up for the project, courtesy of John Boxall at the Arduino Workshop.
Step 3: The Code
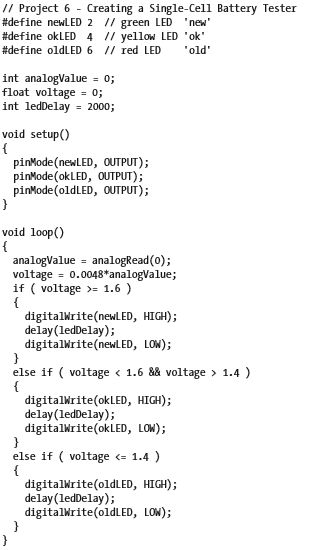
The attached photo contains the code you will upload to the Arduino. To upload this code simply download the Arduino sketch IDE from Arduino’s website (http://arduino.cc/en/Main/Software).
If you want to challenge yourself, I suggest taking the logic from the sketch language and making a C program. To do that you will need Atmel Studio 6 (free and on Atmel’s site) and a bootloader (attached, courtesy of Purdue ECET), you will also need to note that the Arduino Uno R3 uses an ATMega328p microprocessor.
Step 4: Finishing Up
Once everything is wired and the code is uploaded, simply hook the battery positive and negative ends of the battery or wiring harness to the positive and negative leads of the wires.
If a battery such as a AA cell is fully charged it will be near 1.6 Volts, if the voltage measured is greater than or equal to 1.6V then the green LED will briefly turn on, indicating the battery is fully charged, if the voltage is greater than 1.4 Volts and less than 1.6 Volts then the yellow LED will turn on, indicating the battery has some charge, and if the voltage is less than or equal to 1.4 volts then a red LED will briefly turn on, indicating the battery no longer has a significant charge. This process can be conducted indefinitely as long as there is power supplied to the Arduino from either a wall-jack or a computer.
Source: Arduino Uno R3 Battery Tester