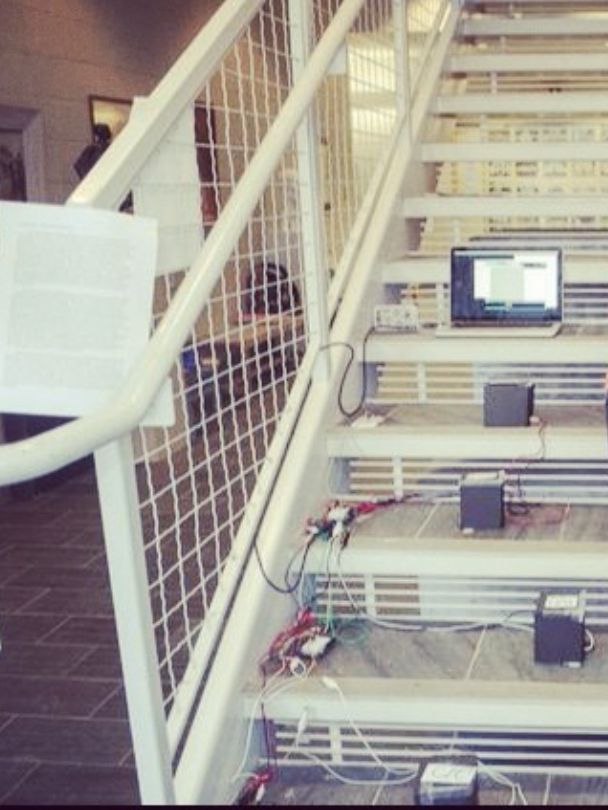
This is a small scaled musical stairs! It was a project that had a deadline; had only two days to build it. So, it is a very small scaled project, but still serves its purpose! IR Sensor (receiver) that I used is TSOP38238 from Adafruit, and the IR LEDs are also from Adafruit. The little black boxes have the IR LEDs in them (made the boxes to help people avoid stepping on the LED), the sensors are all attached on different breadboards at the left end of the stairs. This has 4 active steps, one playing a single note on the piano. For this project, the notes are C,D,E,F, respectively from first step to the top step, and if you press the right arrow key on the computer (on processing), the notes all change to G,A,B,C, respectively from the top step to the lowest. Then, if you press the left arrow key again, the notes go back to C,D,E,F. So, even with these small piano stairs, you can play the whole scale from C to C (one octave)!
If you want to see more tutorials on more sensors, shields, etc., please visit:
ardututes.weebly.com
Step 1: Parts
1 x Arduino (Uno is what I used) [http://www.adafruit.com/products/50] 4 x Breadboards [http://www.adafruit.com/products/64] 1 x Set of Male/Male Jumper Wires [http://www.adafruit.com/products/758] 1 x Set of Alligator Clips [http://www.adafruit.com/products/321] 4 x IR Sensor TSOP38238 [http://www.adafruit.com/products/157] 4 x IR LEDs [http://www.adafruit.com/products/387] Tape (any kind of tape is acceptable)
Step 2: Assemble
I used 123D Circuit to show the assembly, so the sensor and the LED does not look like the ones we used.For the IR Sensor, place the IR Sensor with the bulky part in your direction. Then for the three legs, wire the farthest left one to any non PWM digital output pin, the middle one goes to ground, the far right one goes to power, preferably 5V. Then, for the LED, connect the longer leg to any PWM digital pins (3,5,6,9,10,11) and the shorter leg to ground.For this project, I connected the iR Receiver (the sensor) on the breadboard, and connected them to the main arduino using the jumper wires and alligator clips. Then, I connected the LEDs using wires and alligator clips directly from the arduino to the LED. By doing so, you can move the LED away from the sensor to the range accepted.
During this project, I found out that if you are trying to upload and run this project only through the USB port of your computer, the range of the IR LEDs are very small, which is the reason why the stairs are so small for my project. However, my guess is that the range will be longer, hopefully cover the whole stair when there is an external power supply. Actually, when I connected only one sensor and one LED, I was able to get the full range of the staircase.
Sorry for the shaky photos; also these photos were taken when we were not fully organized, but I hope you can get a sense of what the assembly should look like! 🙂