Background
This is a project that was started 2 years ago which I recently decided to pick up again and finish. The purpose of the product is to test a person’s ability to memorize patterns. It does this on a 2×2 button layout where the user must replicate the LED pattern that is shown. With each successful entry, another element to the pattern is added and the level of difficulty increases (indicated by the number displayed at the top). A video displaying the functional product can be found at the end of the Instructable.
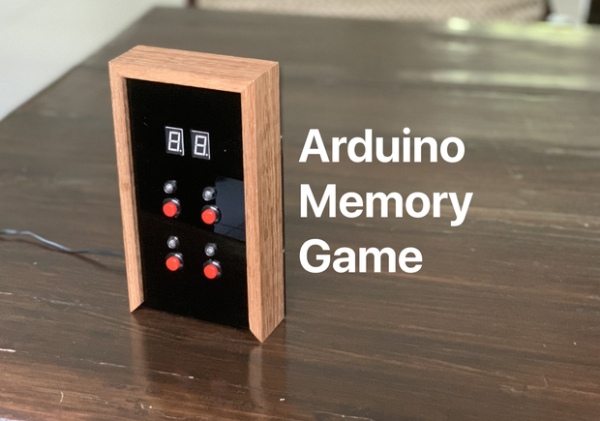
This is, unfortunately, a specialized project as requires access to quite a few resources as you might notice when you read through this Instructable. If you have any questions, please do not hesitate to ask them in the comments, and lastly, please vote for this Instructable in the Arduino Contest if you enjoyed it!
Supplies
Tools
- Drill Press
- Compound Mitre Saw
- Clamps
- Laser Cutter
- Soldering Iron
- Wire Cutter/Stripper
- Table Saw
- Computer
Hardware
- PVA
- Teak Wood
- 4x Wood Screws (any suitable size)
- Black Acrylic
Electronics
- 4 PTM Buttons
- 12x 10K Ohm Resistors
- 18x 470 Ohm Resistors
- 8x Diodes
- 2x 7 Segment Displays
- PCB Board
- 2x 4511 IC
- Perf Board
- 5V Adapter
- Arduino Nano
- Arduino Nano Expansion Board (Optional)
- 4x LEDs
- 4x LED Sockets
Step 1: CAD Models
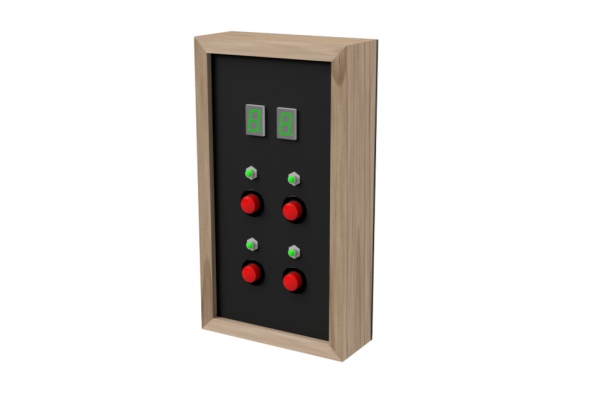
I first developed the product using CAD (Fusion 360). The illustrations above represent my final chosen design using teak wood and black acrylic. CAD models are useful to understand what your product looks like with all the pieces together and to check if they will fit together in the first place.
Step 2: Cutting the Wood
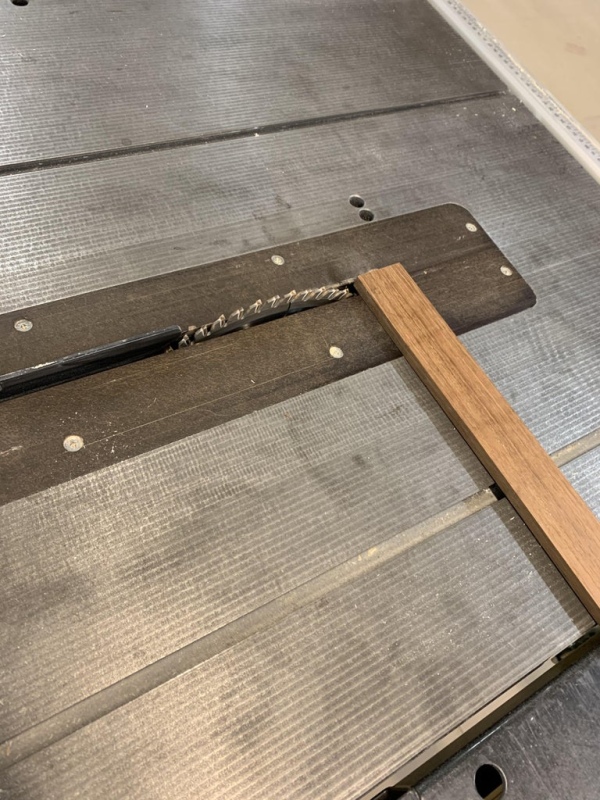
The first step of this process is to produce the frame of the product. I did this using teak wood, a table saw, and a miter saw. The wood that I used was 10 mm thick and all pieces were 40 mm wide. The two longer pieces were both 200 mm in length while the two shorter pieces were 110 mm in length. I used a miter saw to cut 45 degree angles at all corners as shown above. These angled edges can be used later on to form miter joints allowing for a sturdy frame.
Step 3: Making the Rebate
In order to secure the acrylic plate to the housing, I used a rebate joint which allows the UI plate to slide in and out with ease (for repairs and dismantling later on). The non-permanent fixture made the product perfect for testing out different UI designs and configurations.
The rebates were made using a table saw. The rebate is about 3 mm wide (as I was using 3 mm acrylic) and 4 mm deep. The depth of the UI plate is completely up to you although I went with 5 mm lower than the edge of the frame. While this step was relatively simple, please remember to use proper safetyequipment and PPE (and supervision if required). It’s always better to keep all 10 fingers 🙂
Step 4: Joining Method: PVA
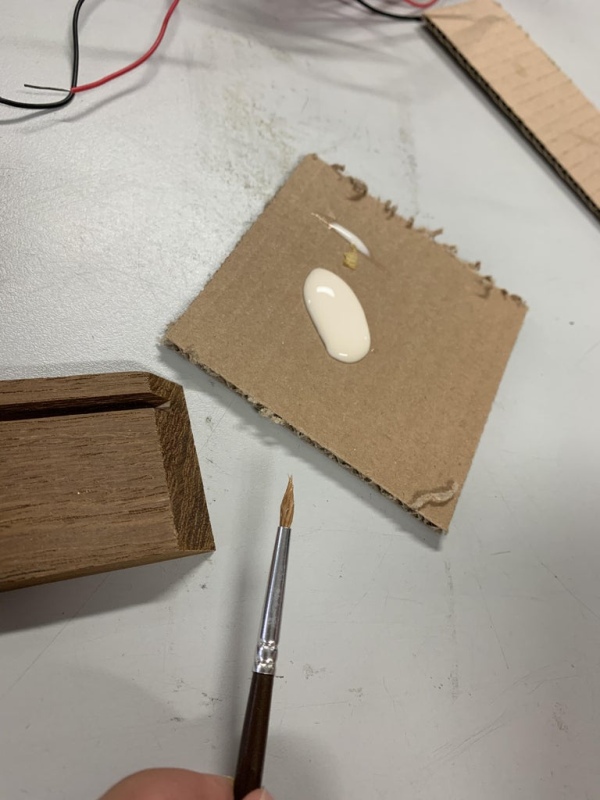
In order to permanently join the housing components together, I used PVA glue. I took two long pieces (teak sides) and one small piece, applied PVA glue with a brush to the angled edges, and clamped it all together for 24 hours. Remember to ensure that the rebate aligns across all 3 pieces.
IMPORTANT: Do not glue the 4th piece (or 2nd small teak side) as the UI plate must be slid into the frame first. However, do not lose track of this piece (which I unfortunately lost 2 years ago) as you will need it to finish the product once the UI plate is in place.
Step 5: Laser Cut: User Interface
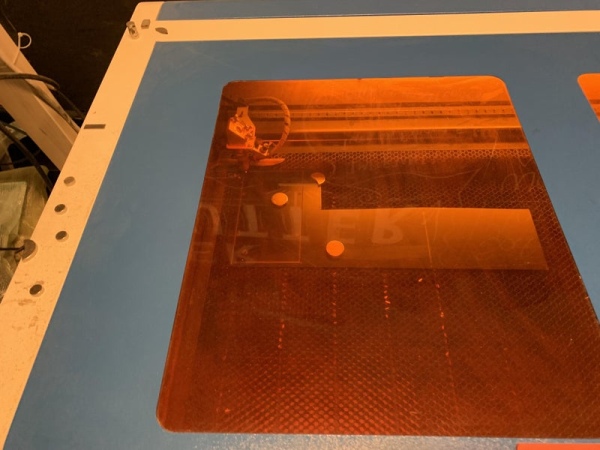
This step involves the use of a laser cutter. In order ensure quality, make sure that the material is level with the laser before cutting and that the cutter is set to 3 mm acrylic. The user interface (UI) plate consists of four buttons, four LEDs, and two 7 segment displays.
I did multiple test cuts using cardboard to ensure that the holes fit my buttons, LEDs, and 7 segment displays. This saved a ton of material and stress later on. I have attached the .svg file that I used to cut my UI plate, although feel free to change the dimensions of the figures to suit the part sizes that you have.
The backplate (TestCut.svg) was much simpler to cut as it consisted of 4 holes for countersunk screws and one hole for the power cable.
Attachments
Step 6: Drilling Holes + Joining Method
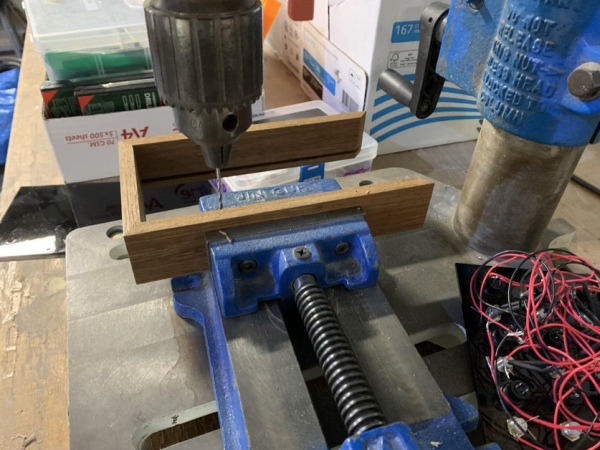
In this step, I used a drill press to create four holes that would allow for the back plate to be secured to the frame using screws. First, ensure that the frame is securely clamped down perpendicular to the drill bit. Then, using a 5 mm (or a size of your choosing) drill bit, produce a hole that goes halfway through the wood as shown in the image above. Make sure to mark each hole in accordance to the holes on the back plate before drilling to ensure all holes line up in the final fit.
Once the 4 holes have been drilled, the holes should line up with those on the back acrylic plate. Using a countersink drill bit (a tool that I didn’t have unfortunately this time around), make an indent over each hole on the acrylic plate. This will ensure that the screw head will be flush with the acrylic surface when fitted. Finally, use a screwdriver (or a Philips head drill bit) to carefully secure each screw into the acrylic and wood creating a tight joint.
Step 7: PCB Setup Explained
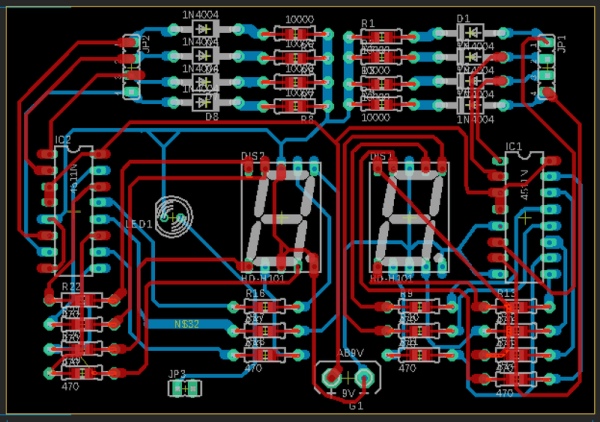
The PCB that I use in this project powers the 7 segment display. It is the same PCB that I used in my Dice Generator project. The PCB was designed by me and was manufactured in Shenzhen. If you would like to learn more about this process, have a look at my Instructable on how to design and fabricate your own PCB.
PCBs help organize wiring and simplify complex circuits. In this case, the PCB is equipped with two 4511 ICs. You may have been wondering how this entire project operates on one Arduino Nano given that I have four buttons, four LEDs, and two 7 segment displays which normally requires 24 IO ports to program (8 per display). However, the 4511 IC helps control each display using binary, which only requires four inputs per display, bringing the total IO port requirement to 16, which the Nano can support (e.g. 1000 or HIGH, LOW, LOW, LOW = 1). The program in the following steps will convert decimal numbers to binary and send information to the PCB using binary which helps with cable management and efficiency.
I have added the Gerber files for the board below.
Attachments
Step 8: The Circuit
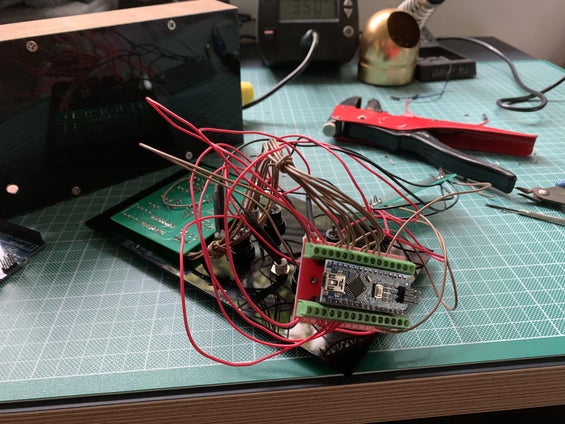
This was probably the most tedious bit of the entire project. Following the circuit shown above, solder each and all of the components onto a perf board. If you aren’t going to use a PCB, just use a perf board for those components as well. The numbering and matching of ports above are based on the code in the next step. It’s quite random as I had a few ports on my Nano extension board that were causing shorts.
Safety Considerations: When using a soldering iron, ensure that you wear proper PPE including protective glasses. Make sure your workspace is well ventilated and clear of clutter.
Important Considerations
- The first thing to keep in mind is to keep wiring short so that all these components will be able to fit inside the housing (it is a very very tight fit).
- For the LEDs or any exposed wiring, make sure to use insulation tape or heat shrink to minimize the possibility of shorts when the components are compacted into the box.
- Before inserting buttons and LEDs, ensure that they function properly.
- Avoid dry solder joints by using multi-core wire instead of solid core.
- If you are using an extension board as well, put some solder at the end of each wire before screwing it in to ensure a secure connection.
Step 9: The Code
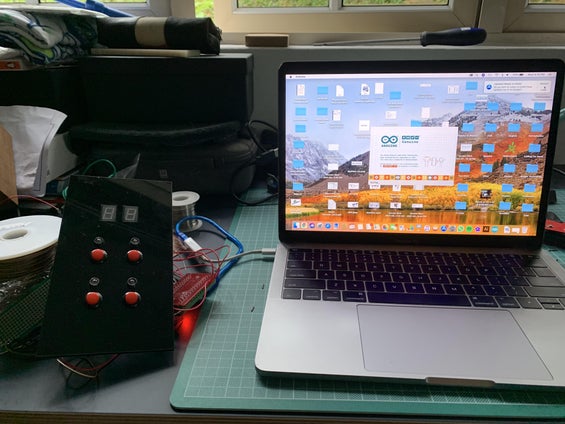
Below is the attached file containing all the code for the project. I apologize for the inefficient code and messy formatting (I am by no means proficient in Arduino programming yet). All you need to do is download the file, and the Arduino IDE, and upload the code to your Arduino Nano.
How the code works
The program starts by creating a random list of 99 integers ranging from 1 to 4. The level is set to 1 and the first bit of the pattern is displayed. Once the user inputs the expected number of button presses (e.g. level 1 = 1 button press), the code checks the inputs against the list of 99 integers. If it matches up, the code repeats and the level is increased to 2 (and so on). If the input is wrong, the code will restart. For those interested in understanding the code, I have annotated it below.
//Written by Rehaan Irani, July 2021

int list[99];
int list2[99];
int x = 1;
int y = 0;
int z = 0;
int level = 1;
int w;
int c;
int d;
int e;
int f;
int g;
int i;
int j;
int h;

void setup() {

  //Declaring all our pins
  Serial.begin(9600);
  pinMode(2, OUTPUT);
  pinMode(3, OUTPUT);
  pinMode(4, OUTPUT);
  pinMode(5, OUTPUT);
  pinMode(6, OUTPUT);
  pinMode(7, OUTPUT);
  pinMode(8, OUTPUT);
  pinMode(9, OUTPUT);

  pinMode(14, OUTPUT);
  pinMode(15, OUTPUT);
  pinMode(17, OUTPUT);
  pinMode(18, OUTPUT);

  pinMode(10, INPUT);
  pinMode(11, INPUT);
  pinMode(12, INPUT);
  pinMode(13, INPUT);

  //This loop creates the random sequence of 99 random numbers between 1 and 4
  for (int i=0; i <= 98; i++){
    list[i] = random(1, 5);
    }
}


//Reset function that we will call if the user inputs the incorrect pattern
void(* resetFunc) (void) = 0;


//Main Loop
void loop() {


  //Condition set to ensure the user makes an input before the next sequence is shown
  if (x == 1) {

    //For loop displays the pattern on the LEDs - depends on the level
    for (int i = 0; i <= level; i++) {

    //Each if statement operates an LED which is triggered depending on if the integer is 1,2,3 or 4
    if (list[i] == 1) {
      digitalWrite(15, HIGH);
      delay(1000);
      digitalWrite(15, LOW);
    }

    if (list[i] == 2) {
      digitalWrite(14, HIGH);
      delay(1000);
      digitalWrite(14, LOW);
    }

    if (list[i] == 3) {
      digitalWrite(17, HIGH);
      delay(1000);
      digitalWrite(17, LOW);
    }

    if (list[i] == 4) {
      digitalWrite(18, HIGH);
      delay(1000);
      digitalWrite(18, LOW);
    }

  }

  //If x is 0, the above code will not run again until x is set back to 1
  x = 0;
  }
  /////////////////////////////////////////

  //These IF statements record the users input depending on which button they press
  if (digitalRead(12) == 1) {
    list2[y] = 1;
    y += 1;
    delay(500);
  }

  if (digitalRead(18) == 1) {
    list2[y] = 2;
    y += 1;
    delay(500);
  }

  if (digitalRead(10) == 1) {
    list2[y] = 3;
    y += 1;
    delay(500);
  }

  if (digitalRead(13) == 1) {
    list2[y] = 4;
    y += 1;
    delay(500);
  }


  /////////////////////////////////////////////////////////////////

  //This IF statements set the condition for running the check which only happens when the number of user inputs = level
  if (y == level + 1) {

    //This for loop checks each user input against the random list
    for (int i = 0; i <= level; i++) {

      //If the lists match, nothing happens, the program continues
      if (list2[i] == list[i]) {
        Serial.print("h");

      //ELSE, if the lists do not match, the program calls on the reset function to restart from the beginning
      } else {
        Serial.print("FUNCTION RESTART");
        resetFunc();
      }
     //x is set to one because the lists match and the next sequence can be shown
     } x = 1;

      //level is increased by one to display one more number on the random list
      level += 1;

      //y is 0 to reset the users inputs
      y = 0;
    }
  //The rest of the code deals with displaying the level on the 7 segment displays

//This part below separates numbers into its two digits (e.g. 43 = 4 and 3)
  int v;
  int randomNumber = level%10;
  v = level - randomNumber;
  int randomNumber2 = v/10;

  //The first digit is converted to binary
  if (z > 7) {// 1st Digit Write
      f = HIGH;
      randomNumber = randomNumber % 8;
    } else {
      f = LOW;
    }

    if (randomNumber > 3) {
      e = HIGH;
      randomNumber = randomNumber % 4;
    } else {
      e = LOW;
    }

    if (randomNumber > 1) {
      d = HIGH;
      randomNumber = randomNumber % 2;
    } else {
      d = LOW;
    }

    if (randomNumber > 0) {
      c = HIGH;
      randomNumber = randomNumber % 1;
    } else {
      c = LOW;
    }

     //The second digit is converted to binary
     if (randomNumber2 > 7) {// 2nd Digit Write
      j = HIGH;
      randomNumber2 = randomNumber2 % 8;
    } else {
      j = LOW;
    }

    if (randomNumber2 > 3) {
      i = HIGH;
      randomNumber2 = randomNumber2 % 4;
    } else {
      i = LOW;
    }

    if (randomNumber2 > 1) {
      h = HIGH;
      randomNumber2 = randomNumber2 % 2;
    } else {
      h = LOW;
    }

    if (randomNumber2 > 0) {
      g = HIGH;
      randomNumber2 = randomNumber2 % 1;
    } else {
      g = LOW;
    }
  //The binary output is sent and displayed on the 7 segment displays
  digitalWrite(2, j);
  digitalWrite(3, i);
  digitalWrite(4, h);
  digitalWrite(5, g);

  digitalWrite(6, f);
  digitalWrite(7, e);
  digitalWrite(8, d);
  digitalWrite(9, c);

}
Attachments
Step 10: Power Connections
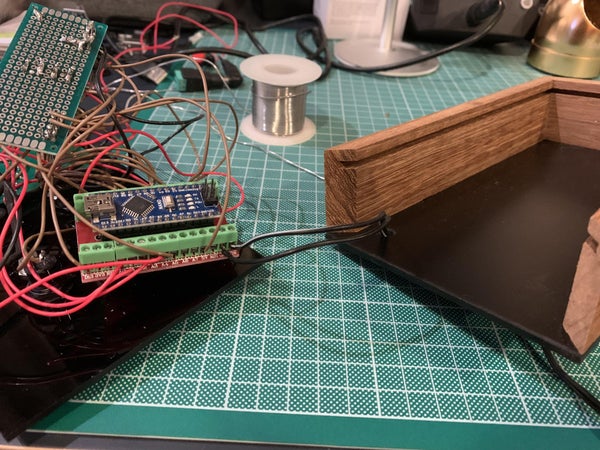
This final step is pretty straightforward. So far the Arduino has been powered by your computer. It is now time to connect it to a more permanent power source.
- Take a 5V adapter and strip the ends of the two wires.
- Use a multimeter to check which wire is positive and which is GND.
- Pass those wires through the hole in the back plate.
- Connect those wires to the V(in) and GND ports on the Arduino Nano
It is very important that the adapter is 5V because unlike the UNO, the Arduino Nano has no on board voltage regulator.
Step 11: Final Setup
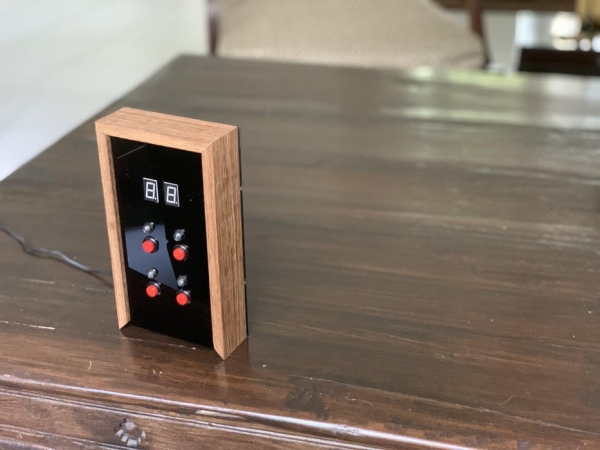
All that is left to do is to slide all the components along with the UI plate into position, and use PVA to secure the final wood piece. That’s it! You are done 🙂
I hoped you enjoyed reading this Instructable!
Special thanks to the Design Technology department @ UWCSEA and the SL2 Community Lab for their help in the production of this product.
Source: Arduino Memory Game
