Have you ever thought of controlling your FuzzBot wirelessly? Do you want to make a real – life video game? Do you want to learn about the tech behind NFC and RFID? – the Qtechknow Robot Obstacle Course How – To Guide is for you!
Please cast your vote for me (at the upper right hand corner, the orange ribbon) in the RC Contest, Tech Contest, and the Microcontroller Contest!
What does it do, how does it work?!
Thanks to Matt for the awesome Hackaday article + interview!
The Qtechknow Robot Obstacle uses the FuzzBot Design, with the Pololu ZumoBot Chassis Kit, SparkFun NFC Shield, XBee Series 1 Wireless Modules, and Adafruit NeoPixel Sticks and Rings. There are 3 main parts of the Obstacle Course:
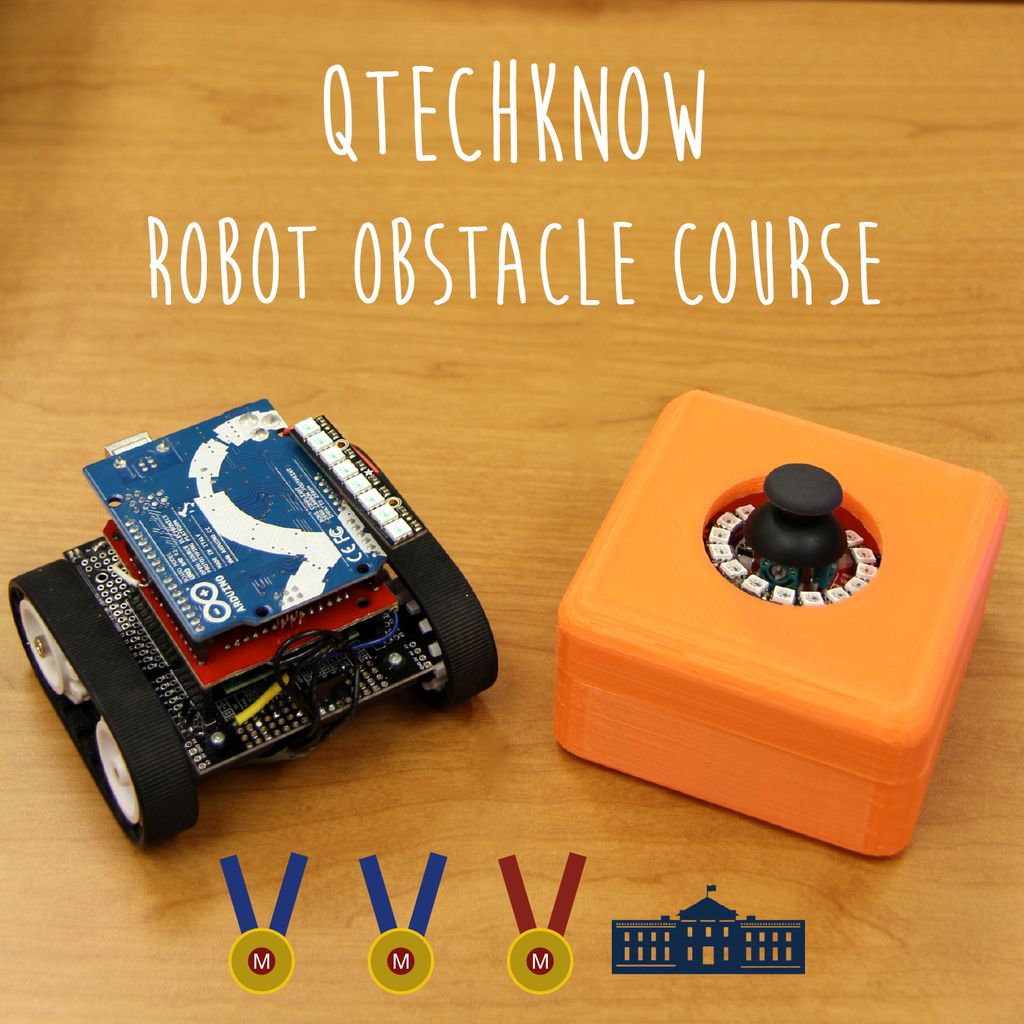
- The Hacked FuzzBot, with an XBee Module, NeoPixel Stick, and hacked NFC shield
- The Controller, with an XBee Module, NeoPixel Ring, and Joystick
- NFC Tags, placed around the obstacle course
The Robot Obstacle Course has been featured at many Maker Faires – SLO Mini Maker Faire, Maker Faire Bay Area, and the White House Maker Faire! It has won Editor’s Choice twice at the the Bay Area Maker Faire, and has the Maker of Merit award at the White House Maker Faire!
Here is the timeline of the complete project, from first prototype to completed project:
Mini Maker Faire SLO: Instead of RFID, I had plates (real dinner plates!) with a force sensor underneath (to detect the presence of a robot above!) with long wires that connected to a central Arduino. Problem: Force sensors didn’t work, robot would get stuck on the side of the plates, and XBee communication didn’t work
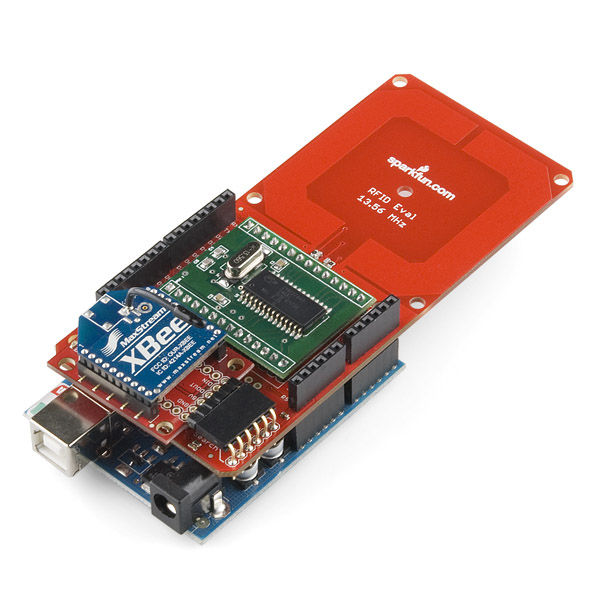
Maker Faire Bay Area: Added RFID which solved the problem of the the plates, and added a few more lines of code to work with the XBees. Problem: RFID didn’t consistently read all of the time, because 1) RFID antennae was too far away from the tags and 2) I didn’t know, but the RFID Serial pins were connected to the motor pins!
Maker Faire White House: Cut the RFID shield in two, and put the antennae at the bottom of the bot, made the box shorter, and rewired the RFID UART pins. Works perfect now!
Let’s get started!
Step 1: Parts and Tools
* All parts are from SparkFun Electronics, except for the ZumoBot Kits / Motors, which are available at Pololu, and the rechargeable batteries, which are available at Amazon.
All tools used in this project are easily reuseable in many other projects, and a majority of the more expensive parts can be reused again in other projects (i.e. Arduinos, XBees, XBee Explorer Regulated).
A SparkFun wishlist that includes all parts except the ZumoBot Kits / Motors, is available here: https://www.sparkfun.com/wish_lists/90202 ($189)
A SparkFun wishlist that includes all tools except the Rechargeable Batteries, is available here: https://www.sparkfun.com/wish_lists/90204 ($42)
Parts for Robot:
- Arduino UNO R3 SMD ($30)
- ZumoBot Chassis Kit ($43 unassembled) + 2 x 75:1 HP Gear Motors ($16 each) // or // ZumoBot Assembled ($100)
- NeoPixel Stick – 8 x LEDs ($6)
- SparkFun NFC Shield ($20) with NFC Module ($30)
- XBee Series 1 Module – Trace / PCB Antennae (802.15.4) ($23)
- XBee Explorer Regulated ($10)
- Stackable Header Kit ($1.50)
- 6 – Pin Right Angle Female Header ($1)
- Right Angle Male Headers ($2)
- Female Headers ($1.50)
Parts for Controller:
- Arduino UNO R3 SMD ($30)
- NeoPixel Ring – 16 x LEDs ($10)
- Joystick ($4)
- Joystick Breakout Board ($2)
- SparkFun XBee Shield ($25)
- XBee Series 1 Module – Trace / PCB Antennae (802.15.4) ($23)
- 3D Printed Enclosure (make your own or print at Shapeways)
Parts for Obstacle Course:
- 15 x NFC Tags (MiFare 1K, 13.56 MHz) ($3 each)
Tools:
- Tool Kit – Beginner** ($22, includes soldering iron and basic tools to complete this project)
- Rechargeable AA Batteries ($22, Amazon)
- SparkFun Cerberus USB Cable ($6)
- XBee Explorer USB ($25)
** solder at your own risk
Step 2: Assembling the Chassis Kit
To assemble your ZumoBot chassis kit, download the PDF below. This is Pololu’s instructional guide and it’s a PDF so that you can easily read it on your tablet or smartphone! However, if you would like to have more pictures to help you along the way, in the next few steps I’ll show you how to make the main chassis!
Take out all of your parts and tools, which were shown in the last step. Here is what is included in the ZumoBot Chassis:
- two silicone tracks
- two drive and two idler sprockets
- a 1/16″ acrylic mounting plate
- battery sockets
- mounting hardware
And here is what is in the Zumo Shield Kit:
- Zumo Shield PCB
- Jumper Connectors (4)
- Jumper Wires for Motors (3)
- Pushbuttons (2)
- Right Angle Switch
- Male Headers (40)
- Female Headers (2)
- Mounting Plates (2)
- Screws for Mounting Plates (2)
You will need the tools from the last step also.
 ZumoBot Assembly Guide.pdf