[Mac OSX Only]
Because I use Quartz Composer, my program works only on Mac OSX. I am now extending and improving it toward cross-platform. If you have knowledge of computer programming, you can make your own system that connects to the blimp. The communication protocol between the blimp and the computer is simple. Read the step 19.
Step 1: Materials and tools
1x Funnel IO
2x XBee
1x Xbee Explorer USB
1x TLC5940 LED Driver
1x IC socket
5x Full-Color Flux LED [Anode Common]
3x LB1638 Motor Driver
3x DC Motor (e.g., MK07-3.3 Orange Motor)
3x Propeller (e.g., EP2510)
1x LiPo Battery
1x 2kΩ Register (for LEDs)
3x 0~30Ω Register (for Motors)
Circuit board
Pin socket (2x 14pin, 8x2pin)
Pin header (2x 14pin)
Wire
Heat shrink tube
Plastic sheet (0.5mm thick)
Screws
Plastic film for the balloon**
Cutter
Nipper
Wire stripper
Solder & Soldering iron
Iron
Tape
I use Heptax plastic film. I think you can use other transparent plastic film. If you cannot find any good film, please contact me. I give you my film.
Step 2: Circuit overview
Before placing and soldering parts, check the circuit diagram and plan your layout of the parts on the circuit board.
Step 3: Prepare the Funnel IO
Solder the pin sockets (2x 14pin and 1x2pin) to the Funnel IO pins.
Solder the pin headers (2x 14pin) at the edge of your circuit board to attach the Funnel IO.
Step 4: Place and solder the parts
Place and solder the LEDs, TLC5940 socket, LB1638s, registers, and pin sockets for motors.
LB1638’s pins do not fit an ordinary 0.1inch (2.54mm) pitch circuit board, so bend the pins by hand. We do not use the Non-Connection pin (pin6 & pin10) of the LB1638, so you can cut off these pins.
Step 5: Wire the parts
Wire the parts according to the pictures in the Step 2.
Step 6: Download the Beatfly programs
Step 7: Upload the program to the Funnel IO
1. To upload the program to the Funnel IO, you need Arduino software. Download it here. Copy the Arduino software into your Application folder.
2. Install the FTDIUSBSerialDriver, which you can find in the downloaded dmg.
3. If there is no Arduino folder in your Documents folder, create it.
4. Copy the Beatfly_v1_001/Funnel_IO/Beatfly_v1_001 folder into your Documents/Arduino.
5. Create libraries folder in your Documents/Arduino folder.
6. Copy the Beatfly_v1_001/Funnel_IO/Tlc5940 folder into your Documents/Arduino/libraries.
7. Open the Arduino software.
8. In the menu bar, choose File>Sketchbook>Beatfly_v1_001.
9. Click the Verify button.
10. Download XBeeConfigTool here.
11. Open the XBeeConfigTool/application.macosx/XBeeConfigTool.
12. According to this instruction, setup your XBee modems, close the solder jumper on the Funnel IO and the XBeeExplorerUSB, and upload the Beatfly_v1_001 sketch (program) to the Funnel IO.
1. If there is no Macintosh HD/Developer/Applications/Quartz Composer, install it from your Mac OSX install disk (DVD). Quartz Composer is included in Option Install/Xcode.
2. Copy the Beatfly_v1_001/Quartz_Composer_Plugin/Blimp_Sender.plugin into your Username/Library/Graphics/Quartz Composer Plug-Ins. If there is no such a folder, create it.
Step 9: Test your circuit
1. Attach the Funnel IO with XBee to the circuit board. Connect a motor to the circuit board roughly. Do not solder the motors yet.
2. Connect the XBee to your computer via USB.
3. Open the Quartz Composer. In the templates, choose Blank Composition.
4. In the Patch Creator, choose Beatfly_v1_001 patch and double click it.
5. Choose the Beatfly_v1_001 patch on the canvas. In the Patch Inspector’s Input Parameters tab, input 0.5 for Vertical Motor, Right Motor, and Left Motor value.
6. In the Patch Inspector’s Setting tab, set the Number of LEDs to 5 and select the serial port of XBee. It should be “/dev/tty.usb-serial….”
7. Now your Quartz Composer Patch communicates with the circuit. In the Patch Inspector’s Input Parameters tab, change the value of each motor and LED. A motor drives forward when its value is 1.0, stops when the value is 0.5, and drives reverse when the value is 0. If the motor drives otherwise (forward at 0 and reverse at 1.0), reverse the +/- pins of the motor.
Step 10: Make the structure
Cut the plastic sheet into the structure parts, bend them, and put them together with screws. My sketch of the structure is included in the Beatfly_v1_001/Structure_Design/Structure_v1_001.jpg. Make your own design to fit your circuit board.
When you decide your design, measure the distance between motors and the circuit board, and cut the wire in this length. Solder the wire to the motors and solder pin sockets to these motor-wires.

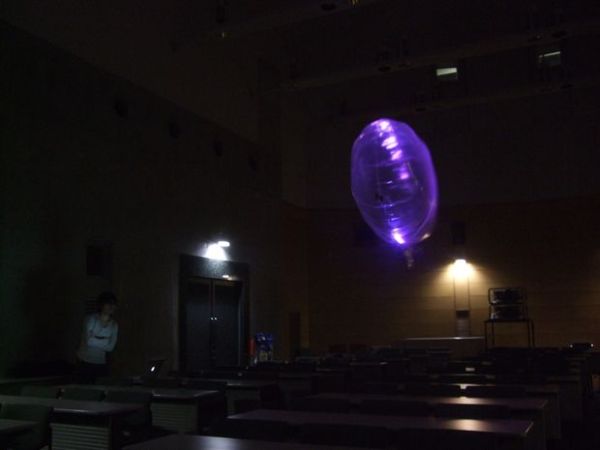
Step 11: Make the balloon
1. Make the balloon pattern using cardboard. My design of the balloon pattern is included in Beatfly_v1_001/Balloon_Pattern/Balloon_v1_001.jpg.
2. Cut the plastic film along your pattern. Make 2 pieces.
3. Lay one piece of the film on the other.
4. Seal the edge of the two pieces with iron. Set the temperature of the iron Low. Too hot iron will melt the film. Test the temperature before you begin sealing. Leave about 10 cm unsealed to insert the helium valve.
5. Make the valve. The valve is just a small tube made of the same film as the balloon. Valve length should be 8 ~ 10 cm, and the diameter of the inner tube should be about 1 cm. When you attach the valve to the balloon using iron, insert a cardboard stick into the tube to avoid the tube being sealed.
For more detail: Beatfly : Make an illuminating blimp and control it with your voice, Keyboard, MIDI Controller, Garageband file, iPhone, Flash, and more! [Mac OSX]