
Summary of YouTube Subscriber Counter With ESP8266
This project builds a realtime YouTube subscriber counter using an ESP8266 (Feather Huzzah) and a 4-digit seven-segment display, housed in a small shadow box. It requires basic soldering, Arduino library installation, and personalizing code with your Google API key, channel ID, and Wi-Fi credentials. A version 2 supports counts above 10K, and alternative ESP8266 boards can be used with the standard 7-segment backpack.
Parts used in the YouTube Subscriber Counter:
- Small shadow box
- Printer and paper
- Scissors
- Cutting mat or scrap cardboard
- Illustration board or more scrap cardboard
- Utility/craft knife
- Metal ruler (optional)
- Tape
- Glue stick
- Feather Huzzah ESP8266 with female headers
- 4-digit 7-segment FeatherWing display
- Micro USB cable (charge + sync, not charge-only)
- USB power adapter (optional)
- Soldering iron and solder
- Flush diagonal cutters
- Desoldering braid or solder sucker
I was inspired by the Play Button awards YouTube sends out for subscriber milestones and whipped up a simple circuit using an ESP8266 wifi board and seven segment display to show off my realtime subscriber count. This is a great IoT beginner project, with just a little soldering and a code personalization required to make it work for your own account. I made a version 2 that supports more than 10K subscribers, too.
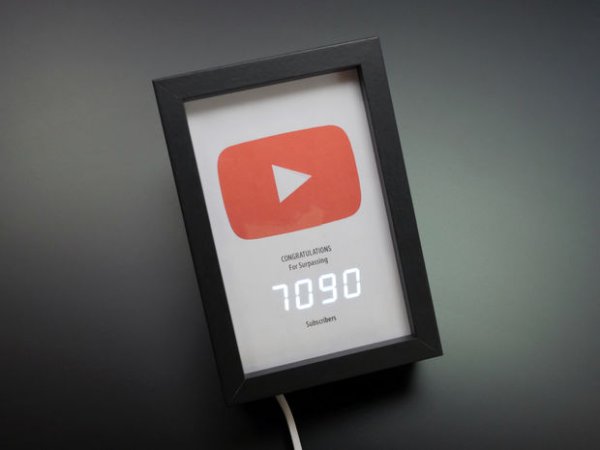
Before attempting this project, you should be generally familiar with uploading new programs to your Arduino board and installing code libraries, both of which you can learn for free in my Arduino Class, though you really don’t have to understand any of the actual Arduino code to get this project running.
For this project, you will need the following materials:
- Small shadow box
- Printer and paper
- Scissors
- Cutting mat or scrap cardboard
- Illustration board or more scrap cardboard
- Utility/craft knife
- Metal ruler (optional)
- Tape
- Glue stick
- Feather Huzzah ESP8266 with female headers
- 4-digit 7-segment FeatherWing display
- Micro USB cable (charge + sync, not charge-only)
- USB power adapter (optional)
and the following tools:
- Soldering iron and solder
- Flush diagonal cutters
- Desoldering braid or solder sucker (for mistakes)
Required software libraries:
Unique data required:
- Google API key
- YouTube channel ID
- Wifi network name/password
As an alternative to the Feather Huzzah, you can also use your favorite ESP8266 microcontroller board, some of which require an FTDI cable to upload new programs. Use the standard 7-segment backpack rather than the FeatherWing version.
Read more: YouTube Subscriber Counter With ESP8266
- What does this project display?
It displays your realtime YouTube subscriber count on a 4-digit seven-segment display. - What microcontroller is used?
The project uses a Feather Huzzah ESP8266 with female headers, though other ESP8266 boards can be used. - What display is required?
A 4-digit 7-segment FeatherWing display is used; if using another ESP8266 board, use the standard 7-segment backpack instead. - What unique data do I need to provide?
You need a Google API key, your YouTube channel ID, and your Wi-Fi network name and password. - What software libraries are required?
You need Arduino YouTube API, Arduino Json, Adafruit GFX, and Adafruit LED Backpack libraries. - Do I need soldering skills?
Yes; the project requires a little soldering to assemble the Feather and display components. - Can this support more than 10K subscribers?
Yes; a version 2 of the project supports counts above 10K subscribers. - Do I need to understand Arduino code to run this?
No; you do not need to understand the Arduino code, only how to upload programs and install libraries. - Is a special USB cable required?
Yes; use a micro USB cable that supports data transfer, not a charge-only cable. - Can I use a different ESP8266 board?
Yes; you can use your favorite ESP8266 microcontroller board, though some may require an FTDI cable to upload programs.
