This project allows you to transmit DHT environmental data from your MKR1000 to your own customizable Google Sheet for data logging.
Things used in this project
Hardware components |
||||||
 |
|
× | 1 | |||
 |
|
× | 1 | |||
 |
|
× | 1 | |||
 |
|
× | 1 | |||
Software apps and online services |
||||||
 |
|
|||||
 |
|
|||||
Story
This project allows you to process data with your MKR1000 and send that data to Google Sheets in the cloud via WiFi. This project can be accomplished without any credit card sign-ups or use of proprietary, black box API’s. For this specific example I use the inexpensive and ubiquitous DHT11 environmental sensor, however you can easily alter the included Arduino code for any sensor or device you like. It’s worthwhile to point out now that this project could easily be combined in a sketch with one of my related project, which uploads DHT11 data to Thingspeak.com for graphical charting.
This is the first of four parts. In the first part of the project you will set up and configure your own Google Sheet to accept your WiFi Data by using the included Google App Script code.
Part 1: Creating and Deploying your Google Sheet
1. Sign up for a free Google email if you don’t have one.
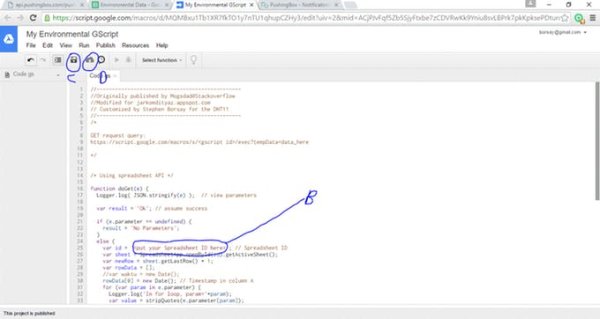
2. log in to your free Google account and create a new “Google Sheet,” this is the spreadsheet which will be populated by our DHT’s sensor values via WiFi. At this point you will need to copy and save your spreadsheets URL key. This key is listed in the URL between the “/d/” and the “/edit” of your new spreadsheet (see blue circle).

3. Name your Spreadsheet something original like “Environmental Data,” now we must create our Google App Script (similar to JavaScript) which will process our data and populate our spreadsheet correctly. To insert our Google App Script we first navigate from our spreadsheet to the Script Editor:
Tools →Script Editor
We will now be on the Google Script Editor page. Now we can name our Gscript something extra-creative like “My Environmental GScript”. At this point we have four things left to do on the Script editor page.
A) Copy and Paste the included Google Script code into the Editor
B) Copy and paste the previously saved spreadsheet URL key (step 2) into the correct line in the Google Script code (between the quotes) where it says:
var id = ' '; // Spreadsheet IDC) Save the script: File→Save All
D) Deploy as a web App: Publish-→ Deploy as web App…
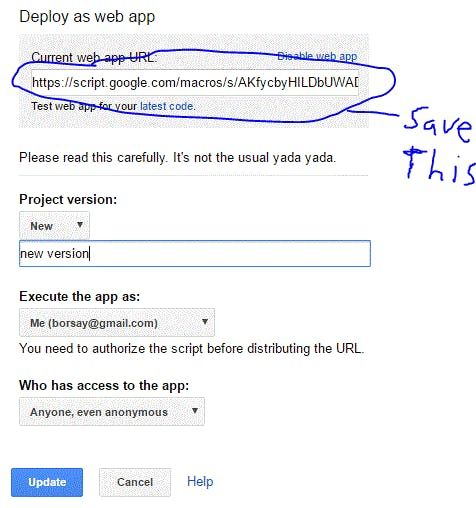
4. Our final Step for setting up our Google sheet will involve configuring the Web deployment parameters. It is important you set all these fields correctly. If you don’t set all four fields exactly your spreadsheet won’t work properly.
Field 1) Copy and Save the “Current web app URL:“ which has just been generated, we will need this later when we configure our API in PushingBox.
Field 2) Save a project version as “new” on each iteration, it’s important to note that if you don’t make a new project version for each script revision you make (if you decide to make any revisions), your script revisions won’t be updated on the web. This is counter-intuitive, and easy to neglect, but this is currently how Google has this system configured.
Field 3) “Execute the app as:“ set this to “me(your GMail here)”.
Field 4) “Who has access to the app: “ set this to “anyone, even anonymous.”
Part 2: Configuring PushingBox
Pushingbox.com serves as as simple, free, and easy API middleman in allowing our DHT data to be palatable to Google Sheets. The need for using the PushingBox API intermediary is to turn our HTTP transmitted data into Google compliant HTTPS encrypted data. We could attempt to make a non-trivial encryption algorithm to satisfy the standard requirement but using PushingBox is easier, and we are given up to 1,000 requests a day for free. In addition we don’t have to deal with any “Black Box” API’s in which we can input our own parameters, but then get little control over customization, and no real idea of how the function actually works. Below are the steps for configuring Pushingbox to work with our data:
1. Create a PushingBox account using your Gmail.
2. At the top click on “My Services”
3. While now in “My Services” go to the “Add a service” box and click on “Add a service”.
4. The service you will want to create is the last item on the list of services and is called: ”CustomURL, Set your own service !”. Now select this CustomUrl service.
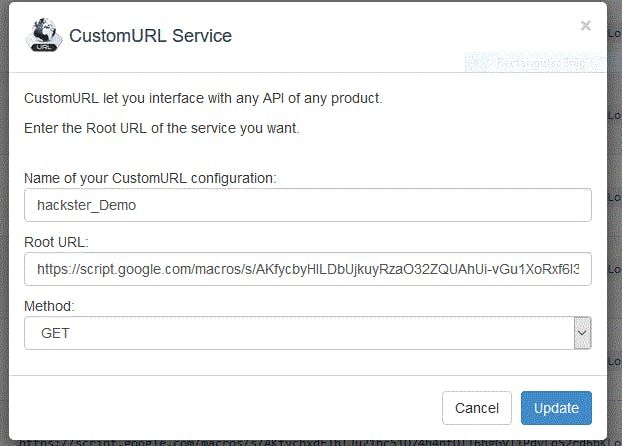
5. A box will open up and ask for three items. Fill them out as below, then hit submit
Name of your CustomURL configuration:
Root URL: This url will start with https://script.google.com… as this is your Google Script address saved from Part 1
Method:
6. After submitting your service you must now create a scenario for the service. To do this select “My Scenarios” at the top of the page.
7. Enter an appropriate name for your scenario in the “Create a scenario or add a device” box. After you name your service click the “add” button to the right.
8. Now it will ask to “Add an action for your scenario” You should now choose the “Add an action to this service” button listed next to the service name you created in the previous step. This assigns your new scenario to your new service.
9. A data box will open asking you for your “Get” or “Post” method (we use the Get method although this seems counter-intuitive). For recording all our DHT data (five data points) into your Google sheet you need to link your variable names listed in your Google App Script to the names listed in our Arduino sketch. Formatting the names correctly in the Pushingbox API will accomplish this linking task. Copy and paste the following string into your box.
?humidityData=$humidityDataamp;celData=$celDataamp;fehrData=$fehrData$ &hicData=$hicDataamp;hifData=$hifData$ Note: Statement begins with ” ? ” to indicate “GET”.
The result should look like as follows, but with your own scenario name and Device ID number:

Make sure to copy your “DeviceID” string, you will need it for both preliminary testing in the next step, and later for the Arduino Sketch in Part 4.
3. Testing The API
Before we move on to the last steep, in which we program the MKR1000 to send our DHT’s data through the web, it would be helpful to test that everything we have done thus far is correct. If we wait to complete the hardware portion then the cause of any errors may be more difficult to track down. Fortunately we have a simple method of testing our code so far. We can just directly enter some hard-coded pseudo-data into our web browsers address bar and check that our Google sheet is being updated correctly. Here is an example of what you can copy and paste into your browsers address bar.
If you like you can even re-enter new fake data with different values for subsequent rows, however remember, you only have a 1,000 requests per day from Pushingbox so don’t go crazy! If this procedure did not update your spreadsheet then go back and review Parts 1 -3 of this instructional for errors before attempting Part 4.
Part 4
After confirming you were able to push some hard-coded pseudo-data directly from your browser onto your Google Sheet you are now ready for the next step which involves sending data directly from the MKR1000 to Google Sheets via Pushingbox over WiFi. Before you can upload and run the included Arduino sketch to the MKR1000 you must complete the following three steps.
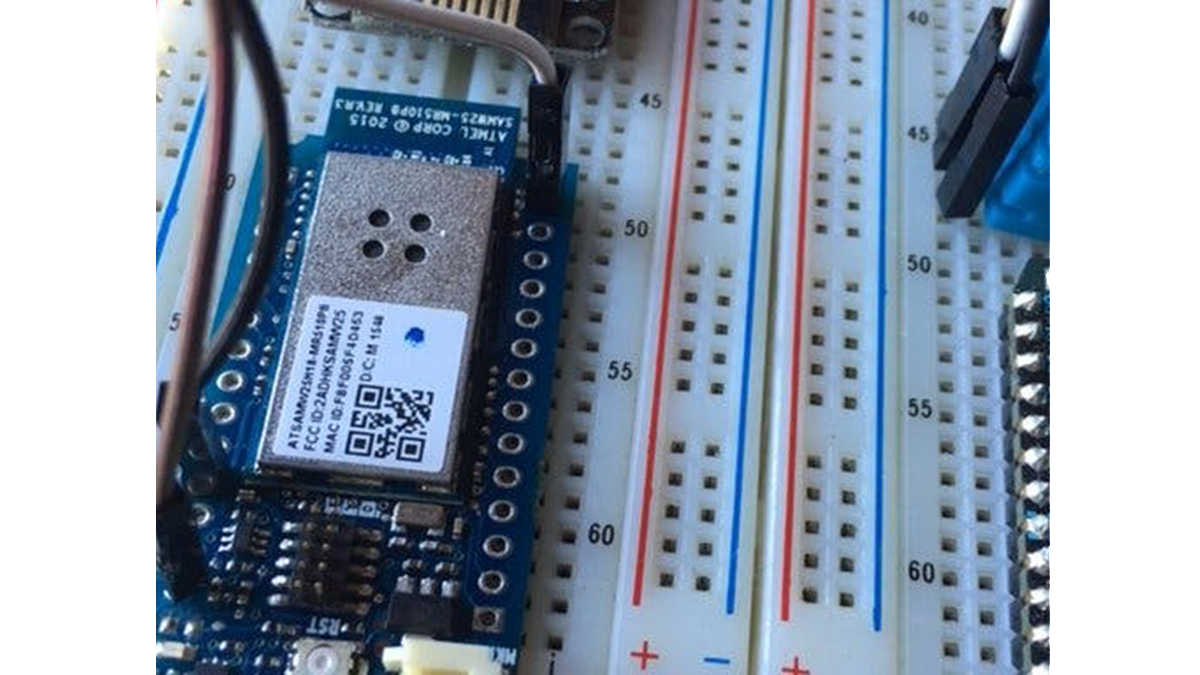
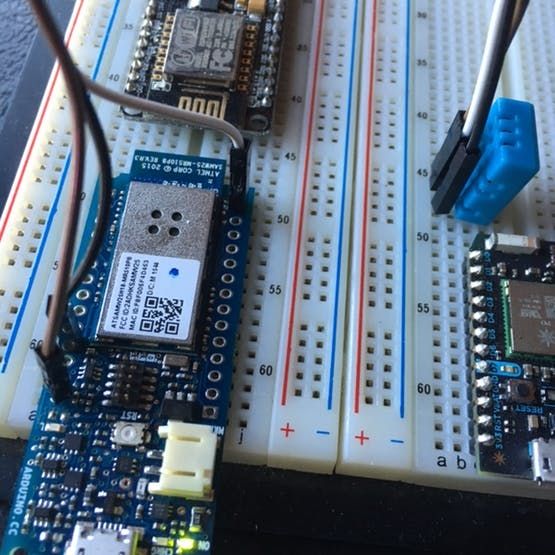
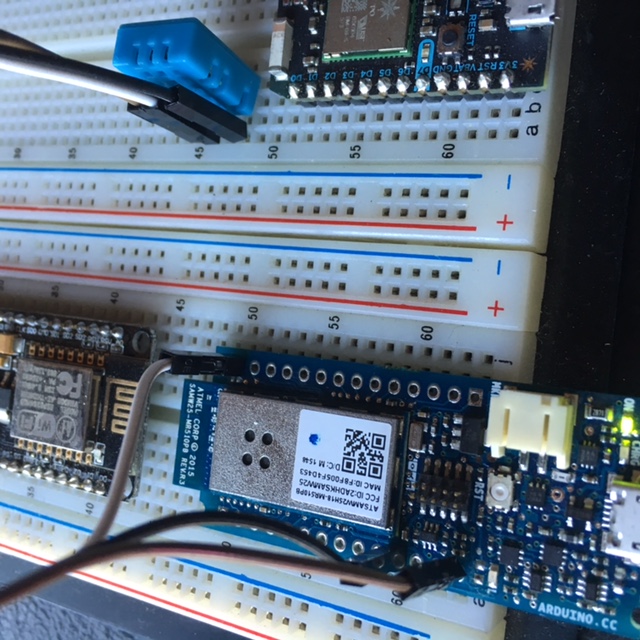
Hardware
1. Wiring the MKR1000 to the DHT: This is a simple task, especially if using the MKR1000. I recommend you power the DHT with 5 volts, which is available on the MKR1000, listed as 5v. Supposedly the DHT can work on 3.3v but I haven’t found the DHT readings reliable at the lower voltage. You have the option of using a number of different pins for inputting the data from the DHT to the MKR1000, but in my sketch I use Pin 5 the which maps to Pin D5 on the MKR1000 on the top of the board.
Software(1)
2. There are a few steps to setting up your Arduino IDE to work with your MKR1000. These steps include downloading two libraries and configuring the Arduino IDE (1.6.4 or later) with the correct MRK1000 Board package (Tools–>Board–>Boards Manager). Many of you will have already installed all the software you need, for those that have not, below are links to retrieve the needed libraries and the MKR1000 board support package. Also note I had to use a previous version of the MKR1000 Board package as the latest MKR1000 board support package did not work correctly. I’m hoping this problem has been resolved by the time you read this.
https://www.arduino.cc/en/Reference/WiFi101
The two required libraries for the sketch:
Software(2)
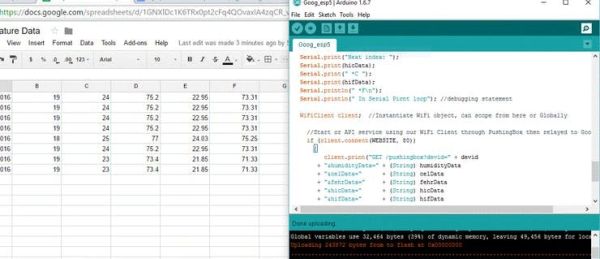
3. You are now ready for the final step of the project, you need to copy and paste the included Arduino sketch, customize it for your device, and then upload the sketch onto your MKR1000. The sketch also relays serial output at 9600 baud so you can monitor the data getting sent via WiFi. The three fields on the Arduino sketch you must customize are:
A) Your WiFi name
B) Your WiFi Password
C) Your Pushing box Device ID (devid)
That’s it, you’re done! If everything was completed correctly your output will look something like the picture below:
Thanks to all the people who built the majority of the software components this project was built upon. I listed their names in the code comments for proper attribution. Please feel free to use whatever pieces of this project you need to create your own magic.
-SDB
Custom parts and enclosures
Source : Send MKR1000 Data to Google Sheets