Summary of Real VO2Max–Measure Your Athletic Potential
This article describes building a low-cost, portable, 3D‑printed VO2Max measuring device using a snorkel-style mouthpiece, Venturi flow sensor, and commercial O2 and CO2 sensors. It covers parts, 3D printing, wiring, assembly, programming the ESP32-based controller to compute VO2Max from measured volumes and gas concentrations, testing, and usage for sports training. The device aims for reasonable accuracy (~±8% flow) at about $150 cost and can output data via Bluetooth/WiFi.
Parts used in the Real VO2Max--Measure Your Athletic Potential:
- SDP816-125PA Pressure Sensor, CMOSens®, 125 Pa, Analogue, Differential
- TTGO T-Display ESP32 CP2104 WiFi bluetooth Module 1.14 Inch LCD Development Board
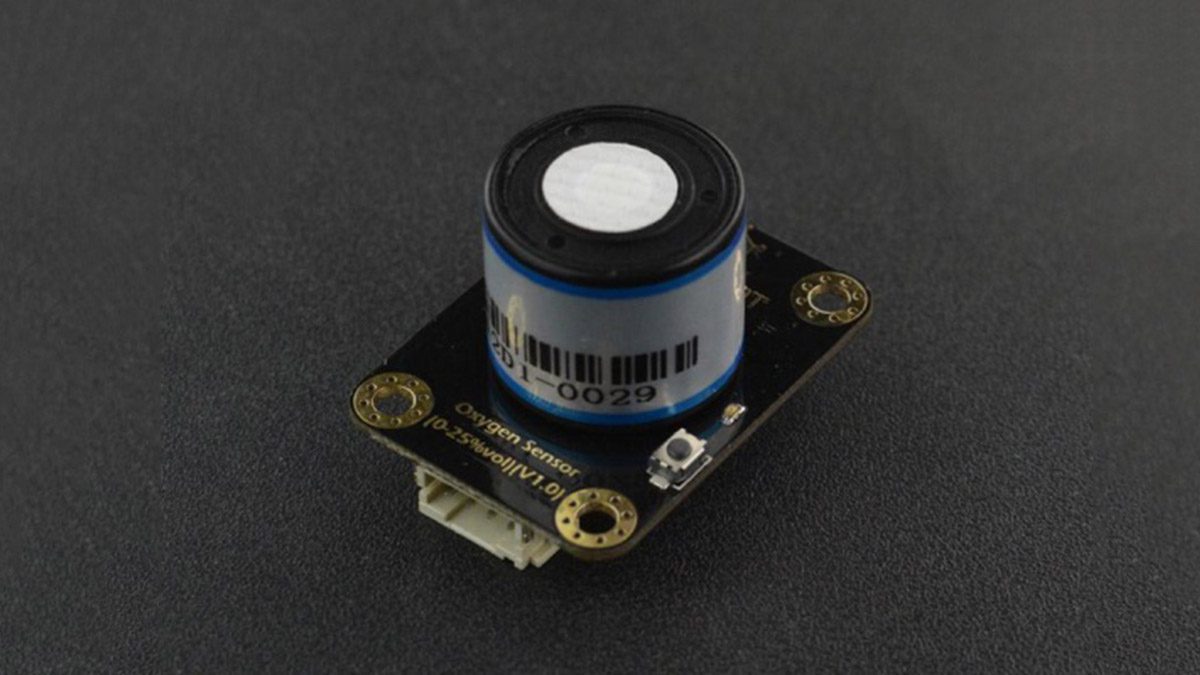
- Gravity I2C Oxygen Sensor (DFRobot)
- SCD30 CO2, Temperature, Humidity Sensor
- Lipobattery 600 mAh (JST connector)
- On/off Switch
- Connector cables (I2C and wiring)
- Dead snorkel mouthpiece (for valves and tubing)
- Silicone film high temp thin rubber sheet (valve discs)
- 3D printed Venturi tower and snorkel housing parts
- M3 screws and M3 heat nuts
- Plastic aquarium tubing (two sections)
- Superglue, hot glue, and E6000 adhesive
- Optional larger battery or USB-C power connection
VO2Max is an interesting concept that proposes that there is a natural limited ability to extract Oxygen nutrient out of the air and consume it. It is like the IQ of sports activities–some algorithm that tells you how gifted you are in doing a variety of athletic contests. It was worked on at the beginning of the last century and relied on bags of exhaled air that were carefully measured with arcane gas analysis that have only gotten more complex. The machine needed to measure this is expensive enough that just taking the test costs about $150. It requires a room with strange machines, assistants, masks and treadmills. Or you can just get an Apple watch that “does some math” and puts out a number that’s based on a variety of well regarded tests –“name of a random doctor who correlated the expensive test with some easily measured thing like heart rate while walking”. They always tell you that Lance Armstrong has a very high one and Sled dogs in Alaska have one that twice as high as Lances. It gets lower as you age, females lower than males and seems to have some basis in physiology–it is the amount in cc’s of oxygen gas used in one minute per kg of tissue.
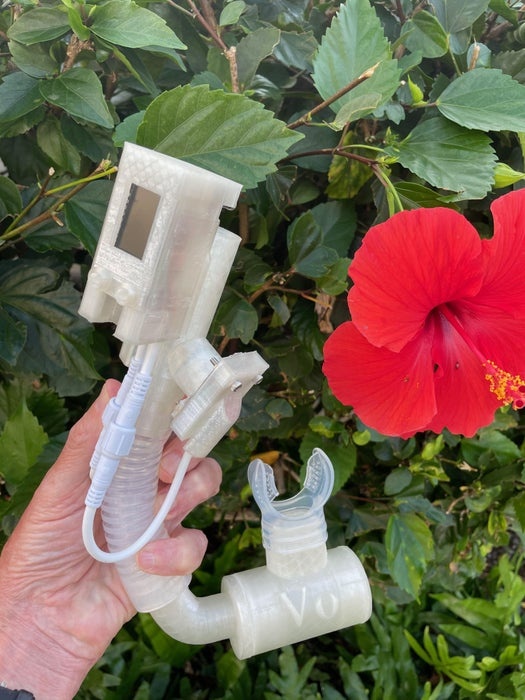
To measure this you actually have to carefully measure the amount of gas going in and out of your body, the level of CO2 and Oxygen in this gas, its humidity and temperature and use a confounding number of formulas to get to this number. (Or just make it up based on shoe size…) This Instructable will enable you to build a 3D printable portable device to do this with reasonable accuracy that costs about $150 and can be used for testing in a variety of sports. It can be Bluetooth/Wifi connected and provide a wealth of information during use. The breathing components can be easily separated from the expensive sensors to limit worries of virus transmission. It could be cheaply offered at health clubs or to individual users to evaluate training progress.
Step 1: Gather Your Materials
The only thing that is expensive in this build are the very fine sensors that are necessary to do the analysis. The heart of the design is based on the https://www.instructables.com/3D-Printed-Spiromete…
spirometer design that measures the volume flow through a tube using this sensor:
1. SDP816-125PA Pressure Sensor, CMOSens®, 125 Pa, Analogue, Differential $30 Newark, Digikey
2. TTGO T-Display ESP32 CP2104 WiFi bluetooth Module 1.14 Inch LCD Development Board $8 Bangood
3. Gravity: I2C Oxygen Sensor $55. DFRobot
4. SCD30 Gas Detection Sensor, Carbon Dioxide, 40000 ppm, 3 % $55
5. Lipobattery 600 Mah $3
6. Switch $1
7. Connector cables $2
8. Dead Snorkel $1
9. Silicone Film High Temp Thin Rubber Sheet Gasket Super Clear Flexible 12×19.7 x1/32 inch
These sensors have been carefully tested for use in this device…there are cheaper but wildly dysfunctional alternatives. I have used different oxygen sensors in the past that required separate ADC and booster boards but found this new one from DFRobot has built in I2C and works very well. (I get no money from no-one)
Step 2: 3D Print It
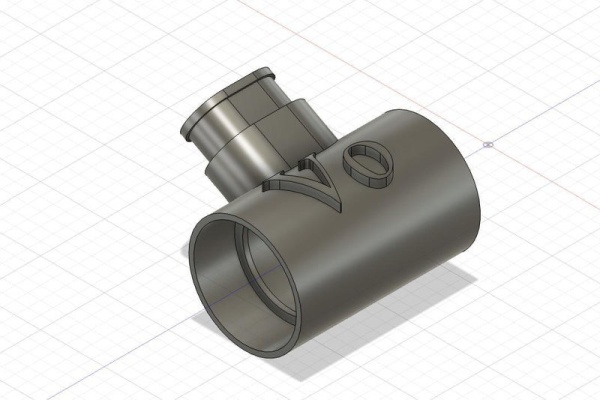
The design is based on previous valved snorkel designs: https://www.instructables.com/3D-Printed-Snorkel/…that utilize one-way valves to prevent the collection of dead air in the snorkel tube. In this case we build a breather apparatus that sucks air in one way and exhausts it through a flexible tube borrowed from a snorkel that connects it to the gas-measuring device. In this way we only measure the exhaled quantity of gas and the level of CO2 and O2 in the exhaled portion. Without the one way valve we would get admixing of the incoming and outgoing flow. The design for the one way valves and their assembly can be found in the above Intstructable. The valve material is soft silicon sheet that is easily cut out with a 3D printed guide.
The Venturi tower is the same design as in the spirometer with extra enclosures for the O2 sensor and the CO2 sensor with built-in covers that make them air-tight and do not interfere with gas laminar flow. The only modification to the computer housing that contains the differential pressure sensor is to enlarge it slightly to accommodate the extra room need for the two I2c connector cables.
Step 3: Wire It

The wiring for this device is very simple. I did a fritzing diagram of it but for the most part it relies on two I2C devices connected together on the same bus( they have different baseline addresses that don’t have to be modified) line with 3v power from the TTGO board and ground. The SDP816-125PA Pressure Sensor has to be connected with its output going to GPIO pin 33. Power and ground are also supplied from the 3v line on the board. The SDA and SCL lines are connected to the GPIO pins 21 and 22. The battery connection is the same as the Spirometer with the tiny JST connector to the TTGO unit with the positive line run through the main push button switch to turn it on and off. To charge the units battery you must of course have the unit turned on. When wiring up the SPD816 unit make sure you GND the OCS pin in the diagram. I used a 600 mah battery but a larger one can be fit in the case. The unit can also be run through the C type connector for power.
Step 4: Build It
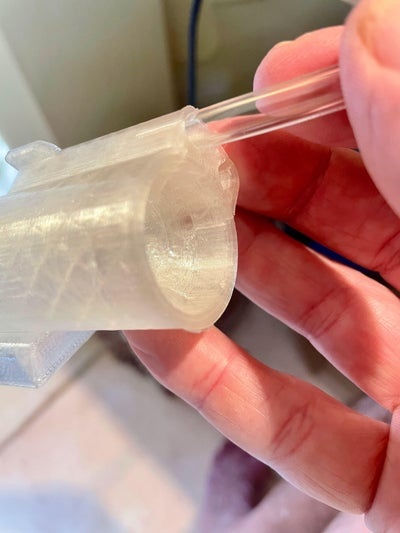
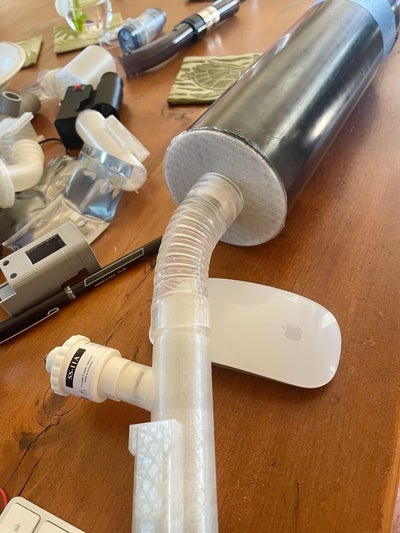
A variety of methods have been used for collecting the exhaled breath for the expensive standard lab units — most involve a strap on mask which controls the breath from nose and mouth. Our build relies on a snorkel mouth breathing unit that makes it more compact. The mouth unit has two valves in it that separates the inhaled from exhaled gas and directs it into the measuring Venturi unit. All the parts for this unit are 3D printed except for the valve discs that must be cut out of thin sheet silicon sheet. A 3D printed disc that is used for cutting the valve discs is also included. The discs are then punched with a central hole to be placed on the valve spindles and a tiny nut is superglued over them to hold them in place. The valve cages are turned so one is input and one is output. The air exit pipe is then super glued on the exit side and the inlet cover disc with holes is glued on the inlet side. Assembly of the computer unit is much like the Spirometer. Two sections of plastic aquarium tubing are fitted into the bottom holes of the unit as far as they will go and then trimmed flush with clippers.M3 heat nuts are placed into the holes in the computer unit and the pressure sensor is screwed into place with M3 20 mm screws. It is then wired to the TTGO unit which is easily fit into its notch in the housing. Some E6000 is used to stabilize it into the housing. Cabling ( 4 wire I2C) to the O2 and CO2 sensors is wired and led through the holes in the top case. The small switch is superglued into place after placement of the battery and wiring. The head of the O2 sensor fits into the round receptacle on the Venturi tube and is held in place with additional heat nuts and M3 screws. A cover fits over the unit and is held in place with additional M3 screws. The CO2 sensor is held in place with a touch of hot-glue and the snap fit cover keeps it airtight. Make sure you have the sensor side facing toward the air chamber.
Step 5: Program It
The program relies on a couple basic sources for doing the computation of VO2 max: https://sites.uni.edu/dolgener/Instrumentation/Rep…
https://www.biopac.com/wp-content/uploads/h19_bsl4…
https://web.cortland.edu/buckenmeyerp/fall2004/lab…
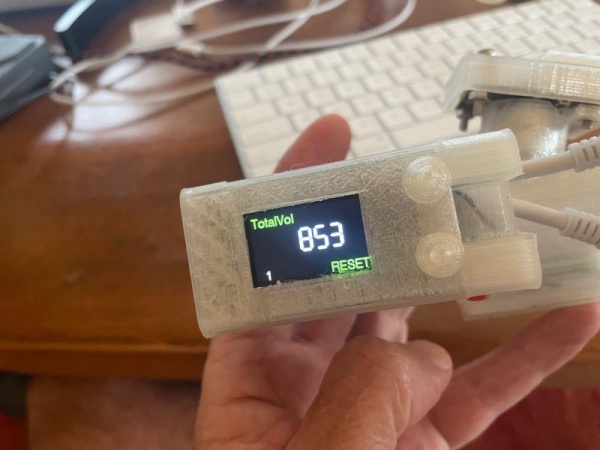
A key concept is that the volume you inhale is not the same as the volume you exhale! It is modified by lung physiology and multiple factors must be calculated to ascertain the true amount on Oxygen you are nibbling on. The software must first take in your weight–this is done by the two buttons cleverly enabled by the TTGO unit– VO2 max is measured in cc/min/KG. Three slots appear on the first of the TFT screen shots and weight is increased by pushing the lower button. The upper button when brought to ground lets you manipulate the next box. This is done in the wtRead() function. Once this is complete a breathing cycle check is initiated to check for the volumeMinute total over 30 seconds of readings. This can be reset with the lower button at any time during the process to restart the 30 seconds count of breathing. A new screen appears with your collected volume so far in the sample and a countdown timer for the 30 seconds. Most commercial machines use a minute but I found it tortuously long if you’re at the end of your breathing limit. In between breaths the oxygen and the co2 levels are checked and placed in a rolling average matrix. Temperature and Humidity are also sampled from the co2 sensor. At the end of the sampling time the goFigure() function calculates the VO2 max and compares it to previous samples and chooses the Max one of course and presents it on the last screen. The volume of expired gas is compensated based on the corrected volumes of expired CO2 and O2 and the temperature, pressure and humidity. I did not include an atmospheric sensor in the unit and used sea level. Bluetooth, Wifi and App development could easily be deployed to make continuous output to TV screens in a club or your phone display CO2, O2, Gas Volumes and Calories Burned.
Step 6: Testing
Most commercial units like this are tested using standardized gas mixtures to check the accuracy of their sensors. I did not. I was more concerned with the accuracy of the volume measurements from the Venturi tube. When building the spirometer I checked it on a rather gross flow meter (15 L/ Min) and found it pretty accurate, but commercial labs standardized their volume calculations with a large 1 liter syringe of air. I built one out of PVC and 3D printed parts and found the accuracy to be about +/- 8% which I was impressed with. I did not spring for a “Real” VO2 Max test to compare my results on the two machines….
Step 7: Using It
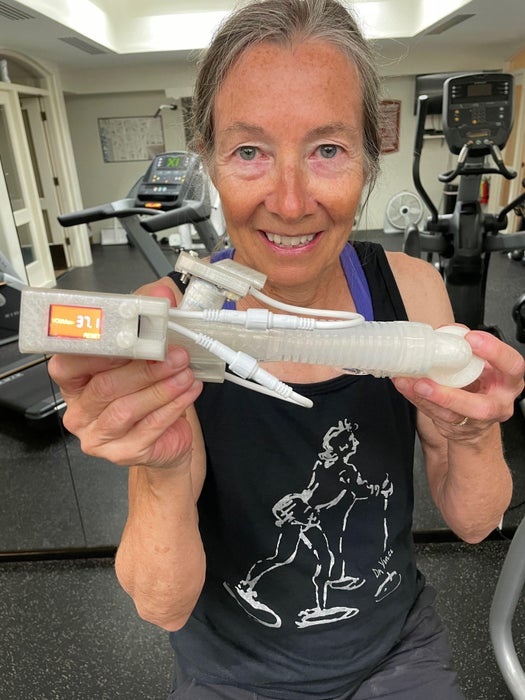
The principal is simple–you’re an engine that burns oxygen and you want to rev the engine until red line and then measure how much oxygen your burning per minute per kilogram. The simplicity of this portable device is that you can pursue your favorite overtaxing sport — running, biking, extreme tennis–and use this instrument when your about to burst and check your VO2Max. You can hang this device from a set of safety glasses if more convenient but I found it was easiest to just grab it and blow for 30 seconds. There are garbage cans of relevant material on VO2Max significance which I won’t drift into but like many other things in life you may have been gifted with a great one or cursed like the rest of us.
Source: Real VO2Max–Measure Your Athletic Potential
- What is the purpose of this project?
To build a low-cost, portable 3D‑printed device to measure VO2Max using flow, O2, and CO2 sensors. - How much does the build cost approximately?
About $150, most cost coming from the gas sensors. - What sensors are required for gas measurements?
An I2C Oxygen sensor (DFRobot Gravity) and an SCD30 CO2/temperature/humidity sensor. - How is exhaled air isolated for measurement?
Using a snorkel mouthpiece with two one-way valves directing exhaled air into a Venturi flow tube. - What microcontroller/display is used?
TTGO T-Display ESP32 CP2104 1.14 inch LCD development board. - How is volume flow measured?
With an SDP816-125PA differential pressure sensor in a Venturi spirometer design. - How long is the sampling period for breath data?
The device samples breaths over 30 seconds for the testing routine. - How accurate were the volume measurements during testing?
Using a homemade 1 liter syringe standard, volume accuracy was about ±8%. - Can the device transmit data to other devices?
Yes, Bluetooth and WiFi are available via the ESP32 and could be extended with apps. - Does the device measure atmospheric pressure?
No, the article states it did not include an atmospheric sensor and used sea level assumptions.