
Summary of MKR1000 Unboxing and Testing (7 Steps)
The author successfully set up an Arduino MKR1000 board on Windows, addressing the lack of official documentation. The process involved manually installing drivers from the Arduino GitHub repository via Device Manager and configuring the Arduino IDE by installing the specific MKR1000 library. Finally, a custom C++ code was written to test the onboard LED by blinking it sequentially across available pins.
Parts used in the Arduino MKR1000 Setup:
- Arduino MKR1000
- Windows PC
- USB Driver (from Arduino GitHub repository)
- Arduino IDE (version 1.6.7 or higher)
- mkR1000 Library
The first run and the first troubles with the Arduino MKR 1000. FAQ.

Things used in this project
Hardware components |
||||||
 |
|
× | 1 | |||
Software apps and online services |
||||||
 |
|
|||||
Story


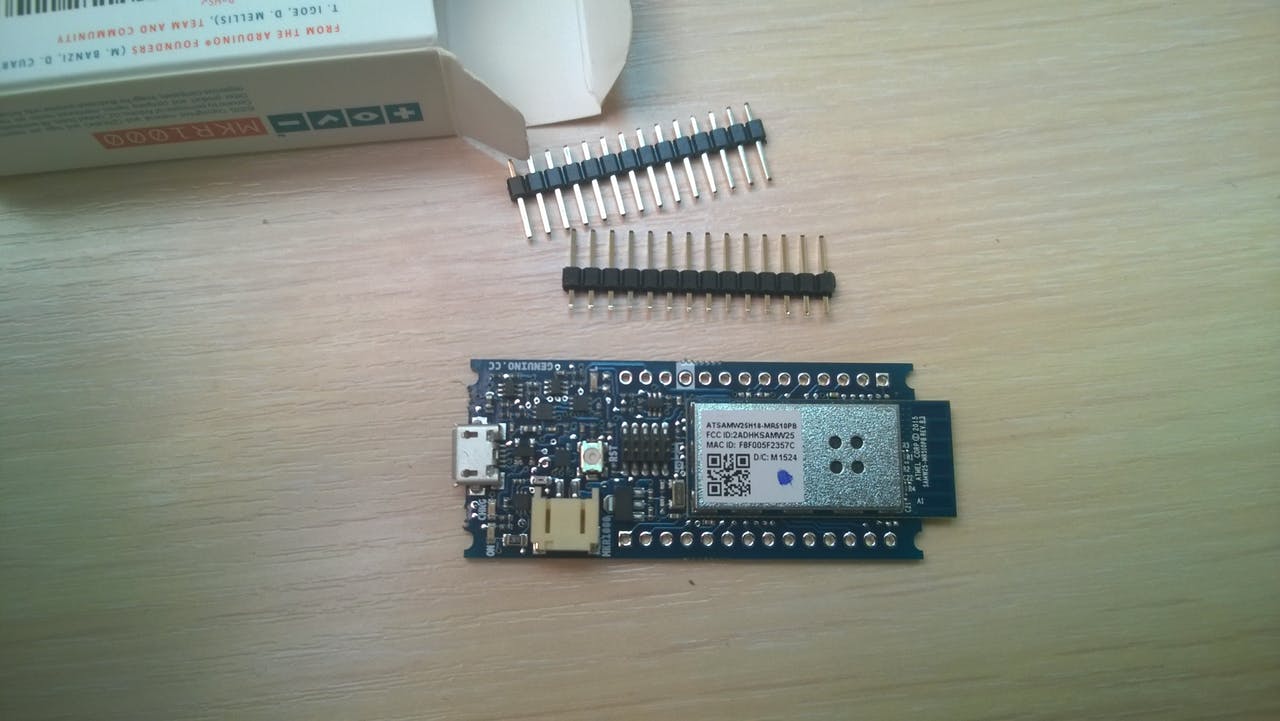
Finally I’ve got the board Genuino/Arduino MKR1000. It was well packed and fast shipped. But I’ve not found any instructions or guides even at the internet. So, I’ve decided to start at random with my Windows PC.
First, I’ve plugged in and seen that it requires some USB-driver:

Second, I’ve decided to let my system find this driver into the Arduino opensource repository. So, I’ve navigated to https://github.com/arduino/Arduino and downloaded all this repository as a single .ZIP file:

After I got it, I unpacked it and started installation of the driver.
Step 3: Device manager -> “Other Devices” -> Unknown Device -> Right click “Update Driver”

Step 4: Choose “Browse my Computer…” -> Point it under the folder you just unzipped “\arduino-master” including subfolders.

Step 5: After that your board should appear under “ports” section like this:

Step 6: Next, I must prepare the IDE for this type of board. So, I’ve just started my Arduino IDE (at least 1.6.7 release) and in the library manager (sketch -> include library -> manage libraries) I’ve searched for the “mkr1000” string.

I’ve seen the only one available library and installed it.
That’s it!
And of course the first program to test the board and to define the onboard LED pin (see below). The number of blinks is equals to the LEDs port number.
So, in my board the LED is on the 6th pin.
Enjoy your MKR1000!
Code
Source : MKR1000 Unboxing and Testing (7 Steps)
- How do I install the USB driver for the MKR1000?
Navigate to the Arduino GitHub repository, download the ZIP file, unzip it, and use Device Manager to browse your computer for the driver folder. - What should I do if the device appears as an Unknown Device?
Go to Device Manager, find the Unknown Device under Other Devices, right-click, and select Update Driver. - Which Arduino IDE version is required?
You need at least the 1.6.7 release of the Arduino IDE. - How do I install the necessary library for the board?
Open the library manager in the IDE, search for the string mkr1000, and install the only available library found. - What does the provided code do?
The code tests the board by defining the onboard LED pin and blinking it sequentially across all IO ports. - On which pin is the onboard LED located in this project?
In this specific board configuration, the LED is located on the 6th pin. - How many IO ports are configured as output in the setup?
The setup loop sets all IO ports from 0 to 14 as OUTPUT pins. - What happens when the LED pin counter exceeds 14?
The code resets the _ledPin variable back to 0 to start the sequence again.
