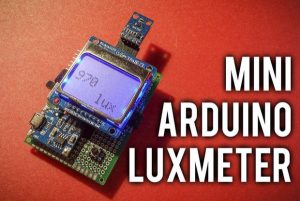
I needed a Lux meter for testing flashlights. There are some good lux meters available in the $15-25 range, but shipping always takes a long time and I needed it now. That’s when I realized that I had an unused BH1750 light meter module laying around, which I bought some time ago but never used it. So I grabbed an Arduino, a Nokia 5110 LCD, wired everything up on a breadboard and had a functioning lux meter within a few hours. To make it a bit more fancy, I added some graphing functionality and made the LCD backlight switch on/off depending on the light level.
Finally I decided to make this a small handheld, battery-powered unit and to write an Instructable about it. So, let’s get into it!
Step 1: Parts List
For this project we will need the following parts:
Arduino Pro Mini 3.3V and an USB <> Serial converter (a.k.a. FTDI) for programming. Arduino Nano could be used as well, but has a slightly larger footprint.
Nokia 5110/3310 LCD module. Note that there seem to be two versions of this module, one with a blue and one with a red PCB. I used the blue version. They should be functionally identical, but their pinouts are different, so if you use the red type, you will need to adjust your wiring or change the pins in the code.
TP4056 LiIon charger module – I recommend the version with battery protection circuit, just to be sure.
Lithium battery – I used an old 800mAh battery from some Samsung phone.
1 slide switch (SPST) – ideally a 90° type such as this one and a push button.
A prototype PCB, I used a 5x7cm double sided type.
Optional, if you want the backlight control: a PNP transistor (for example BC327 or BC557), a 1K resistor and a 10K resistor.
You will also need some male and female pin headers for connecting the LCD and of course some wire to make all the connections.
The total cost depends on how many components do you already have at hand and should be under $15. I already had all components in my collection, so the build was essentially free for me.
Read more: Mini Arduino Lux Meter

