As open-source hardware users and makers, we love playing with new chips, boards and tools. And there is one chip which is quite popular these days: the CC3000 WiFi chip from TI. This chip comes with many promises: cheap (around $10), easy to use, low-power … It was featured in many articles around the web, but somehow it was quite hard to use with Arduino as there was no breakout board or library available.
Luckily, Adafruit solved that for us with a nice breakout board and a working library for Arduino. In this article, I will show you how to use this chip for home automation purposes. Remember that weather station project? We are going to do the same: measure the temperature and the humidity. But this time we won’t display the information on an LCD screen. Instead, we will transmit the data wirelessly via WiFi to your computer and display it there. Excited ? Let’s get started!
Hardware requirements
The whole project is based on the Arduino platform, so of course you will need an Arduino board. I really recommend using the Arduino Uno board for this project, as it is the only board that is currently compatible with the CC3000 library at the time this article was written.
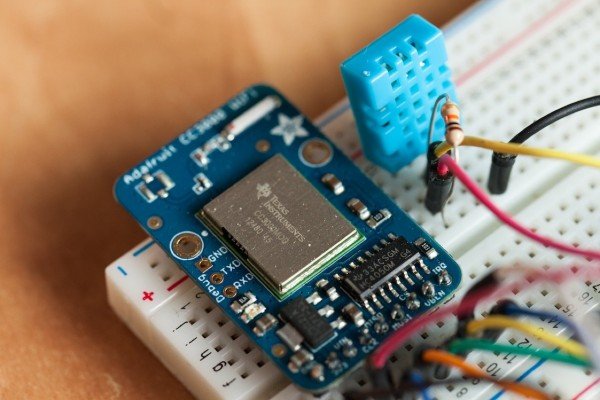
Then, you need the famous CC3000 chip. There are also many alternatives to do that. What I recommend is using the Adafruit CC3000 breakout board, which is the only one I tested that worked without problem. It is nice and compact, has voltage regulators onboard, as well as an onboard antenna. I tried the official TI CC3000 board, but it never worked properly, and you have the use level shifters as well (the CC3000 works with 3.3V, and the Arduino Uno with 5V). The other alternative is to make your own breakout board, there are many PCB layout available online.
You also need a DHT temperature & humidity sensor. I used the DHT11 sensor, but this project would also work fine with a DHT22, you would just have one line of code to change. You will also need a 10K Ohm resistor to be used with the DHT sensor.
For more detail: Make a WiFi Weather Station With Arduino