
Summary of Make A LCD Shifter for Arduino
This article details a project to simplify controlling a 16x2 LCD using an IC 74HC595 with Arduino by creating and installing two custom libraries: "ShiftOut" and a modified "Lcd". The guide covers library installation, code writing in the Arduino IDE, and hardware connections. The example sketch displays the seconds elapsed since the Arduino restarts on the LCD screen.
Parts used in the Make A LCD Shifter for Arduino:
- Arduino
- Arduino IDE installed
- LCD (16x2)
- One IC 74HC595
- One 4.7Kohm resistor or similar
- One 104 capacitor
- Wires
The original idea was to create a library that simplify the use of IC 74HC595 between Arduino and other hardware. In this Instructable I will share this to you using as example the control of a 16×2 LCD.
The example will show on the LCD the seconds that has passed since Arduino was restarted.
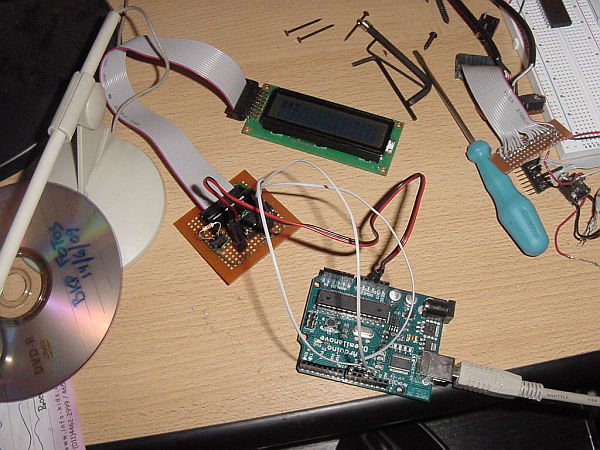
I hope it will be useful to you.
Step 1: Place the Library under Arduino Folder
I’ve named the library “ShiftOut”. It goes under %arduino-directory%/hardware/libraries
This one is the library that I’ve programmed. Comments are welcome.
 ShiftOut.zip3 KB
Step 2: LCD Library
The second library needed is the one that communicate to the LCD. I’ve used this one and not the one that came with Arduino because it’s an initialization bug. It’s based on www.slashdev.ca/arduino-lcd-library/ and has the necessary changes to integrate the ShiftOut Library that I made.
This must be uncompressed under %arduino-directory%/hardware/libraries too.
Lcd.zip251 KBStep 3: Open Arduino IDE
Now w it’s time to write the code. Open Arduino IDE and write this:
#include <Lcd.h>
#include <ShiftOut.h>
ShiftOut sOut(8, 12, 11, 1);
Lcd lcd = Lcd(16, FUNCTION_4BIT | FUNCTION_2LINE | FUNCTION_5x11, &sOut);
void setup()
{
lcd.set_ctrl_pins(CTRLPINS(1,2,3)); // RS->1, RW->2, E->3
lcd.set_data_pins(_4PINS(4,5,6,7)); // D4->4, D5->5, D6->6, D7->7
lcd.setup();
lcd.clear();
}
void loop()
{
lcd.home();
lcd.print((long)millis() / 1000);
}
This simple sketch shows on the LCD the seconds that has passed since Arduino was restarted.
Step 4: Compilation
It’s important that the libraries are copied before Arduino IDE is open. Otherwise the compilation could fail.
If everything was OK, you could connect Arduino to a 74HC595 and this one to a LCD following the schematic images diagrammed using Fritzing.
The connection should be as follow:
Major Components in Project
– Arduino
– Arduino IDE installed
– LCD
– One IC 74HC595
– One 4.7Kohm resistor or similar
– One “104” capacitor
– Wires!
For more detail: Make A LCD Shifter for Arduino
- What is the primary purpose of this project?
The goal is to create a library that simplifies the use of IC 74HC595 between Arduino and other hardware. - How should the ShiftOut library be installed?
It must be placed under the %arduino-directory%/hardware/libraries folder. - Why was a specific LCD library chosen over the standard one?
The author chose a library from slashdev.ca because the standard one had an initialization bug. - Can the compilation fail if the order of operations is wrong?
Yes, it is important that the libraries are copied before opening the Arduino IDE to avoid compilation failure. - What does the example sketch display on the LCD?
The sketch shows the seconds that have passed since the Arduino was restarted. - Which pins are assigned to the RS, RW, and E control lines?
The code sets RS to pin 1, RW to pin 2, and E to pin 3. - What is the role of the 74HC595 IC in this setup?
The IC 74HC595 acts as a shifter to communicate with the LCD using fewer Arduino pins. - Are schematic diagrams provided for the connections?
Yes, the article mentions connection diagrams diagrammed using Fritzing.
