
Summary of Cheap wireless transmission between two Arduinos with Infrared
This article describes a low-cost, wireless data transmission project between two Arduinos using Infrared (IR) technology instead of radio modules. The system utilizes an IR LED for the emitter and a 38 kHz IR receiver module for the receiver, enabling unidirectional communication while maintaining line-of-sight. A DHT11 sensor is used to transmit temperature and humidity data from one board to another, which then forwards it to a computer.
Parts used in the Wireless Arduino IR Transmission:
- Two Arduino cards (Uno and Mega)
- Computer with Arduino software
- IR LED with a 100 ohms resistor
- 38 kHz IR receiver module
- Wires
- Breadboard
- DHT11 temperature and humidity sensor
Hi all,
For a project, I was looking for a cheap solution to send data from an Arduino to an other one. The serial port was already taken, and my transmission (unidirectional) needed to be wireless.
My researches has brought me to discover these kinds of radio modules (433MHz). They were available on the net, but I was still looking for something else.
So, I remember that I have in my stock an IR receiver with a small remote control. I also had an IR led. After some research on the web for libraries, I used an existing one to create a small and easy IR protocol to send data between my two cards.
Of course, the range and the baud rate are limited, and you must keep the cards in “eye contact”.
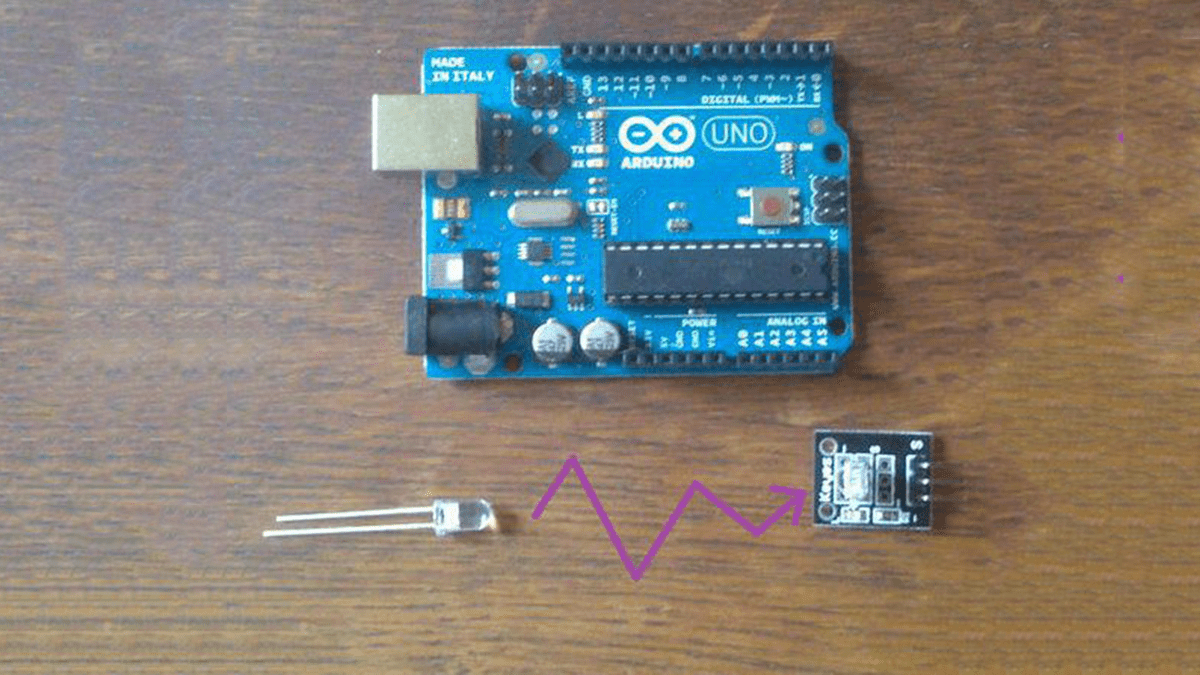
Here is a step by step presentation of this system. In my example, a temperature and humidity sensor will be used for data transmission (DTH11). The data will be sent to the other Arduino and sent to a computer. Feel free to use and modify this example for your own projects !
Thanks for the 10k views !
Step 1: Materials list
Ok, you will need:
• two Arduino cards (uno, mega…). I’ll use an Uno and a Mega in this project.
• a computer with the Arduino software
• an IR led, with a 100 ohms resistor
• a 38 kHz receiver module
• wires
• breadboard, or similar
• In my case, a DTH11 temperature and humidity sensor. If you don’t have it, you can simply sent a demo string. (see the code in the next step)
This site was a good source of information. I encourage you to read it ! The main IR libraries are here. Please download and install them in the Arduino “Libraries” folder. (Should be in “My documents / Arduino”)
The libraries for the temperature and humidity sensor are here.
Step 2: Wiring the emitter
The emitter is easy to build. You just need to wire a led with a 100 ohms resistor, and use an other pin to connect the sensor.
The Arduino pin used for the led is the 3. (See the attached pics). Watch out, the Fritzing illustration doesn’t fit my real module. If you have the naked chip, you will need more parts ! See the DTH11 datasheet.
If (like me) you are not sure about the LED orientation, or if you don’t know if it works correctly, temporally connect the DATA wire to the +5v pin on the Arduino (to turn the LED on). Then, check with a mobile phone camera if the led is emitting (you should see a low purple colour, see pics)
The temperature sensor is wired this way:
• Vcc : to the +5v pin of the Arduino
• Dnd : to a GND pin
• Data : arduino pin 2
If you don’t have this sensor, you can try the transmission by sending a string. Just check the code.
The code is attached. Compile it and upload in on the card.
 TransmissionIR_EmetteurTemperature.ino
Step 3: Wiring the receiver
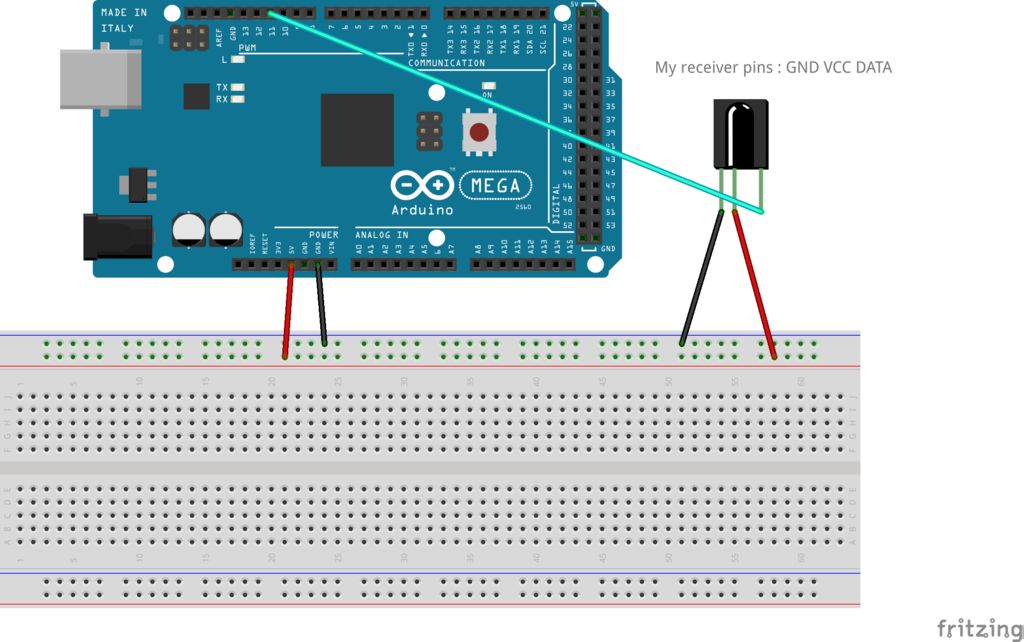
Ok, for the receiver, I have a ready-made reception module (38 kHz). It was used with a small remote control. Just connect it to the second Arduino following:
• Gnd to GND
• Vcc to Arduino Vcc (+5v)
• Data : Arduino pin 11
Watch out, again the module shown in the illustration is not the same as my module. if you have a naked receiver, you must add parts !
For more detail: Cheap wireless transmission between two Arduinos with Infrared
- Why did the author choose infrared over radio modules?
The author needed a cheap solution because the serial port was already taken and required wireless unidirectional transmission. - What are the limitations of this infrared transmission system?
The range and baud rate are limited, and the cards must be kept in eye contact. - Which Arduino pin connects to the IR LED in the emitter circuit?
The Arduino pin used for the LED is pin 3. - How can you verify if the IR LED is emitting light?
Temporarily connect the DATA wire to the +5v pin and check with a mobile phone camera for a low purple color. - What pins does the DHT11 sensor connect to on the Arduino?
Vcc connects to +5v, Dnd connects to GND, and Data connects to Arduino pin 2. - Which pin on the receiving Arduino connects to the IR receiver module?
The Data pin of the receiver module connects to Arduino pin 11. - Can this project work without a DHT11 sensor?
Yes, you can simply send a demo string by checking the provided code.
