Summary of ATTiny powered Arduino Projects
This article explains how to replace a standard Arduino Uno with a compact ATTiny84 microcontroller for simple projects, reducing size and cost. It details the process of programming the ATTiny using an Arduino as an In-System Programmer (ISP) via specific IDE setup steps and provides the necessary circuit connections between the two chips.
Parts used in the ATTiny powered Arduino Project:
- Arduino Uno
- ATTiny44
- ATTiny45
- ATTiny84
- ATTiny85
- 10microFarad capacitor
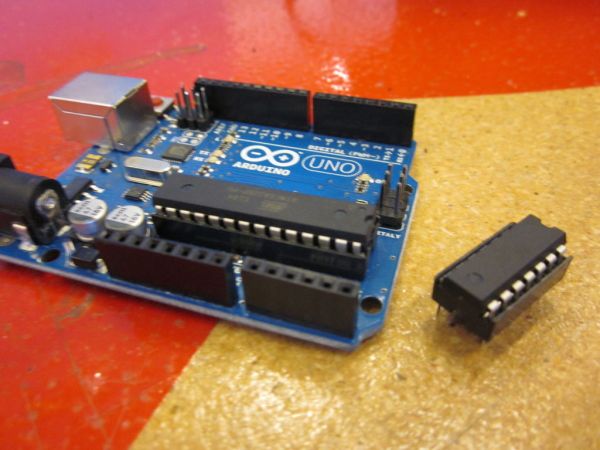
Arduino is a great platform. No question. But what if I told you that you could take your entire board and compact it into tiny package. And I mean really small. The chip in the picture is an ATTiny84, and that is the big version. So if your project only needs a few pins and isn’t very complicated, this little chip and do it in a fraction of the space! Not only that, but each of these ATTiny chips are only $2 a piece.
Just another thing I made at TechShop.
Step 1: Materials
You will need:
An arduino uno
One of the following. All of these are 8bit microcontrollers as apposed to the 32bit chips in the standard Arduino platform. Whatever fits your needs. (I’m using an ATTiny84)
ATTiny44 – 4kb flash storage & 14pins
ATTiny45 – 4kb flash storage & 8pins
ATTiny84 – 8kb flash storage & 14pins
ATTiny85 – 8kb flash storage & 8pins
10microFarad capacitor
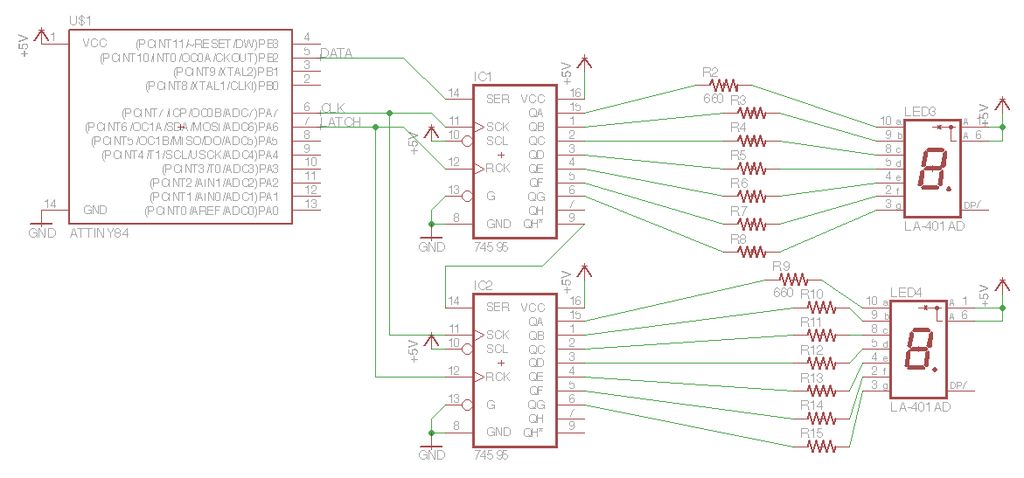
For the display, see this instructable
http://www.instructables.com/id/Arduino-powered-7-seg-LED-display-using-Shift-Regi/
Step 2: Setting up the ATTiny programmer
There are a couple of important steps to getting the Arduino to talk to the ATTiny. Essentially, we need to turn the arduino into an ISP or In System Programmer.
Make sure that you are using at least Arduino 1.0 IDE. This will not work on older versions.
Next download this file from github: https://github.com/damellis/attiny/tree/Arduino1
Now locate your arduino sketch folder. If it does not have the folder “hardware” there, create it now.
Put the attiny folder in that directory. It should look like Documents->Arduino->hardware->attiny
Reset the arduino program. Now when you open Tools->Board it should have the ATTiny boards as well.
Step 3: The Circuit
Now we need to connect the ATTiny to the arduino.
On the Uno the connections are like this
Uno ATTiny
Pin13 -> SCK
Pin12 -> MISO
Pin11 -> MOSI
Pin10 -> RESET
And a 10microFarad cap across the Reset on the Uno to prevent it from just resting the bootloader immediately.
ATTiny84
For more detail: ATTiny powered Arduino Projects
- Why use an ATTiny chip instead of a standard Arduino?
You can compact the entire board into a tiny package at a fraction of the space and cost. - What is the price of each ATTiny chip?
Each of these ATTiny chips costs only $2 a piece. - Which Arduino IDE version is required for this project?
You must use at least Arduino 1.0 IDE because older versions will not work. - How do you add support for ATTiny boards in the IDE?
Download the attiny folder from github and place it in your arduino sketch hardware directory. - What are the pin connections between the Uno and the ATTiny?
Pin13 connects to SCK, Pin12 to MISO, Pin11 to MOSI, and Pin10 to RESET. - What is the purpose of the 10microFarad capacitor?
The capacitor goes across the Reset on the Uno to prevent it from resetting the bootloader immediately. - Can I use other ATTiny models besides the ATTiny84?
Yes, you can use ATTiny44, ATTiny45, or ATTiny85 depending on your pin and storage needs.