Summary of Arduino Nokia 5110 Tutorial #2- Displaying Customized Graphics
This tutorial expands on a previous guide by demonstrating how to display customized graphics, such as brand logos, on a Nokia 5110 LCD using an Arduino. It details the hardware setup, including the PCD8544 controller and low power consumption, alongside software tools like Microsoft Paint and LCD Assistant for image conversion. The guide provides schematics for connecting the display via two parallel ports and emphasizes using a 3.3V supply with caution for the backlight due to the lack of internal current limiting resistors.
Parts used in the Nokia 5110 Custom Graphics Project:
- Nokia 5110 LCD Display
- Arduino Mega
- Jumper wires
- Breadboard
INTRODUCTION
In one of our previous tutorials we did an introduction on how to use the Nokia 5110 LCD with the Arduino, the tutorial covered displaying texts with different fonts etc. For this tutorial, we are taking things a little bit further and will be working through the display of customized graphics on the Nokia 5110 LCD display. This tutorial will particularly be useful for those who want to display their brand logo or any other kind of image on the LCD asides ordinary texts.
The Nokia 5110 display is basically a graphic LCD display useful for a lot of applications. It was intended originally to be used as a screen for cell phones and was used in lots of mobile phones during the 90’s. This display uses a low powered CMOS LCD controller/driver PCD8544, which drives the graphic display of size 84×48. In a normal state, the display consumes about 6 to 7mA which makes it quite ideal for low power usage.
A detailed explanation on the operational principle of the display is found here.
REQUIREMENTS
Both software and hardware requirements exist for this tutorial. To start with the hardware;
Required Components
The following components will be needed for this tutorial;
Required Software
The following software tools will be used for this tutorial.
- Microsoft Paint/Corel draw/ Photoshop/paint.net
- LCD Assistant Software
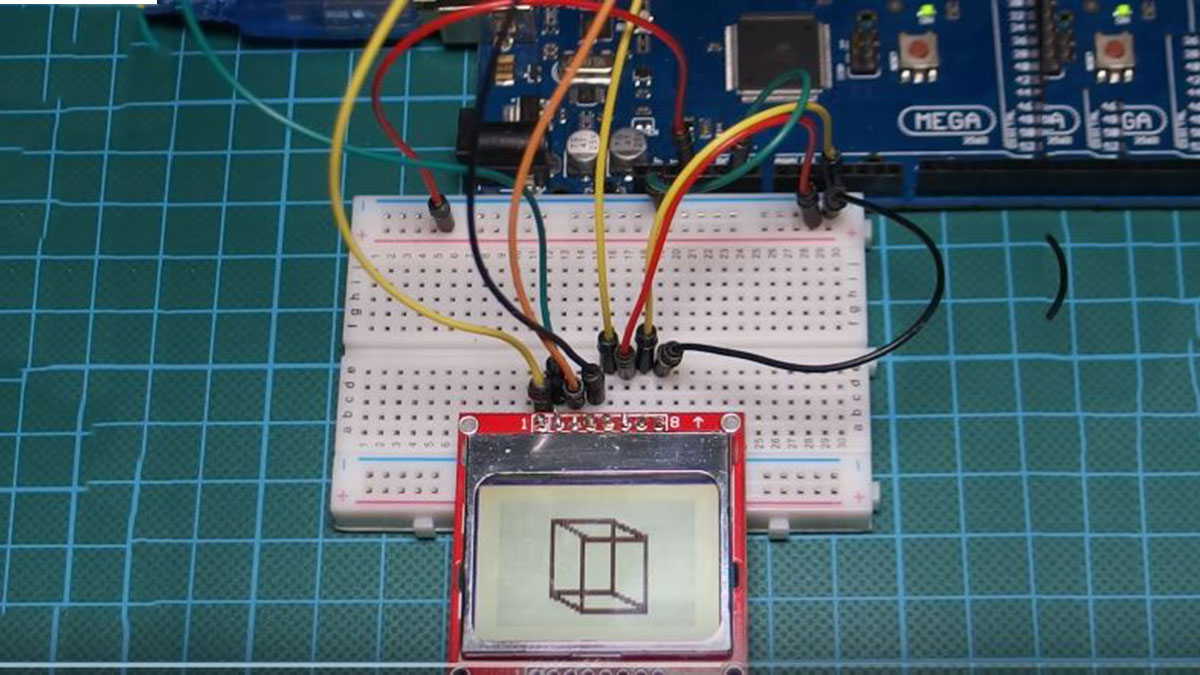
SCHEMATICS
To interface with a micro controller and power itself, the display has two parallel 8-pin port to which headers pins can be connected. You can pick one of the sides and solder header pins to it for connection to the Arduino board.
There are two main power sources needed. The first one is the operational power supply which according to the data sheet should be between the range of 2.7V to 3.3V. The second power supply is required for the LCD back-light. The LCD circuit has no current limiting resistor inbuilt so its better to play safe and only power with 3.3V max.
The LCD is connected to the Arduino as shown in the Schematics below.
Read more: Arduino Nokia 5110 Tutorial #2- Displaying Customized Graphics
- What is the main purpose of this tutorial?
To demonstrate displaying customized graphics like logos on a Nokia 5110 LCD. - How many pins does the display have for connection?
The display has two parallel 8-pin ports for headers. - What voltage range is recommended for operational power?
The data sheet recommends a range between 2.7V and 3.3V. - Why should you limit the backlight power to 3.3V?
The circuit lacks an internal current limiting resistor, so 3.3V max is safer. - Which software tools are required for image preparation?
You need Microsoft Paint, Corel Draw, Photoshop, paint.net, or LCD Assistant Software. - What type of controller drives the graphic display?
It uses a low powered CMOS LCD controller/driver named PCD8544. - What is the resolution of the Nokia 5110 display?
The display size is 84×48 pixels. - How much power does the display consume in a normal state?
It consumes about 6 to 7mA.