Bring your 3D models to life! In this instructable we will custom make a remotely controlled tank. We will infuse paper-craft with an arduino based system. This tank will be controlled on a android based phone though a bluetooth connection. I’ve strived to create something with a pleasing fit and finish. Remote control is also quite cheap and feasible for any project! I will show you how and why.
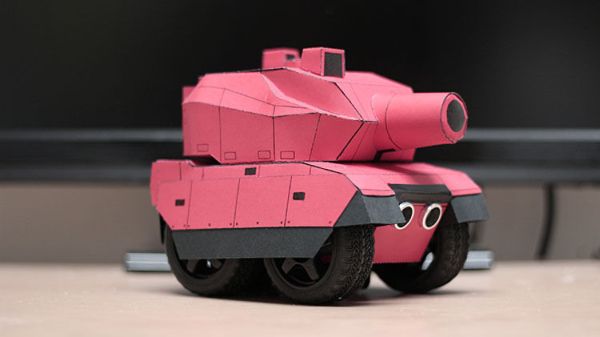
I want to show that It is possible to achieve a high level of visual aesthetic without the need for expensive machinery (no need for laser cutters, power tools or 3D printers).
I hope the pictures alone will guide and inspire you try new things! Show me what RC creations you have made in the comments below 🙂
Step 1: Create/Choose a model
There are thousands among thousands of existing paper-craft models to choose from. If there isn’t already a model you can always convert a 3D model into a foldable model using pepakura. Paper craft is powerful in that it lets us create 3D objects from paper. it is also relatively inexpensive to aquire. One bonus is that the models are designed hollow and leave room for skeleton circuitry.
Step 2: Pick features
There are thousands among thousands of existing papercraft models to choose from. What you want to remotely control is totally up to you. However there is always a few things to keep in mind
- Keep it simple. Don’t go all out if you aren’t familiar with etiher sides of the spectrum
- Know the limitations. the individual features of an ironman suit may be possible but it will not fit in a regular sized model
- Commit. Taking on a paper model is a tedious task. Brining it to life seamlessly takes level of engineering and creativity.
RC features:
understand what you are capable of bringing to the model. what mechanisms already exist and how easily they are to implement. This takes experience. In other words don’t go off building something impossible.
For example… I want my RC tankto have :
- full ground movement
- led stop light
- push to start
- rotating turret
- speed control
- recoil
Step 3: Gather Materials
[box color=”#985D00″ bg=”#FFF8CB” font=”verdana” fontsize=”14 ” radius=”20 ” border=”#985D12″ float=”right” head=”Major Components in Project” headbg=”#FFEB70″ headcolor=”#985D00″]
In this Instructable you will need:
- 4 Gear Motors – $24**
- 4 Wheels – $12**
- Motor Shield – eBay ($5)
- Arduino Uno – eBay ($10)
- 5xAA Battery Holder – ($2)**
- Foam Board – your local dollar store ($1)
- Bluetooth Adapter ($8)
- 1 Servo – eBay ($3)
- Paper
- Glue/Tape[/box]
*These parts came from a 4WD kit. (see next page) but can be sourced individually
Tools:
- Paper Cutter (Optional)
- Knife
- Pen
- Ruler
- Solder Iron
Step 4: Construct Arduino proptype
Lets make sure everything work as intended before we dive into the paper model portion. This stage is to allow you to figure ouput how to configure and program the circuit.
More information about how things are hookedup will be given on in the later stages.
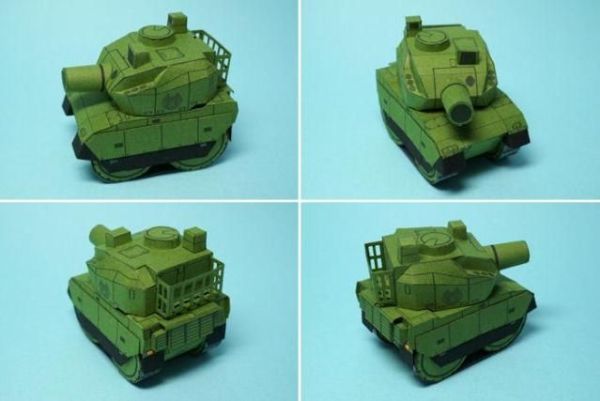
Step 5: Build the model
This part isnt documented as well. but as you can see in the picture above i did quickly contruct a white version of this tank before settling on the final design. We need to do this to figure out exacly how much space we have and how to shape our tank chasis before conrction
Step 6: Design Protoype
After building the model i noticed that the proportions just wouldn’t be enough to fit the circuit and that every part would need to be closely pinned together. I attempted to create a base that would be as small as physically possible and resize the model to adjust for it.
I used foam-board to space everything out and electrical tape to squeze everything together in a non-pernament fashion. Quickly put on wheels to see how it would look.
Step 7: Modifications to the model
So the prototype proved that we needed to make some adjustments. Now we need to alter our original model and make room for our components.
Step 8: Papercraft.
Now that the final model is ready we can move onto the final cuts. I have used a paper cutter to cut all the pieces . However it is possible to do this task with a knife (which many do).
I went over some of the folds with pen because the red construction paper bled white when cut. This is unfortunate but rather unoticable.
Step 9: Fitting
Lets piece everything together now to see how it fits.
For more detail: RC Paper Tank – Bring your 3D models to life