Hello,
this is my first instructable, so I hope someone can do anything good with it.
So, what exactly is this about?
Imagine: You are working on a project. You want to program in the Arduino language because of the simplicy. But you don’t want to use a 28 pin monster. Or you need peripherals like CAN or similar what the normal Arduino supported MCUs don’t have. So, what to do? Where are two alternatives:
1. Just don’t use the Arduino language and use things like bits and ports what you can’t understand.
2. Or continue reading this!
So, this instructable is going to show how to use the core files available from avr-developers.com. I’m also going to show you how to program the different MCUs and how to connect them to do so. At the end I’m going to give some ideas on what you can to with your new knowledge earned from this.
As a little side note I want to say something; I’m just 14 years old, so please, if something is not as good as if an 40 year old engineer had done it, have mercy, write a comment about it and I will try to fix it.
If you have any problems, feel free to post a comment or drop me an email (jan[at]dalheimer[dot]de). If you can’t figure out what to use instead of the [at] and [dot], I don’t want an email from you.
I just saw that some MCUs use the ArduinoISP as default and some use the USBtinyISP as default. To see how to change, see step 5.
I want to say a big thank you to Mark Sproul for the modified core files at avr-developers.com. THANK YOU!
So…. Let’s get started!
IMPORTANT: I give no warranty in any way for anything in this instructable. Some names like Atmel, ATmega etc. belong to their owners. Also almost all pictures do NOT belong to me.
Step 1: A list of that Atmels can be programmed with this and that is needed
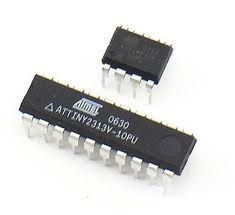
Now you know something about that this is about, but you wonder; what MCUs exact can I program using this instructable? First of all, only ATmegas, AT90s or ATtinys. Perhaps some day, PICs to. Or ARM. Or.. Or..
But for now, just MCUs from Atmel.
The frequency for each MCU can be found by choosing your MCU here, opening up the boards.txt file and then searching for your MCU. There will then stand yourBoard.bootloader.low_fuses=fuse and yourBoard.bootloader.high_fuses=fuse. Then copy the number that stands instead of fuse into the fields at the bottom of the page. Click “Apply Values” and then you can see what type and speed of crystal to use in the drop down menu further up on the page.
For more detail: Arduino on all sorts of Atmels