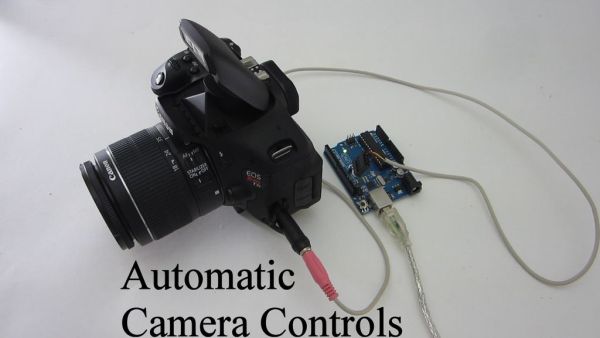
The best part of haunted houses and amusement park rides is getting to see pictures of your friends screaming in terror. To get these kinds of pictures requires perfect timing. The best way to get this is with an electronic control circuit. So in this project, I am going to show you how to make a simple automatic camera shutter switch.
 The best way to set this up depends largely on what kind of camera you have. So I am going to cover a variety of methods that you can use with different cameras.
Step 1: Connecting to a Camera with a Remote Shutter Switch Terminal

If you are fortunate enough to have a camera that has a built-in shutter switch terminal, then it is really easy to connect an external circuit to your camera and activate it remotely. All you need is a connector that matches the terminal on your camera. Different camera models use different connectors. So here is a link to a good page that shows the various connector types:
http://www.doc-diy.net/photo/remote_pinout/
For example, a Canon EOS Rebel T3i uses a 2.5mm stereo plug (3/32″ can also work). As shown in the picture, the sleeve is connected to ground. The center ring activates the focus function. The tip activates the shutter. To activate the focus and the shuttle, you just need to connect that pin to ground (the sleeve). You can do this with either a mechanical button or an electrical circuit.
Step 2: Connecting to a Camera without a Remote Shutter Switch Terminal
If your camera does not have a built-in shutter switch terminal, it may still be possible to control it with an electrical circuit. But it will require you to do some internal surgery on your camera.
First remove all the screws from your camera and remove the outer housing. Keep in mind that there may be screws hidden behind stickers.
As you are opening up the camera, be careful to avoid the camera flash capacitor. If you aren’t familiar with what a capacitor looks like, it is a large cylinder with two wires coming out of it. This capacitor can hold a charge of several hundred volts even after the batteries have been removed. Do not touch it!
Locate the camera’s shutter switch. This will typically have one terminal that connects to ground to activate the focus and one terminal that connects to ground to activate the shutter. Most cameras will auto focus when you activate the shutter. If this is the case, you only need to make a connection to the shutter terminal. Solder one wire to the shutter terminal and one wire to the ground terminal. Touch the two wires together. If all the connections are made properly, this should activate the camera’s shutter.
Now you can activate the shutter with an external circuit. All you need to do is connect the ground wire from the camera to the ground of the circuit. Then have your circuit connect the shutter terminal to the common ground. The easiest way to do this is with a simple momentary switch or a transistor. With some circuits you can activate the shutter by outputting a LOW signal to the camera’s shutter terminal.
Here are two other instructables that do a great job of illustrating this process:
http://www.instructables.com/id/Shutter-Trigger-for-Kodak-C653/
http://www.instructables.com/id/Time-lapse-add-on-to-a-Rollei-digicam/
Step 3: Make an External Button Actuator
If your camera does not have a built-in shutter switch terminal and it is not possible to add a connection to the shutter switch as detailed in step 2, then you still have the option of mounting an actuator onto the camera that can mechanically press the button for you. This will still let you automatically control the camera. It just requires the addition of a motor and a motor controller circuit.
One method is to use a servo to press the button. The servo is mounted immediately next to the shutter button. When the servo turns, the arm (sometimes called the horn) presses the button.
It is also possible to use a regular motor. Just mount it above the shutter switch. Then attach a bracket to the shaft that is capable of pressing the button. You can use something as simple as an offset circle. This method works best for taking pictures at regular intervals such as with a time lapse setup.
Here are a couple of other instructables that do a good job of illustrating these methods.
http://www.instructables.com/id/Kite-aerial-photography-rig/
http://www.instructables.com/id/360-analog-camera-hat/
http://www.instructables.com/id/electromechanical-time-lapse-trigger/
http://www.instructables.com/id/Knex-Time-lapse-intervalometer/
Step 4: Activate the Camera Shutter with an External Switch
The simplest way to activate the shutter is with a momentary switch. This is very commonly used in photography. But it can also be an easy way to automatically take a picture of something. For instance, the switch could be a pressure plate switch. It could be an open door or window sensor. It could be a limit switch. You could even use a trip wire. You can use any kind of momentary switch and there is no limit to the number of ways that you can set it up. Just use your imagination.
For more detail: Automatic Camera Shutter Switch