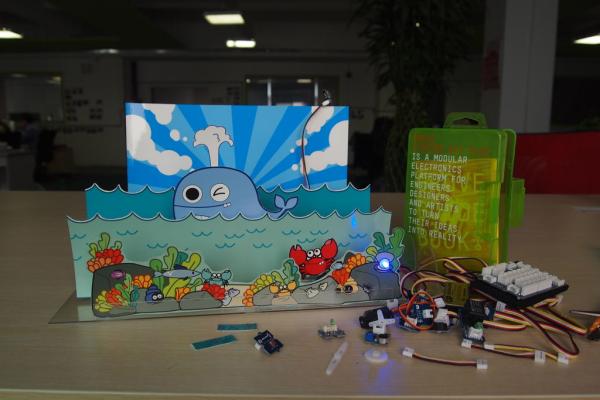
I kind of fall for paper toy lately. Besides cutting and pasting 3D paper toys, I decided to make a live one that can actually move and interact with me. I had the cartoon figures and paper scenes printed in a print store, cut the mechanical parts by a laser cutting machine and used a Grove – Starter Kit Plus to create the movement, light effect and audio effect of this project.
I have all the original design files attached in this post. If you find the cartoon figures cute and the acrylic parts useful, you can download and use it as you like. 🙂
Here is a video roughly displaying how I built this project and the outcome. The specific steps are following.
Step 1: Material Used & Tools
Shown in the 1st picture. We arranged the figures on 350g art paper in A3 size, and had some of them doubled due to spare space. But you only need one and A4 is more suitable for home printer, so we rearranged them in A4 size. You can find them in the last two pictures.
2. Mechanical Parts
Shown in the 2nd picture. I added notes to illustrate the uses of those acrylic parts. Move on the parts to see the notes. I used 2mm acrylic board to cut these parts, that’s why the width of slots is set 2mm in the .cdr file. If you are going to cut them with materials of other thickness, you need to modify the width of slots in the .cdr file attached. Actually I think wood would be a nice choice. If you determine to go with wood, please let me know the outcome!
What if you don’t have a laser cutting machine? First laser cutting service is easy to find over the Internet. All you need to do is uploading your design file and wait for the package beside your mail box.
Here is the page of our service: Seeed laser cutting service.
Besides you can totally replace acrylic with other more handy materials and get some hand craft job. For example, hard card board or wood board.
3. Grove – Starter Kit Plus
Shown in the 3rd picture. Containing most-frequently-encountered electronic modules, this kit is a great gift for yourself or your kids. It’s suitable for quick prototyping and helps beginners to learn more about electronic and have fun. Get one here!
Shown in the 4th picture. You will need scissors and utility knife to cut out the paper figures. Adhesive tape is useful when making some paper joints. Glue gun is a must! It can provide you with a firm connection between the acrylic parts.
 2.cdr23 KB
