
Summary of IKEA ceiling lamp LED modification
This article describes an open-source, Arduino-based ambient wall light using a repurposed IKEA ceiling lamp. The project features color-changing capabilities via a serial Bluetooth protocol and utilizes WS2812B LEDs. Although initially intended for the living room, the creator plans to use it as a morning sun-imitating lamp in the bedroom, controlled by a Raspberry Pi running a Node.js script. The custom PCB was designed in Eagle using an ATmega8 microcontroller, optimized for single-layer manufacturing with minimal jumper wires, and milled in 20 minutes.
Parts used in the IKEA Ceiling Lamp LED Modification:
- IKEA ceiling lamp
- WS2812B LEDs
- ATmega8 microcontroller
- Raspberry Pi
- Eagle PCB design board
- CNC machine
An ambient, full colored, Arduino based Wall Light. The case is based on a cheap IKEA ceiling lamp. The color of the light can be changed through a simple serial bluetooth protocol.
This Project is fully open source and publicly released on github under the MIT License. Any further contribution to this project is highly appreciated
I started this project 2 days before we went to France for a 2 week holiday but since this is a really quick project the lamp worked fine after 2 days. Now when we came back I gave it the last touches and finished some bugs in the software.
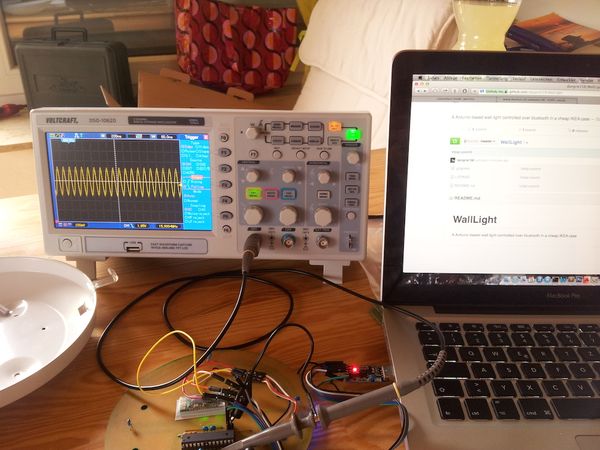
Initially this lamp should be a replacement for a lamp in our living room but I was way too greedy with the WS2812B LEDs. Eventually, the lamp wasn’t bright enough so I’m going to mount it now in the sleeping room as one of thosemorning, sun imitating lamps. As a controller I’m going to use a Raspberry PI with a node script that will also control some other devices in my house like my Wall Clock.
The case of this lamp is based on a really cheap (around 2€) IKEA ceiling lamp that I had lying around for a while. After cleaning off the dust and remove the high voltage socket I was really happy with the space that I had left and the diffusion of the glass.
The board is quite simple and was constructed in eagle. I still had an old board lying around with an MTMega 8 so I chose it as the main processor.
To reduce costs and complexity I’ve tried to only use one Layer and as less jumper wires as possible. I fitted the boards outline and drill holes to match the case of the IKEA lamp.
After several optimizations and double checking the pinout (would not be the first time that I accidentally Placed an IC upside Down on the board) the board was ready to be manufactured. Thanks to my CNC machine this process only took 20 Minutes.
Surprisingly everything went right the first time while milling and I was really happy with the outcome. Until now I always had to run the GCode a second time with a lower Z Axis.
For more detail: IKEA ceiling lamp LED modification
- How can the color of the light be changed?
The color is changed through a simple serial bluetooth protocol. - What microcontroller is used as the main processor?
An old MTMega 8 board was chosen as the main processor. - Can I contribute to this project?
Yes, any further contribution is highly appreciated as the project is fully open source under the MIT License. - What is the controller planned for the sleeping room setup?
A Raspberry PI with a node script will control the lamp and other devices like the Wall Clock. - Why was the lamp moved to the sleeping room?
The lamp was not bright enough for the living room due to being too greedy with the LEDs, so it is now used as a morning sun imitating lamp. - How much did the IKEA lamp case cost?
The case is based on a really cheap IKEA ceiling lamp that costs around 2€. - What software was used to design the circuit board?
The board was constructed in eagle. - How long did the CNC milling process take?
The manufacturing process only took 20 Minutes thanks to the CNC machine.
