
Summary of A decorative LED frame
This project transforms a cheap IKEA photo frame into a 12×10 pixel LED matrix controlled via smartphone. Using an Arduino Uno and Ethernet shield, the system displays clocks, messages, and color effects. A Neopixel strip provides RGB lighting, diffused by tracing paper, while a real-time clock maintains time settings during power outages.
Parts used in the Decorative LED Frame:
- IKEA photo frame (23x23cm)
- Adafruit Neopixel LED strip (2m, 120 LEDs)
- Tracing paper sheet
- Arduino Uno
- Ethernet shield
- 5V 10A power supply
- 4700μF capacitor
- Push button
- Protoboard
- 2.5m cable with 3 big wires
- 5-pin DIN connector
- M3 10mm screw and nut
- Black ABS plastic
- White spray paint
- DS1307+ real-time clock
- 0.033MHz 12.5pF quartz
- Lithium CR2032 battery
- Two 2.2kΩ resistors
Here is a small personal project to brighten my home made from a cheap IKEA photo frame, and Arduino and a multicolor “NeoPixel” LEDs strip. The goal is simple: to realize a matrix of 12×10 big square pixels able to emit light in any color, and controllable from a smartphone. A simple demo video will explain the principle better (the LED flicker is due to the video and not normally visible):
The video shows different working modes of the frame: clock, random pixels, gradual color change, sliding message. It is obviously possible to invent many other modes. Here are pictures of the frame:
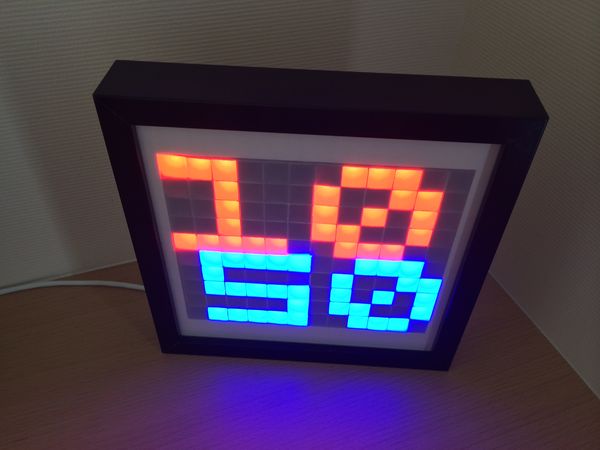
The first picture shows the frame itself, with the white cable used to power the LEDs and to control them. The second image shows the power supply and the control circuit. The white cable attached to the frame can be seen. The last image shows the application used to control the frame from a smartphone. Let’s now see how this frame is built.
Material
Let me list what I used to build the frame :
- a cheap IKEA photo frame made for a 23x23cm image, and deep of 4.5cm;
- an Adafruit Neopixel LED strip of 2m with 120 RGB (multicolor) LEDs that can be controlled individually;
- a sheet of tracing paper (23×23 cm at least) to diffuse the light;
- one Arduino Uno to control the strip;
- one Ethernet shield to connect the frame to the local network;
- a 5V 10A power supply to power the strip;
- a 4700μF capacitor to protect the circuit;
- a push button to ask the frame to display its IP address;
- a protoboard to soldier all components;
- a 2,5m cable with at least 3 big enough wires to put a distance between the controller and the display;
- a 5-pin DIN to plug the display into the controller;
- an M3 10mm screw and a nut to close the control box;
- black ABS plastic for the control box and the square pixels;
- some white spray paint for the pixels grid;
- a DS1307+ real-time clock to remember the time and the state of the frame;
- a 0.033MHz 12.5pF quartz to rhythm the clock;
- a lithium CR2032 battery to power the clock when the frame is unplugged;
- two 2.2kΩ resistors to connect the clock to the Arduino (pull-up).
For more detail: A decorative LED frame
-
How is the light from the LEDs diffused?
A sheet of tracing paper at least 23×23 cm is used to diffuse the light. -
What components are used to control the LED strip?
An Arduino Uno controls the strip along with an Ethernet shield for network connection. -
How does the frame remember the time when unplugged?
A DS1307+ real-time clock powered by a lithium CR2032 battery remembers the time and state. -
Can the frame be controlled from a smartphone?
Yes, the frame is controllable from a smartphone using a specific application over the local network. -
How can I find the IP address of the frame?
Pressing a push button asks the frame to display its IP address. -
What power supply is required for the LED strip?
A 5V 10A power supply is needed to power the strip. -
How is the circuit protected from voltage spikes?
A 4700μF capacitor is used to protect the circuit. -
What material is used for the control box and pixels?
Black ABS plastic is used for the control box and square pixels, painted with white spray paint.
