The resolvent of clock synchronization over internet. by PKJ,
The web−based clock management system allows you to monitor clock status from wherever they are and centrally change settings. and this small device is built with PoE technology, thus IP clocks get their time, data and power from the same network that supports your other IP endpoints.
Author: https://www.facebook.com/pan.kejia
Editor: https://www.facebook.com/Microduino
Main features:
– Set automatically by SNTP (Simple Network Time Protocol)
– DHCP or static IP addressable
– Power over Ethernet (IEEE 802.3af) using the same network components as IP telephones
– Time synchronization with PCF8563
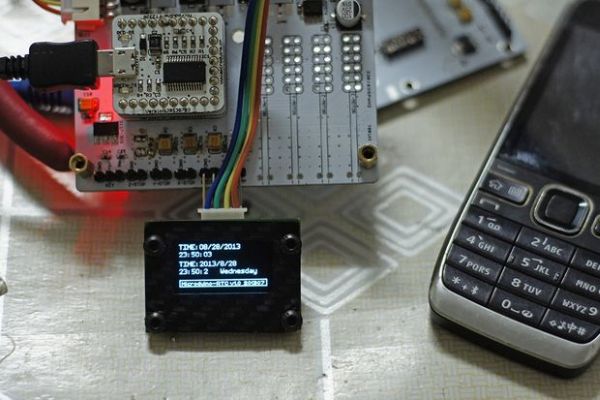
– OLED display component
Hardware partlists:
1. Microduino-Core+
2. Microduino-FT232R
3. 【Microduino-ENC28J60】 + 【Microduino-RJ45】
4. Microduino-OLED
5. Microduino-RTC
Please check technical details in http://wiki.Microduino.cc
Step 1: Microduino-RTC

Microduino-RTC is a RTC module in Microduino series.
– the main chip is PCF8563
– use I2C interface
– on-board EEPROM AT24C32
– open source files [check]
use below codes to drive and test Microduino-RTC module.
necessary library [download]
#include <Wire.h>
#include <Rtc_Pcf8563.h>
//init the real time clock
Rtc_Pcf8563 rtc;
void setup()
{
Serial.begin(9600);
//clear out the registers
rtc.initClock();
//set a time to start with.
//day, weekday, month, century(1=1900, 0=2000), year(0-99)
rtc.setDate(29, 4, 8, 0, 13);
//hr, min, sec
rtc.setTime(00, 21, 0);
}
void loop()
{
//both format functions call the internal getTime() so that the
//formatted strings are at the current time/date.
Serial.println(“CODE_1:”);
Serial.print(rtc.formatTime());
Serial.print(” “);
Serial.print(rtc.formatDate());
Serial.print(“\r\n”);
Serial.println(“CODE_2:”);
Serial.print(“20”);
Serial.print(rtc.getYear());
Serial.print(“/”);
Serial.print(rtc.getMonth());
Serial.print(“/”);
Serial.print(rtc.getDay());
Serial.print(” “);
Serial.print(rtc.getHour());
Serial.print(“:”);
Serial.print(rtc.getMinute());
Serial.print(“:”);
Serial.print(rtc.getSecond());
Serial.print(“\r\n”);
delay(1000);
Serial.print(“\r\n”);
}
}
—–
Microduino is open-source hardware, compatible with Arduino System, the most popular ecosystem where designers can get everything to build their own applications. All opensource codes can be downloaded from http://wiki.Microduino.cc
Currently, Microduino series already had 3 core modules and around 20 extension boards developed, all modules are designed and tested within Microduino community, and around 700 Microduino fans contribute effort to further develop Microduino series.
Step 2: Hardware partlist
1. Microduino-Core+
2. Microduino-FT232R
3. Microduino-Enc
4. Microduino-OLED
5. Microduino-RTC
For more detail: Build a network clock (NCLK) with Microduino-RTC