This article explores an easy wireless communication setup between two Arduinos using low-cost ASK RF transmitter and receiver modules that are readily available in the market. They are found in different shapes, but functionally they are all same. Both Tx and Rx modules contain a single data line for input and output and support a low-speed Amplitude Shift Keying modulation for data communication. You can get them with 315MHz or 433MHz carrier frequency. In this tutorial, I am using a 433MHz Tx/Rx pair with two Arduino boards to illustrate how to construct a low-range wireless temperature and humidity monitor.
ASK Tx/Rx modules
As I mentioned, you can buy varieties of ASK Tx/Rx modules from both domestic and international markets (specially China). Some of them come with spring antennas, and some don’t. With the ones without antennas, you can connect ~20cm wire to their antenna pin on circuit board. The figure below shows some of the ASK RF modules you can buy on eBay and Amazon.
The Tx/Rx RF modules I am using in this project are manufactured by NiceRF, a China-based company. You can also buy these modules directly from our Tindie store. The nice things about these modules are they are very compact, breadboard and PCB friendly, made of high-quality PCB, come with copper spring antennas and have a reasonably good coverage area. With the spring antennas installed on both ends, I was able to achieve reliable communication between any two corners within my 2-story, 2000 sq. ft. house. Below is a picture of these Tx/Rx modules.
Things you will need
You will need the following items to build this project.
- ASK transmitter/receiver pair
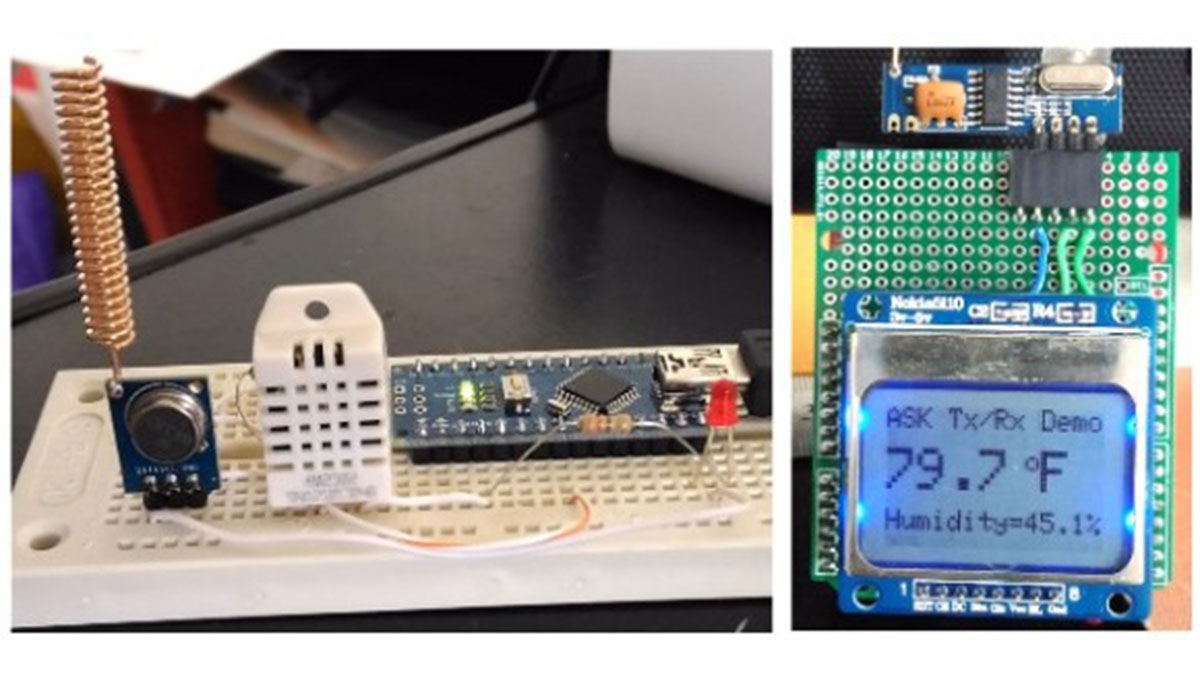
- Two Arduino boards. I am using an Arduino Nano on transmitting side and Arduino Uno on receiving end.
- One Nokia 5110 LCD for receiving side
- One DHT22 sensor for measuring temperature and humidity at the remote site
- Two LEDs and two 330Ω resistors
- Wires, breadboard, prototyping board, etc.
Circuit setup: Tx End
The ASK transmitter module has three pins: VCC, Data, and Gnd. They could be in different sequence depending upon the manufacturers. So, always read the pin labels carefully to identify the data and power supply pins on these modules. The VCC and Gnd pins are connected to +5V and Gnd pins of Arduino Nano, whereas the Data pin of the Tx module goes to digital I/O pin 12 of Arduino. An LED is also connected to I/O pin 11 along with a current limiting resistor in series. During data transmission, this LED is turned on.
Read more: Wireless communication between two Arduinos using inexpensive RF modules