Control cyborg technology and revolutionize your PowerPoint presentations – build a wearable mouse!
So you converted some video glasses to a heads-up display glass. You built a wearable Raspberry Pi, pcDuino, or BeagleBone Black. Now, how do you control your cybernetic augmentations? You make a wearable mouse, of course!
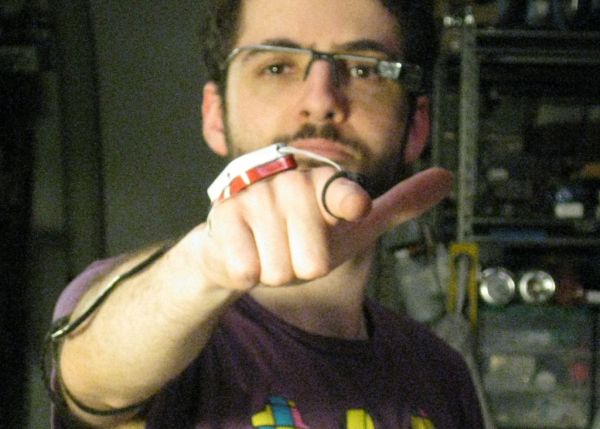
The Point Shooter turns your hand into a mouse. Draw your gun gesture to activate, aim your hand to move the cursor, and pull the trigger to click. BANG!
The Point Shooter doesn’t need drivers, is easy to build, and uses about $40 worth of common hardware-hacker staples you might already have. It’s seriously badass and surprisingly usable.
Step 1: Equip Yourself!
[box color=”#985D00″ bg=”#FFF8CB” font=”verdana” fontsize=”14 ” radius=”20 ” border=”#985D12″ float=”right” head=”Major Components in Project” headbg=”#FFEB70″ headcolor=”#985D00″]
Parts and Supplies:
– 1 Teensy 3.0
– 1 Wii Nunchuk
– 1 strip Swiss machined headers (female)
– 1 strip Swiss machined pins (male)
– 1 phenolic Veroboard, at least 4″x6″
– 1 Altoids Tiny Tin, any flavor
– 2 4.7kΩ resistors
– 2 ordinary tactile switches (pushbuttons)
– 1 12mm tactile switch.
– 2 Velcro cable ties, plus more to fit
– 2″ of 0.5″-diameter heatshrink
– 2″ of 1.5″-diameter heatshrink
– 10ft 26 AWG wire. Stranded is better, but solid works fine.
– 1 Micro-USB cable, 5′ or longer
– Hot glue gun with sticks
– Soldering iron with solder
– Optional: Primer, paint
[/box]
Substitutions:
– You could try a knockoff Wii Nunchuk, but size is important here and it may not fit.
– You can substitute an ordinary button for the 12mm button, but your mouse will be harder to use.
– Don’t substitute standard headers for the Swiss machined ones. The board won’t fit in the case!
– If you can’t find 1.5″ heatshrink, electrical tape will work but the finished project will be sloppier. Harbor Freight sells it as part of a set.
Special Tools:
– Tri-wing screwdriver
– Flush-cut pliers
– Dremel with drills, cutoff wheel, flapwheel, sanding drum
– Heat gun
– Needle file set
Preparation:
If the Altoids tin still contains Altoids, this would be a perfect time to eat them.
Step 2: Hack the Nunchuk

The motion sensor is a Wii Nunchuk. We’re going to rip out its guts and slice the board in half, which happens to be just the right size to cram into the Altoids tin.
Open up the Wii Nunchuk. Those screws are tri-wing, not Phillips, and need a special screwdriver. You can bodge it with a slim precision flathead and a lot of patience.
Remove the board. Cut the Nunchuk’s PCB just above the mounting holes. A Dremel works best, but you can also deeply score the board with a utility knife and break it against a table. Toss the joystick half in your parts bin.
Cut the cable as close to the metal crimp as possible, leaving about 2″ of wires. Cut off the white wire, strip the ends of the rest, and tin them. I had to extend the wires because I cut them shorter than 2″. Oops!
You’ll end up with an adorable little circuit board. Test-fit it in the Altoids tin, filing down the edges if necessary.
Step 3: Build the Board
With the Nunchuk board ready, we can assemble the electronics! The board is quite simple and laid out on the diagram. Note that in the diagram, the Veroboard is translucent – in real life, you put components on the no-copper side.
Cut or grind down the corners of the Veroboard until it fits loosely into the Altoids tin. Turn the board over and cut all the strips down the middle.
Solder the female headers and resistors first. The headers are 14 pins long, and the resistors are 4.7kΩ.
Snap off two strips of 14 male headers and insert them into the female headers. These male pins have a conical side and a flat side – make sure you insert the conical side into the female headers.
Drop the Teensy onto the headers upside-down, so the reset button points towards the board. Solder it in place. Trim off the protruding headers as close as possible, then remove the Teensy.
Solder in the Nunchuk as shown and make sure it fits in the blank part of the PCB.
Cut five foot-long fine-gauge wires and solder in as shown. Strip the ends of the wires.
Step 4: Burn and Test Code
The Teensy will be extremely difficult to program after we close it up, so now’s the time to burn that code and test it all out.
Download the attached code and upload it. You will need the i2c_t3 library.
The Teensy 3.0 requires a special Arduino add-on and programming method. Visit the Getting Started with Teensy page for step-by-step instructions.
When the code’s up, touch the Pin 5 wire to a GND wire and tilt the Nunchuk board. Your mouse cursor should move. Touching the Pin 6 wire to GND should cause a click, and touching the Pin 7 wire to GND should cause a right-click.
If something’s not working right, check your board against the schematic, look for shorts, and make sure you cut all the traces all the way through.
Step 5: Protect That Circuit
Awesome, circuit works, now to make it stand up to the punishment of everyday wear. I know you’re cool enough to wear this bad boy every day – come out of the cyborg closet!
Stick the Nunchuk to the Veroboard with a drop of hot glue. Make sure the square accelerometer is pointing upwards, and that the Nunchuk PCB is as level with the Veroboard as possible.
Tack down the wires with hot glue, making sure to keep the Nunchuk wires within the bounds of the Veroboard. The wires should point away from the USB port.
Test-fit the entire assembly into the Altoids tin. Sand things down and nudge ’em around until it fits. There should be a lot of space on all sides.
Cut the 1.5″ heatshrink to the length of the circuit assembly. Slide it over the board stack and shrink it down.
For more detail: The Point Shooter Cyborg Mouse