
Summary of DRIVING A CONTROLLERLESS LCD WITH THE HUMBLE ARDUINO UNO
This article details Ivan Kostoski's project of driving a 320×240 STN LCD salvaged from an old tape library directly using an Arduino Uno. Since the display lacks an onboard controller, the project addresses stringent timing requirements, negative voltage generation for the screen, and backlight hardware. The guide covers graphics and text modes while optimizing RAM and flash usage on the 8-bit platform.
Parts used in the Controllerless LCD Driver:
- Arduino Uno
- 320×240 STN LCD
- Tape library (source of the display)
- Hardware for negative voltage generation
- Hardware for backlight driving
These days, you could be forgiven for thinking driving an LCD from a microcontroller is easy. Cheap displays have proliferated, ready to go on breakout boards with controllers already baked in. Load up the right libraries and you’re up and running in a matter of minutes. However, turn your attention to trying to drive a random LCD you’ve yanked out of a piece of old equipment, and suddenly things get harder. [Ivan Kostoski] was in just such a position and decided to get down to work.
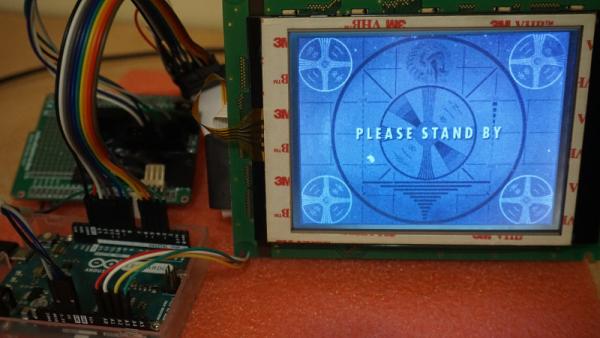
This is easier said than done. There are stringent timing requirements that push the limits of the 8-bit platform, let alone the need for a negative voltage to drive the screen and further hardware to drive the backlight. These are all tackled in turn, with [Ivan] sharing his tips to get the most flexibility out of the display. Graphics and text modes are discussed, along with optimizations that could be possible through the varied use of available RAM and flash.
The code is available on Github. If you need inspiration for your own controllerless LCD driver. [Ben Heck] has done similar work too, using FPGA grunt to get the job done.
Source: DRIVING A CONTROLLERLESS LCD WITH THE HUMBLE ARDUINO UNO
- What type of LCD did Ivan Kostoski drive?
He drove a 320×240 STN device salvaged from an old tape library. - Does the display have an onboard controller?
No, the display featured no onboard controller. - Can you drive this specific LCD with an Arduino Uno?
Yes, Ivan decided to drive it directly from an Arduino Uno despite timing challenges. - What are the main hardware challenges mentioned?
The project requires handling stringent timing, generating negative voltage, and driving the backlight. - What modes of operation are discussed in the article?
Graphics and text modes are discussed along with optimization techniques. - How can flexibility be increased with this setup?
Flexibility is improved through varied use of available RAM and flash memory. - Where is the code for this project located?
The code is available on Github. - Who else has done similar work according to the text?
Ben Heck has done similar work using FPGA grunt to get the job done.
