Summary of Arduino Trumpet
This article describes a DIY Arduino project that emulates a trumpet by playing notes through three buttons (valves). The device generates sounds corresponding to the C major scale across one octave using specific timing delays in the code. It is simple to build but limited to natural notes without sharps or flats.
Parts used in the Arduino Trumpet:
- Arduino board
- Speaker (Piezo)
- Three switches
Step 1: Code
Load this into your Arduino:
int speaker = 9; // Hook up speaker to digital pin 9
int sw1 = 15; // Switch hooked to analog pin 1
int sw2 = 16; // Switch hooked to analog pin 2
int sw3 = 17; // Switch hooked to analog pin 3
int valve1;
int valve2;
int valve3;
void c () { // Presets the note “c” to be used later
digitalWrite(speaker, HIGH);
delayMicroseconds(1915);
digitalWrite(speaker, LOW);
delayMicroseconds(1905);
}
void d () {
digitalWrite(speaker, HIGH);
delayMicroseconds(1700);
digitalWrite(speaker, LOW);
delayMicroseconds(1690);
}
void e () {
digitalWrite(speaker, HIGH);
delayMicroseconds(1519);
digitalWrite(speaker, LOW);
delayMicroseconds(1509);
}
void f () {
digitalWrite(speaker, HIGH);
delayMicroseconds(1432);
digitalWrite(speaker, LOW);
delayMicroseconds(1422);
}
void g () {
digitalWrite(speaker, HIGH);
delayMicroseconds(1275);
digitalWrite(speaker, LOW);
delayMicroseconds(1265);
}
void a () {
digitalWrite(speaker, HIGH);
delayMicroseconds(1136);
digitalWrite(speaker, LOW);
delayMicroseconds(1126);
}
void b () {
digitalWrite(speaker, HIGH);
delayMicroseconds(1014);
digitalWrite(speaker, LOW);
delayMicroseconds(1004);
}
void C () {
digitalWrite(speaker, HIGH);
delayMicroseconds(956);
digitalWrite(speaker, LOW);
delayMicroseconds(946);
}
void setup() {
pinMode(speaker, OUTPUT);
pinMode(sw1, INPUT);
digitalWrite(sw1, HIGH);
pinMode(sw2, INPUT);
digitalWrite(sw2, HIGH);
pinMode(sw3, INPUT);
digitalWrite(sw3, HIGH);
// Serial.begin(9600);
}
void loop() {
valve1 = digitalRead(sw1); // Reads switch 1
valve2 = digitalRead(sw2); // Reads switch 2
valve3 = digitalRead(sw3); // Reads switch 3
if ((valve1 == LOW) && (valve2 == LOW) && (valve3 == LOW)) { // If all valves are pressed, then
c(); // It plays a “c”
}
else if ((valve1 == LOW) && (valve2 == HIGH) && (valve3 == LOW)) { // If the first and third valves are pressed, then
d(); // It plays a “d”
}
else if ((valve1 == LOW) && (valve2 == LOW) && (valve3 == HIGH)) { // If the first and second valves are pressed, then
e(); // It plays a “e”
}
else if ((valve1 == LOW) && (valve2 == HIGH) && (valve3 == HIGH)) { // If the first valve is pressed, then
f(); // It plays a “f”
}
else if ((valve1 == HIGH) && (valve2 == HIGH) && (valve3 == HIGH)) { // If no valves are pressed, then
g(); // It plays a “g”
}
else if ((valve1 == HIGH) && (valve2 == HIGH) && (valve3 == LOW)) { // If the third valve is pressed, then
a(); // It plays a “a”
}
else if ((valve1 == HIGH) && (valve2 == LOW) && (valve3 == HIGH)) { // If the second valve is pressed, then
b(); // It plays a “b”
}
else if ((valve1 == HIGH) && (valve2 == LOW) && (valve3 == LOW)) { // If the second and third valves are pressed, then
C(); // It plays a “C”
}
else{
delay(1);
}
}
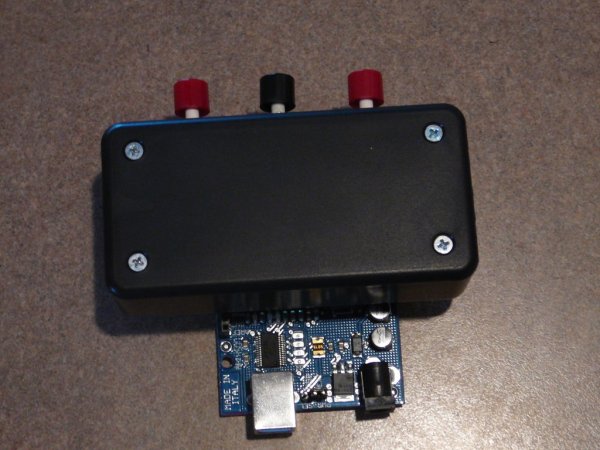
Step 2: Hook it up
Each of the three switches go from ground to analog in 1, 2, and 3. The Piezo goes from digital pin 9 to ground. Make sure to have the switches in the right order in order to have the correct fingerings. Afterwords, download the file and upload it to your Arduino.
For more detail: Arduino Trumpet
- How many valves does this trumpet emulation have?
The project uses three buttons to emulate the valves. - What range of notes can the device play?
It can only play one octave and no sharps or flats. - Which digital pin connects the speaker?
The speaker is hooked up to digital pin 9. - Where are the switches connected?
Each switch goes from ground to analog pins 1, 2, and 3. - Does the code support playing sharps or flats?
No, the article states it cannot play sharps or flats. - What happens if all three valves are pressed?
The code plays the note "c" when all valves are pressed. - What note is played when no valves are pressed?
If no valves are pressed, the device plays a "g". - Is this project considered easy to make?
Yes, the text describes it as easy to make and fun to play with.