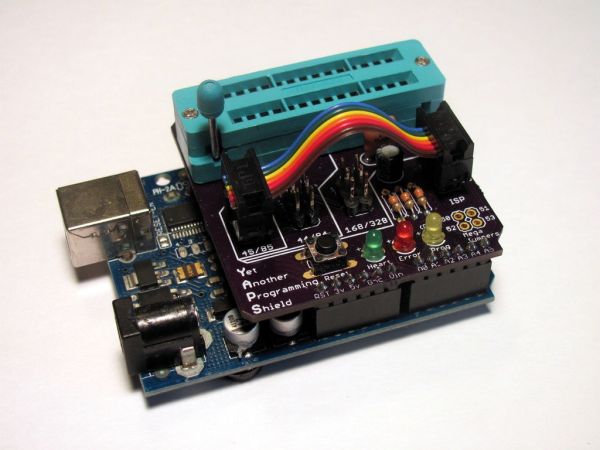
Do you need a quick and easy way to program AVR chips. Did you know you can use your Arduino and the Arduino IDE? This Arduino shield makes the process much easier.
You can:
- Burn a bootloader onto a replacement Atmega328 for your UNO.
- Make a stand-alone Atmega328 breadboard project.
- Use inexpensive Attiny chips for smaller projects.
- Reprogram a chip in an existing circuit with an ISP header.
This shield lets you:
- Quickly setup to program chips.
- Program a variety of chips easily:
- 8, 14, and 20 pin Attinys.
- 28 pin Atmega168 or Atmega328.
- Quickly see if a sketch is working on pin D3.
- Use on a Arduino Mega (with optional jumpers).
- Create a stand-alone programmer.
There are a lot of AVR programming shields available. That is why we call this one “Yet Another Programming Shield”, or YAPS for short. We think ours has a lot of advantages. If you want to learn more about how we developed it, check out http://makersbox.blogspot.com/2013/12/anatomy-of-small-open-source-hardware.html
This project was recipient of a 2013 Innovation Grant from Wyolum which helped us get it to the kit stage.
The kit is available on Tindie.com. Purchasing the kit will save you the time and expense of ordering from several different vendors and avoid the minimum PCB order premium. You will also be helping us develop and share other projects!
Step 1: Gather the Parts
To start, check to see you have everything:
Bill of Materials:
- PCB available at OSH Park ($20.70 for three copies).
- (1) x 28-pin DIP ZIF socket
EMSL 9220005 $2.25ea
Adafruit 382 $3.00
Sparkfun ZIF PRT-09175 $2.95 - (1) x 6-pin DIL ribbon cable
$2.50 (EMSL) 3″ – or-Sparkfun PRT-10651 $0.35ea
Digikey 609-2842-ND $0.90
Digikey 609-2841-ND $0.82
(4) x 2×3 male header (or order extra 36 pos. straight header) Digikey 609-3218-ND $0.26
(3) x 3mm leds (Green, Yellow, Red) yellow-
- Digikey 1080-1106-ND $0.33 green,
- Digikey 1080-1115-ND $0.33 red,
- Digikey 1080-1123-ND $0.33 yellow
- (3) x 330-ohm resistors (Digikey 330QBK-ND)
- (1) x 10 uF cap (Digikey P975-ND)
- (1) x 16-Mhz resonator (Digikey X908-ND)
- (1) x straight header (Digikey S1011EC-40-ND, $0.67) [0.120″ tail]
- (1) x tactile button (Digikey SW402-ND $0.42)
Optional (for Arduino Mega):
- (1) x 2×2 female header Digikey A26452-ND $1.25
- Four male jumpers
Optional (for Optiboot or Adaloader):
- (1) x Piezo Buzzer
- PS1240Adafruit 160 $1.50
- Digikey 445-2525-1-ND $0.73
Remember, I’ve done all the hard work if you just want to buy the kit at Tindie.com
-
-
Step 2: Gentlement, Start Your Iron
- 2 x Ribbon Crimp Connector – 6-pin (2×3, Female)
We are going to assume you have some kit-building experience. If you need some help soldering, head over to http://www.sparkfun.com/tutorials/213 to brush up.
The order of assembly is largely a matter of preference. If you don’t have a helper or a vice, I generally go from lowest height to tallest so when the board is reversed on the table, the parts stay in place. Picture numbers correspond to the step numbers:
- Three 330-ohm resistors
- Tactile button
- LEDs:
- Long lead is positive. Look for the “+” on the PCB.
- Green -> Heartbeat, Red -> Error, Yellow -> Programming
- Solder one lead first, check it is seated correctly, and then solder other lead.
- Capacitor (short lead is negative, look for the “-” on the PCB.
- (2×3) headers:
- Use the ribbon crimp connector to hold the header in place.
- Crystal (no polarity, but put the value facing out).
- ZIFF connector:
- Solder one pin on each opposite side, check the seating, and then finish.
- Shield headers:
For more detail: Arduino AVR Progamming Shield

