Summary of Raspberry Pi Alamode CNC Controller
This article details the construction of an Arduino-based CNC controller system using a Raspberry Pi as the host computer. The author replaced a frustrating parallel port setup with a USB-connected solution where the Raspberry Pi processes GCode files and communicates with an Arduino via an Alamode board for voltage translation. This stack controls stepper motors through a CNC shield, enabling precise machine operation without requiring a powerful PC to handle real-time motor signals.
Parts used in the Arduino based CNC Controller:
- Arduino UNO
- Raspberry Pi
- Raspberry Pi Alamode
- CNC Controller Shield (100% Grbl compatible)
- Pololu A4988 stepper motor driver carriers
- Adafruit heat sinks
- Polarized headers
- Yellow jumpers
This is my first attempt at an instructable. I hope it helps someone else.
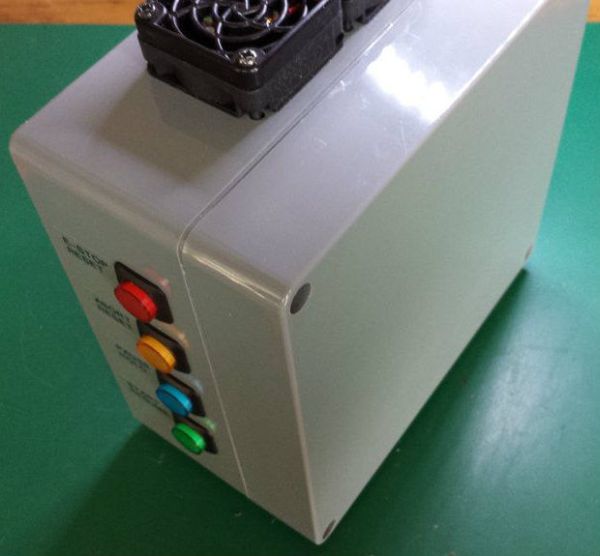
Switches and Lights and fans, oh my…
I bought a CNC machine some time ago and I was never happy with it. It used a traditional parallel port controller and of course no modern computers have those. So it was always a point of frustration. I used an old Pentium based computer and ran LinuxCNC on it for a while but was still not happy with that. So I started looking for another solution. I decided that I would try to put together an Arduino based controller and try to use USB to communicate with it.
After studying that for a while I came to realize the Arduino was just not going to be able to do all that needed to be done on its own. The Arduino UNO just does not have enough memory or processing capacity to process a design file by itself. So I modified my solution and started working on using a Raspberry Pi as my host computer.
I created a Visio drawing of what I intended to do: It didn’t turn out that way and the drawing continued to evolve as I learned more. It kept on changing until I finally got my project completed.
I have now built an Arduino based CNC Controller system that uses a Raspberry Pi as its host computer. The Raspberry Pi processes an “nc” file that contains a design that is described in GCode commands that can be understood by the Arduino. I have used a few tools on my Windows 8.1 Pro laptop to design a few simple things (like tutorials in makercam here: http://www.makercam.com/). This is a great introduction to designing things for CAD/CAM and it is really easy to use.
After creating a design that I wanted to use I wirelessly connected to the Raspberry Pi using WinSCP to transfer design files to the Raspberry Pi. You can get WinSCP here: http://www.soft-now.com/listing/123823/WinSCP?did=11055&pid=1&ppd=search,44532390848,winscp20download,e,,c,0,,,&gclid=CJuIkNHds74CFagWMgodpxMAJw. Its great, you can just drag a file from one window to the other to move files between systems. You will have to know the IP address of your Raspberry Pi to connect to it. If you have gone through the initial setup of the Raspberry Pi and setup a network connection you can get the IP address by using the ifconfig command on the Raspberry PI. A really helpful tool for getting your IP address and seeing that your Pi is online is a tool called the Advanced IP Scanner here: http://www.advanced-ip-scanner.com/. Another great tool is Wireshark: http://www.wireshark.org/
I then used Remote Desktop Connection (Remote Desktop connection is part of Windows and should be on your Windows machine. It can be run by entering mstsc in the Run Open: box) to connect to my Raspberry Pi. Otherwise you could use VNC or TightVNC: http://www.tightvnc.com/. TightVNC is what you need to put on your Raspberry Pi to allow you to use Remote Desktop Connection from another machine. I can now run the Grbl Controller on the Raspberry Pi which in turn connects to an Alamode (an Arduino like board that plugs directly into the GPIO connector on the Raspberry Pi and provides automatic voltage level translation. So that the Arduino can communicate with the Raspberry Pi directly. The Alamode also provides Arduino headers to allow for Arduino shields to be plugged directly into it. So I ended up with a stack of three boards that are tightly integrated due to being plugged directly into each other. The Alamode (Arduino) processes the GCode commands from the Raspberry Pi into signals that are sent to the CNC Controller shield to run the stepper motors and passes the various function signals on to the CNC Controller shield too. They can then be accessed from the external world. All is well so far… But now I have to connect these things to the external world.
Step 1: 100% Grbl Compatible CNC Controller
First, I purchased the 100% Grbl compatible CNC Controller shield from: http://blog.protoneer.co.nz/arduino-cnc-shield. I already had an Arduino and intended to use that with the CNC Controller shield and run something on my laptop to control everything. Then I found out that the Arduino would not be able to process an entire design file all by itself. This is due to it not having enough memory to handle more than one GCode command at a time. In fact not all GCode commands are currently completely implemented in the Arduino Grbl software. However, the Arduino does directly interface with the CNC Controller shield and can pass commands to the stepper drivers on the CNC Controller shield without any additional circuitry.
The sets of three yellow jumpers that you see in the pictures set the micro stepping for the stepper motors. The one single yellow jumper selects how the limit switches work. Mine are set up so that when the switch closes a ground is detected (the default). The alternative is to sense a hi when Vcc is selected. That is to say that the limit switch logic can be set to sense a hi or lo, your choice. The two yellow jumpers on the left side of the picture are for selecting which axis the A-axis mirrors (two motors on one axis).
I used polarized headers to connect to the stepper drivers so that I would not be able to plug in my stepper motors backwards – that’s pretty important.
The 100% Grbl compatible CNC Controller shield does not actually include any stepper motor drivers. It is only a means of integrating the stepper motor drivers into an Arduino shield conveniently and it works great for that purpose. The CNC Controller shield is designed to use the Pololu type step driver modules like the A4988 stepper motor driver carrier that is shown here: http://www.pololu.com/product/1182
I purchased some from China that were about $4.00 each and appear to be exactly the same (we shall see when I actually try to use them). They came with some heat sinks too but I decided to use the ones you see (from Adafruit) instead of the ones that were included instead. You actually only need to populate the X, Y and Z stepper driver carriers on the CNC Controller board (because the Grbl software on the Arduino only knows about three axes). Unless you intend to use the A-Axis too (for a second motor on one of the primary axes). The CNC Controller allows you to mirror the control signals from X, Y or Z to the A axis by using jumpers. I am not using the fourth axis. I just included the fourth stepper driver carrier so that I would have a spare in case one of the others stops working. Then again who knows what might be in the future?
Step 2: Raspberry Pi
It became clear that I needed some way to process a complete design file and break it into individual GCode commands that the Arduino could then pass on to the CNC Controller shield. Many articles are available on the internet about running the Grbl Controller software which provides this specific function on a Raspberry Pi. I had a Raspberry Pi that I had played with a bit, some time ago, but it was an older version. I am sure it would have worked but I decided to get a new one and dedicate the new one to being the host in my new CNC Controller system. For more information about running the Grbl Controller software on a Raspberry Pi look here: http://zapmaker.org/raspberry-pi/running-grbl-controller-on-raspberry-pi/
Due to reading a lot of those articles that I mentioned I became concerned that the Raspberry Pi would overheat when inside of an enclosure so I put heat sinks on it. Then I had to trim down the heat sink on the processor as it was too tall.
I also came to realize that the Arduino and the Raspberry Pi are slightly, electrically incompatible. The Arduino operates with 5V logic and the Raspberry Pi operates with 3.3 V logic. So a voltage level translator of some sort is required as an interface between the two environments. I looked around for a solution and found a few. I didn’t really like anything that I was finding and it took a while to get to what I wanted but I eventually found the Raspberry Pi Alamode board.
Step 3: Raspberry Pi Alamode
The Alamode board plugs directly into the GPIO connector on the Raspberry Pi and provides the level shifting function that is needed for the Arudino to communicate with it. It also provides Arduino compatible headers so that any standard Arduino shield can be plugged into it too. Including the CNC Controller shield. So it now appeared that I could have a stack of three boards that communicate with each other properly and elegantly – with no additional circuitry required.
Some quick features of the Alamode – that I am interested in: The Alamode has a real time clock that is directly available to the Raspberry Pi (with a coin cell battery backup). The Alamode can be powered from the Raspberry Pi or it can be powered directly through its own micro USB connector. There is a tiny jumper that allows you to select how you want to power it. The jumper header fell off of my board (probably my own fault). I looked at it and decided I just didn’t need it as I intended on powering it through its own micro USB port anyway. The big deal is that the Alamode includes the signal level shifting that is required for an Arduino to communicate with a Raspberry Pi.
Once the Alamode is connected to the Raspberry PI you can then load the Grbl software onto the Alamode. The Grbl code is loaded into the Alamode with the Arduino IDE. You need to load the Arduino IDE onto the Raspberry Pi to load the Grbl code into the Alamode. The Getting Started instructions at the Alamode site are very good and complete: http://wyolum.com/projects/alamode. Refer to the User Guide for instructions on how to set up the real time clock.
Let me just say that it works exactly as they say it does. It is a bit of a task to get everything together to actually use it but once it is set up (mostly on the Raspberry Pi) it works great.
For more detail: Raspberry Pi Alamode CNC Controller
- Why did the author switch from a traditional parallel port controller?
Modern computers no longer have parallel ports, making the traditional controller unusable. - Can an Arduino UNO process an entire design file by itself?
No, the Arduino UNO lacks sufficient memory and processing capacity to process a design file independently. - What software is used on the Raspberry Pi to process GCode commands?
The Grbl Controller software is used on the Raspberry Pi to process nc files containing GCode commands. - How do you transfer design files to the Raspberry Pi wirelessly?
You can use WinSCP to wirelessly connect and drag files between your Windows laptop and the Raspberry Pi. - What tool helps find the IP address of the Raspberry Pi?
The Advanced IP Scanner is a helpful tool for finding the IP address and verifying the Pi is online. - Why is the Alamode board necessary in this project?
The Alamode provides automatic voltage level translation between the 5V logic of the Arduino and the 3.3V logic of the Raspberry Pi. - Does the CNC Controller shield include stepper motor drivers?
No, the shield does not include drivers; it is designed to integrate external modules like the Pololu A4988. - How are limit switches configured on the CNC Controller shield?
A single yellow jumper allows selection between sensing a ground or a high signal (Vcc) when the switch closes.